CTE Curriculum
Prepare learners with CTE curriculum aligned to industry standards.


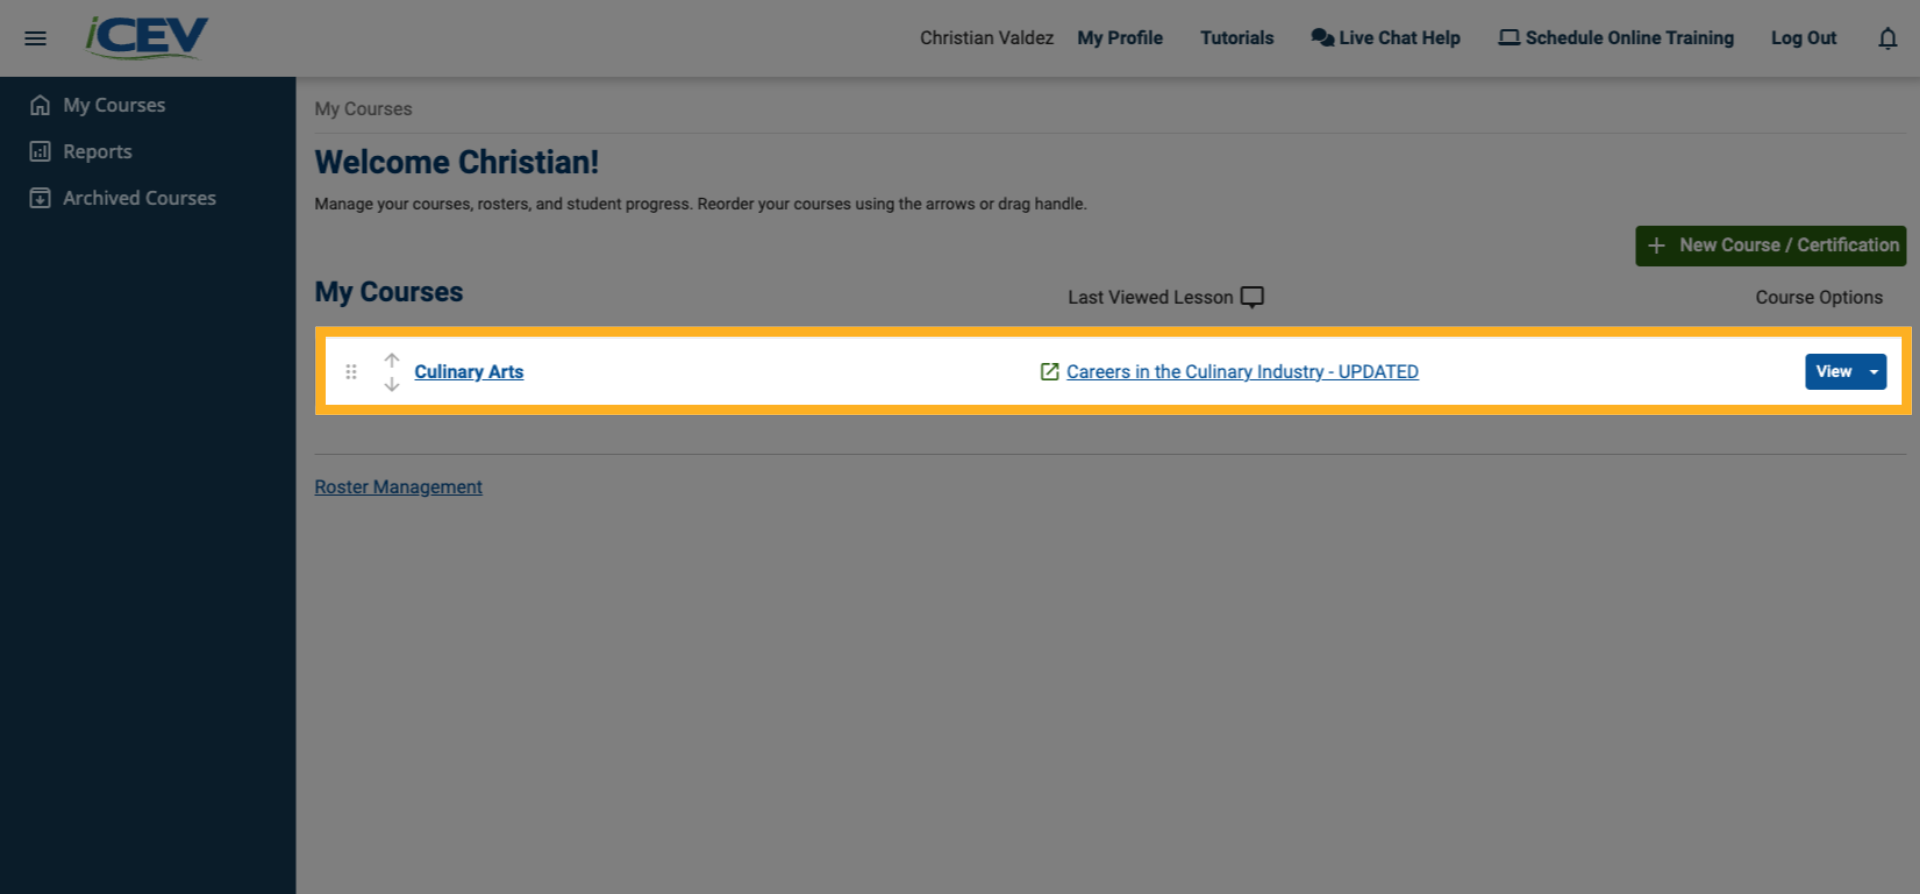
1. Select a Course
Choose the course you want to associate with your custom assessment.
This selection determines which lessons and content will be available to include in the assessment.
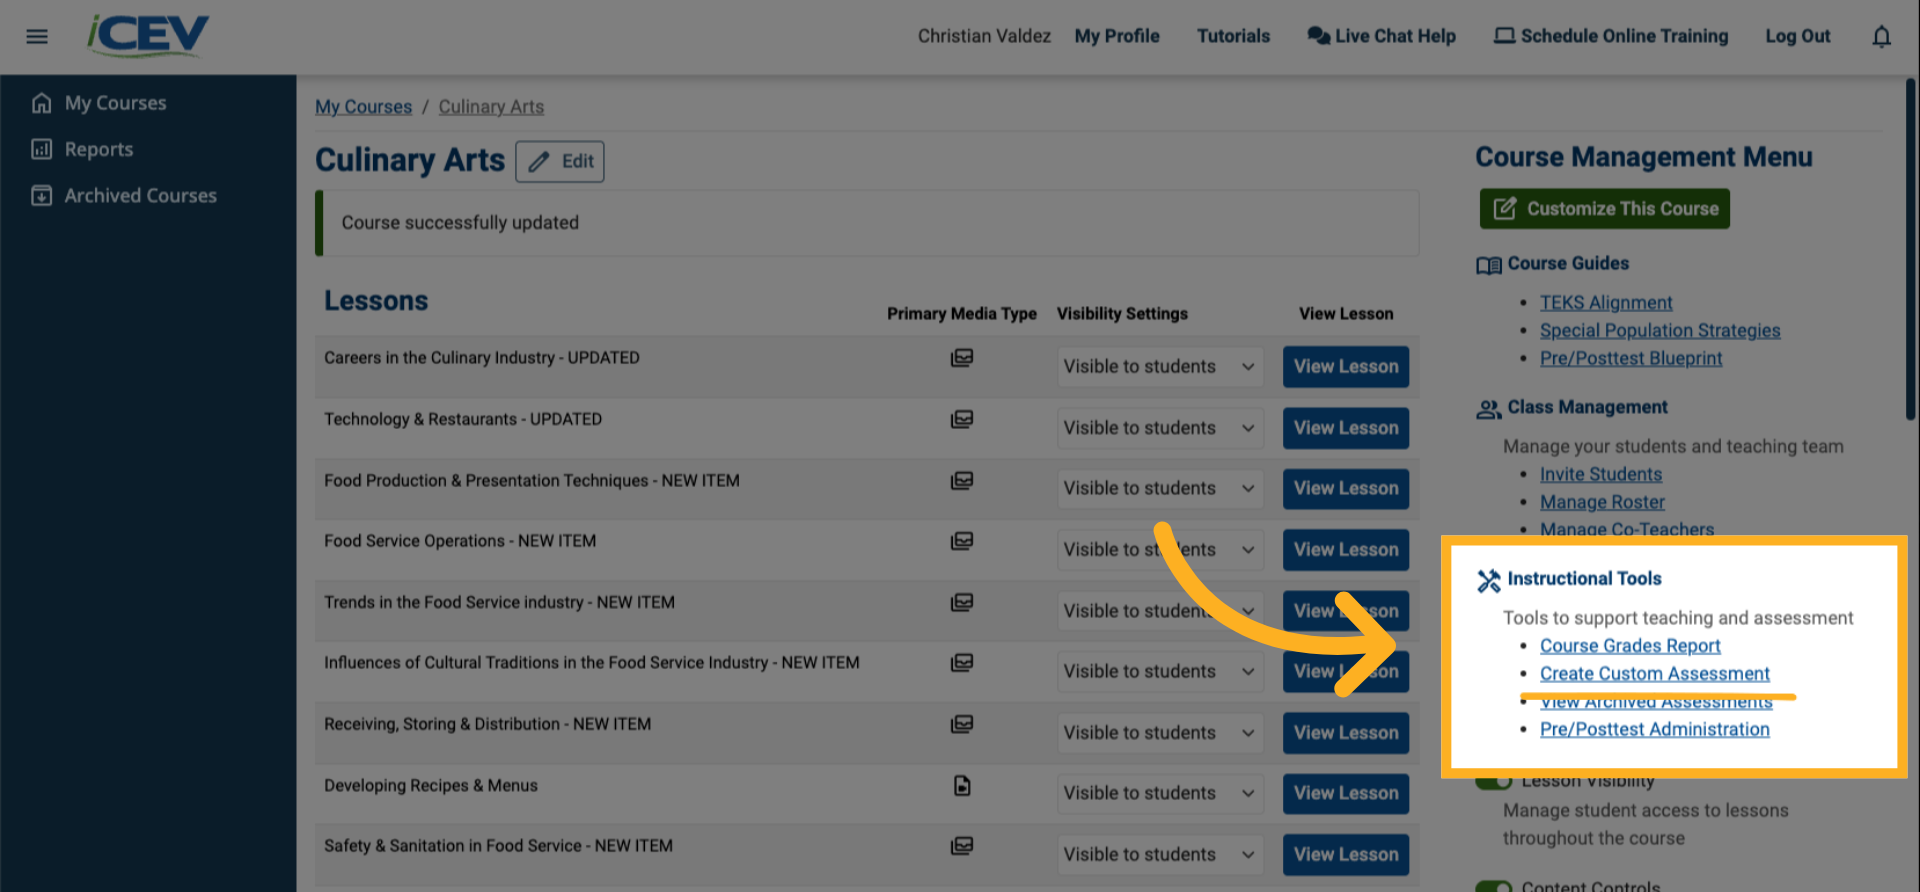
2. Open Create Custom Assessment
Within the Course Management menu, locate the Instructional Tools section and select Create Custom Assessment.
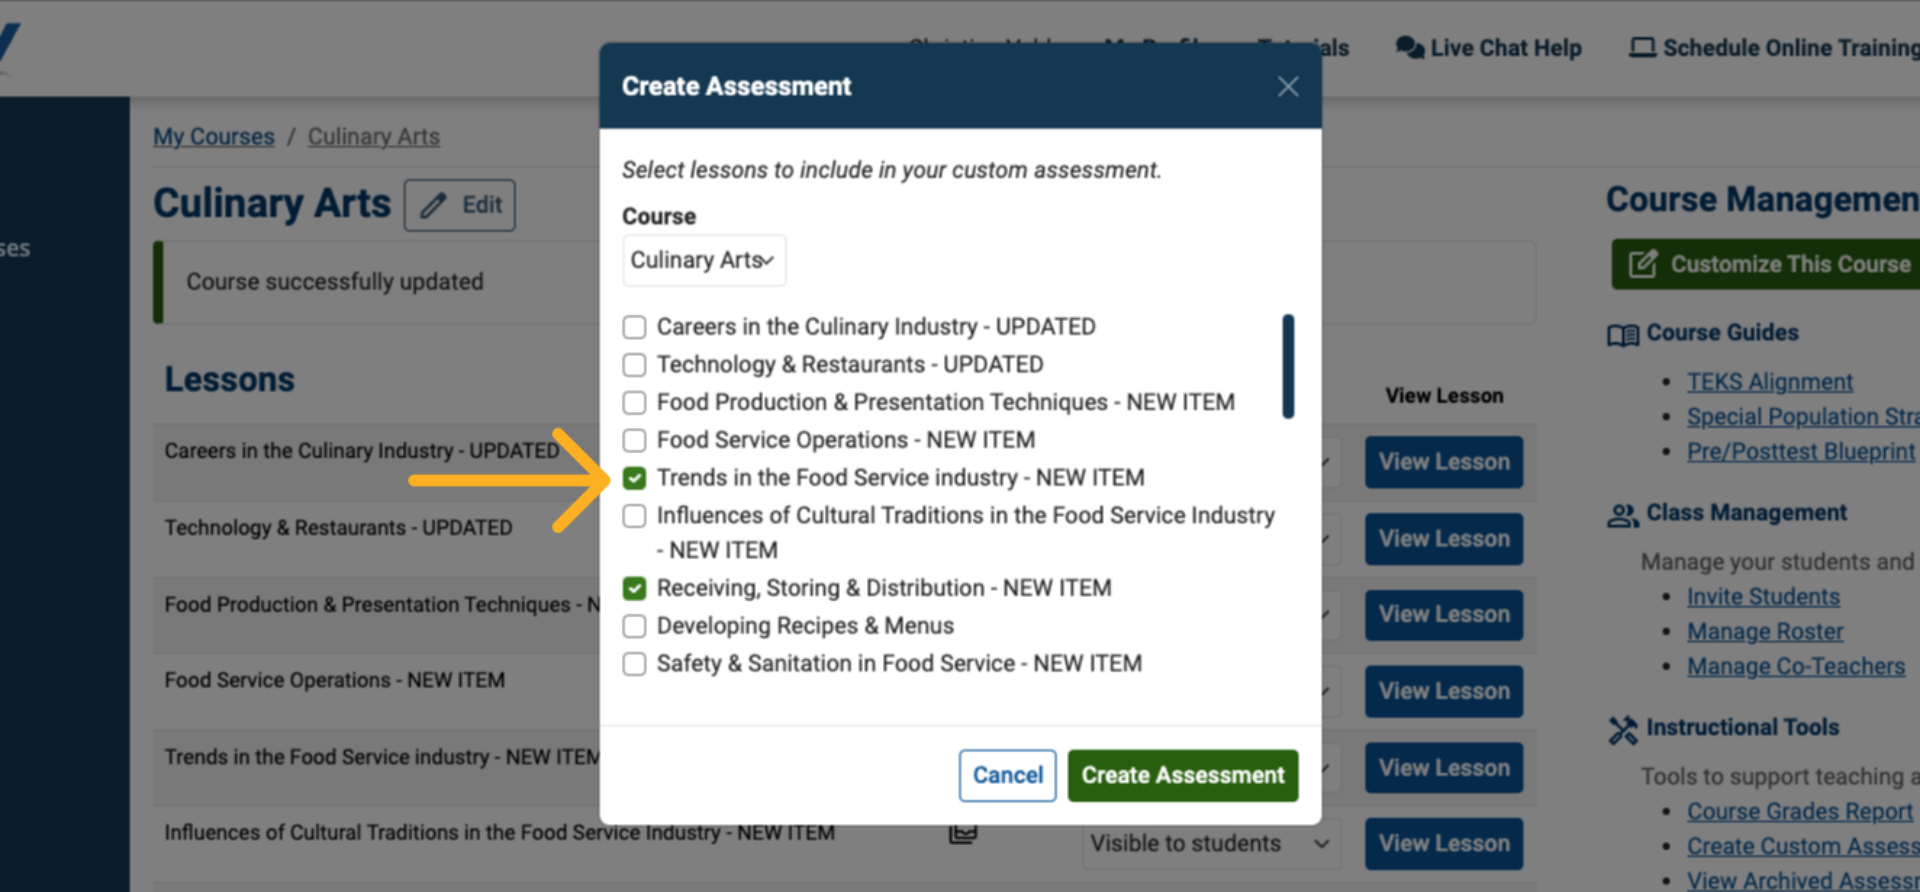
3. Review the Create Custom Assessment Modal
When the Create Custom Assessment modal opens, confirm that the correct course is selected in the drop‑down menu.
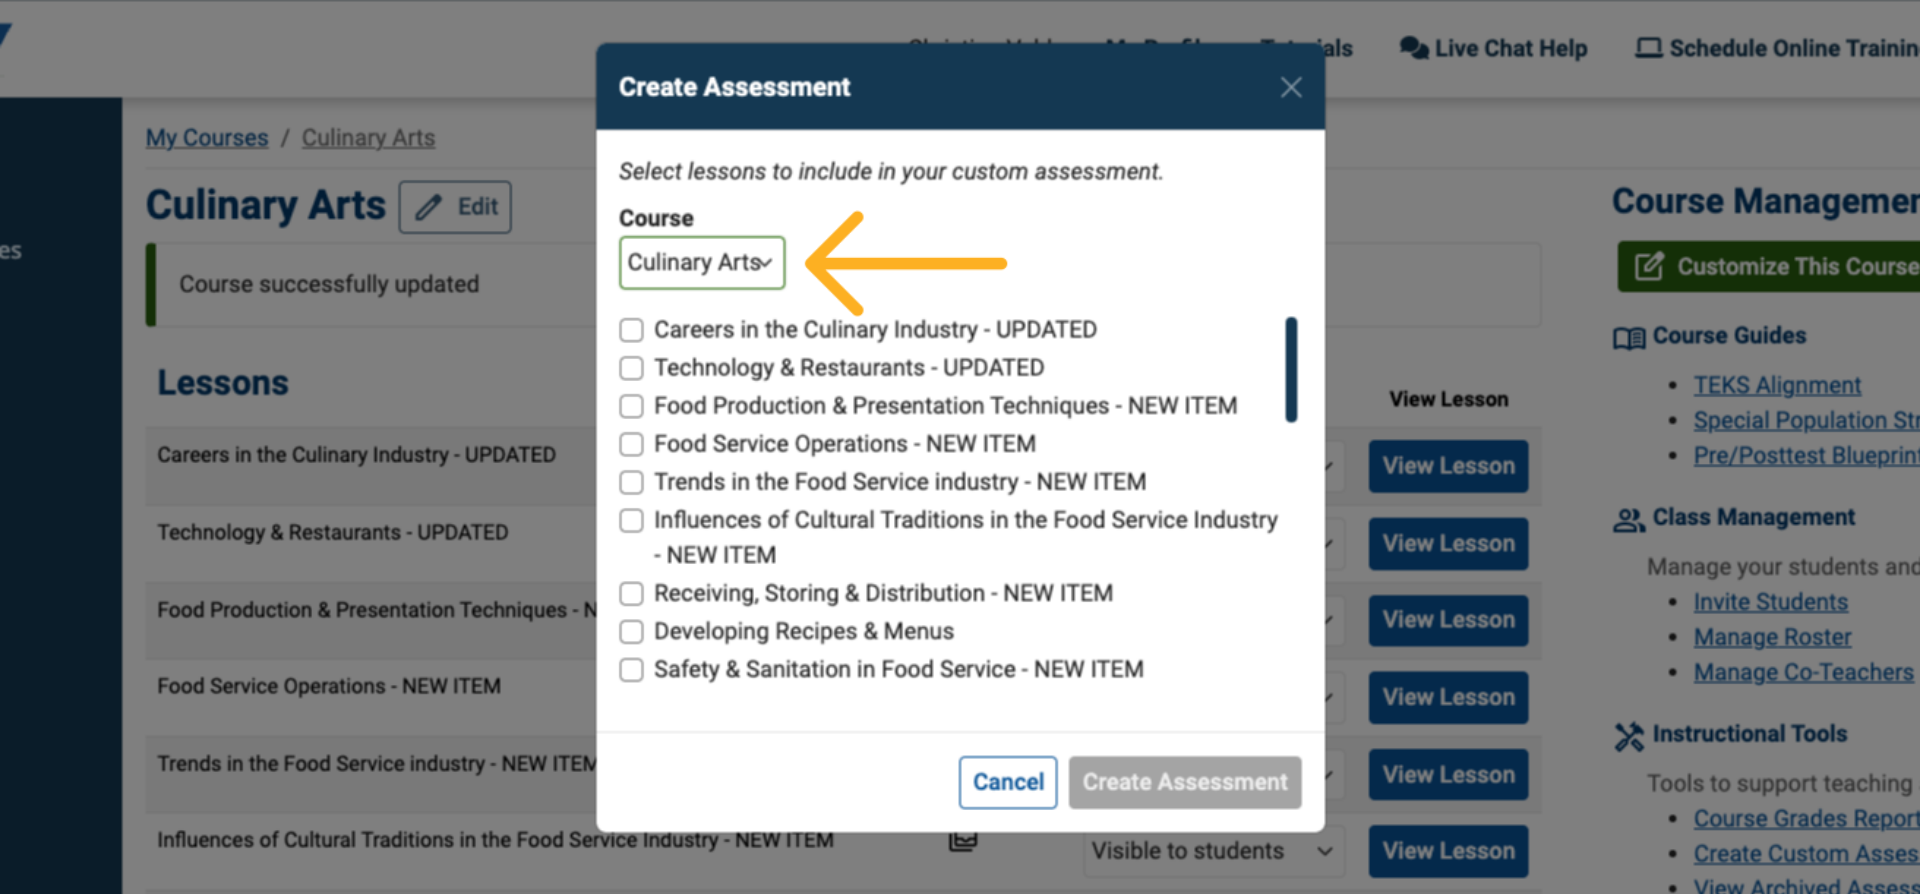
4. Select Lessons
Choose the lessons from the selected course that you want to use to build the assessment.
These lessons will supply the question pool for your custom assessment.
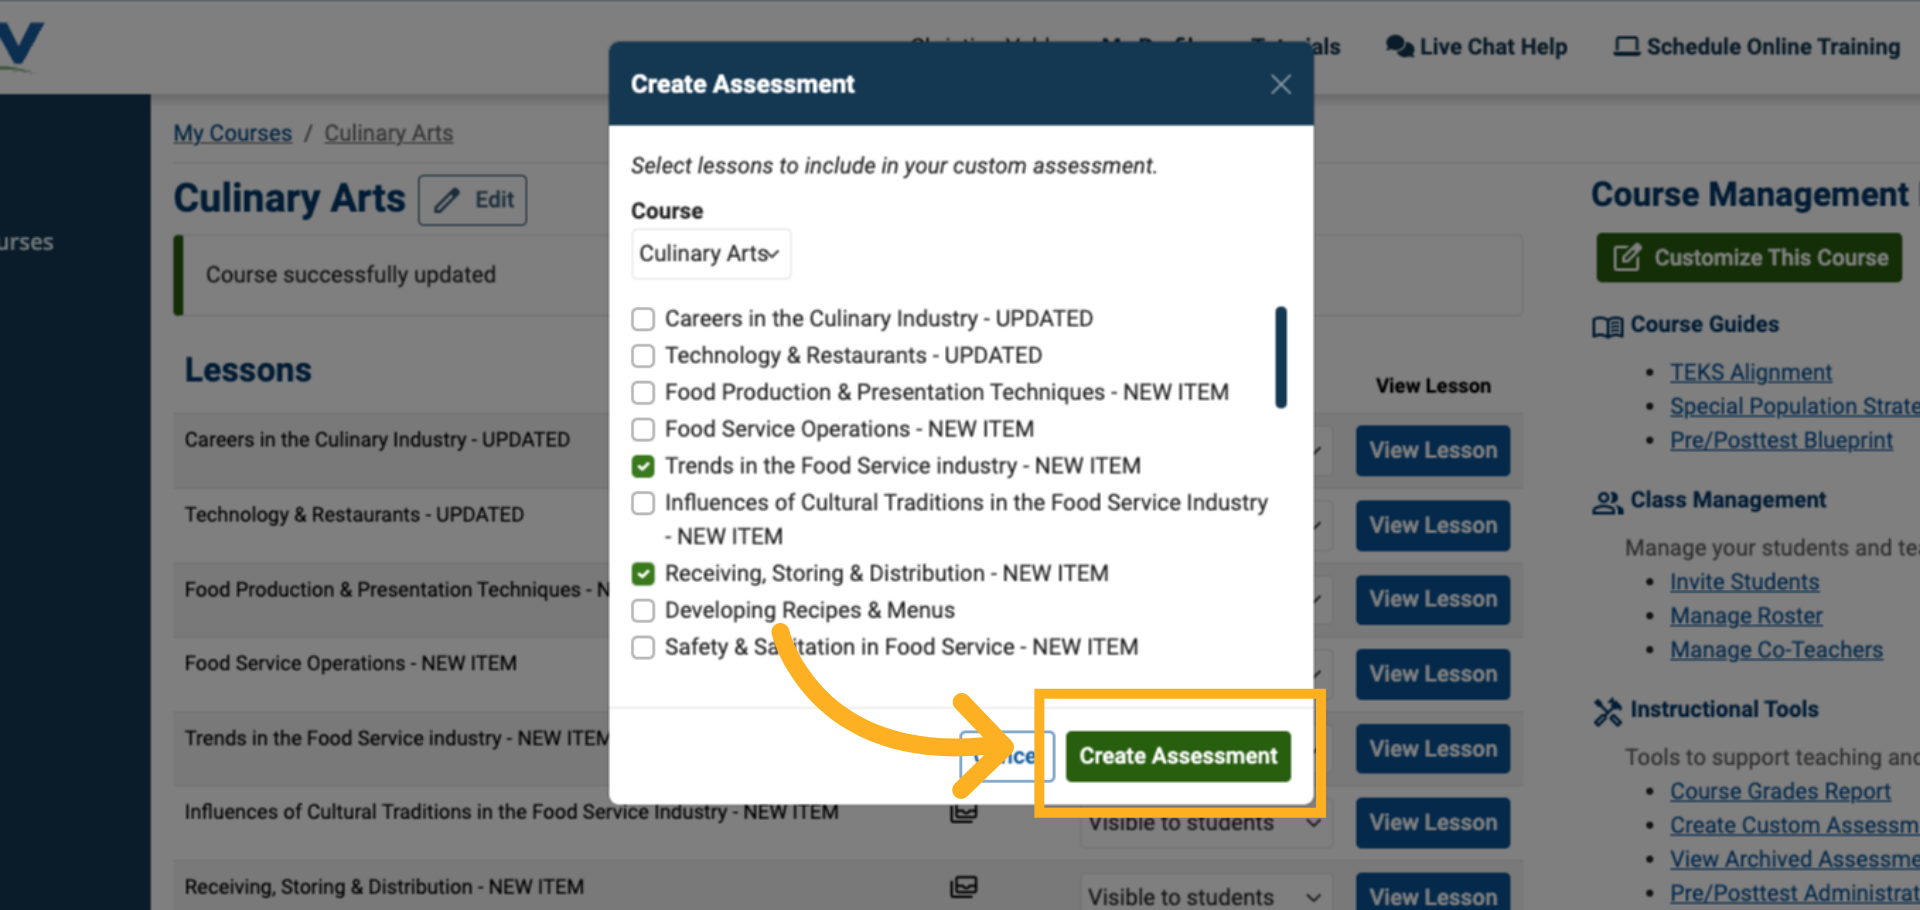
5. Create the Assessment
Once your course and lessons are selected, click Create Assessment to generate the initial assessment framework.
6. Access the Editor
After the assessment is created, you’ll be automatically taken to the Custom Assessment Editor, where all configuration and editing takes place.
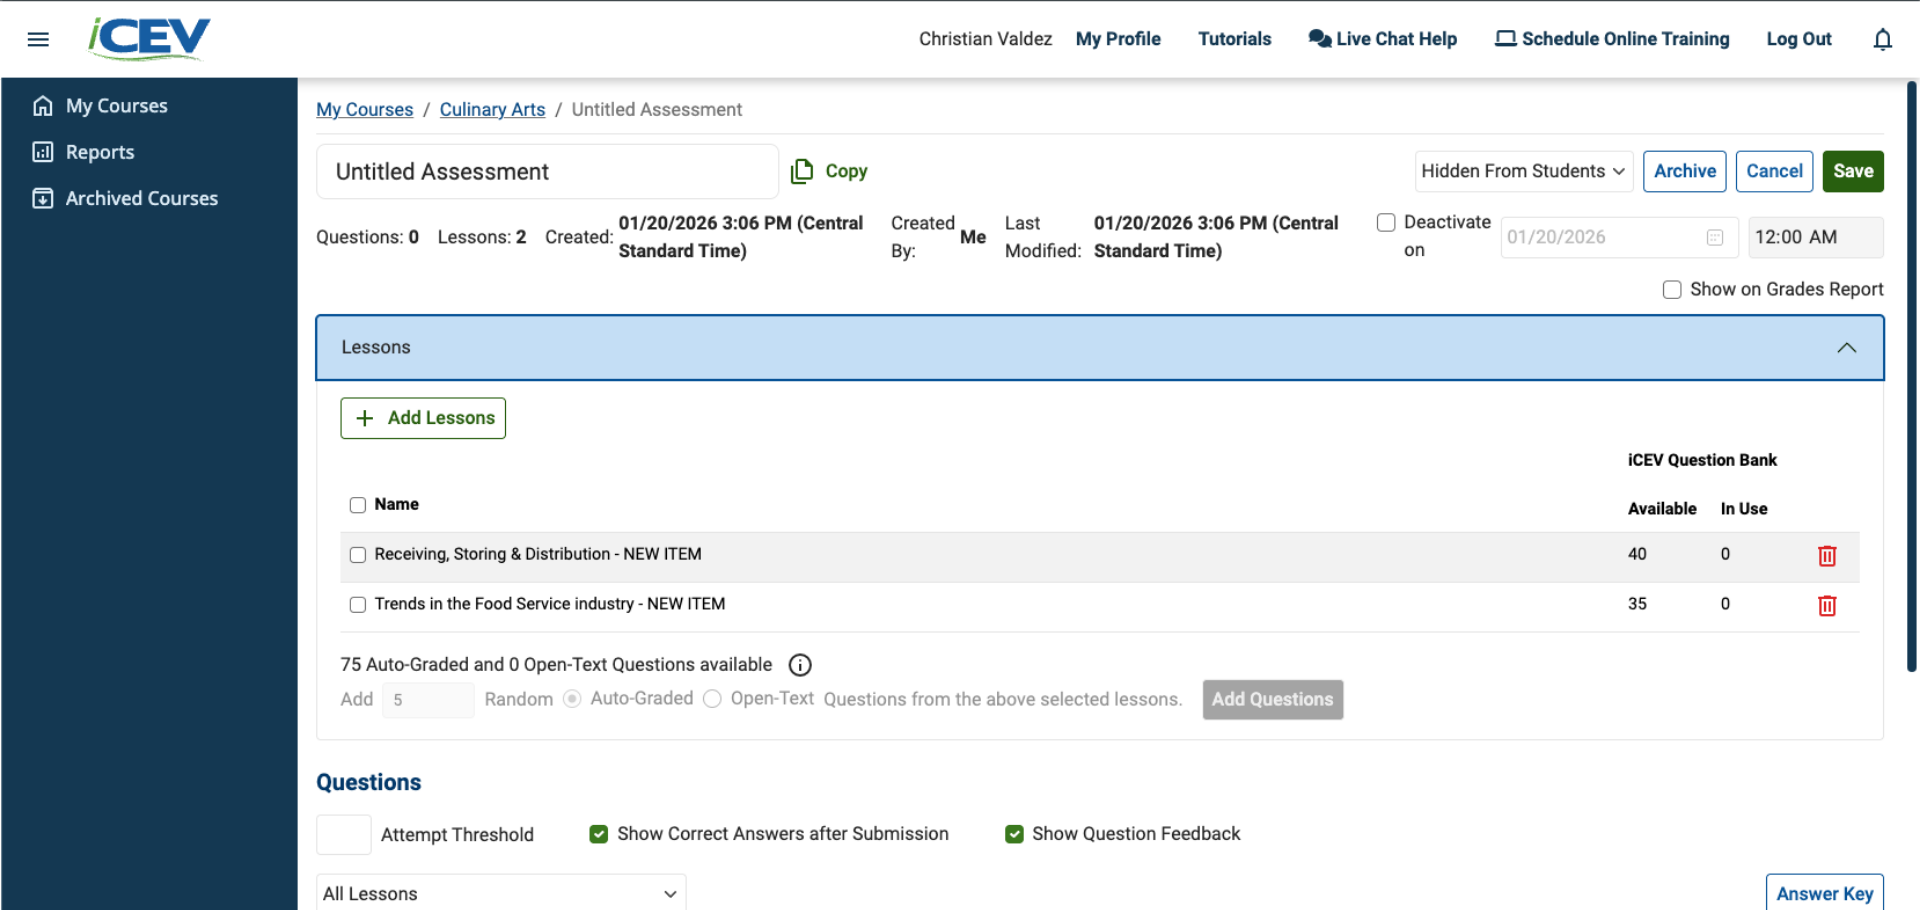
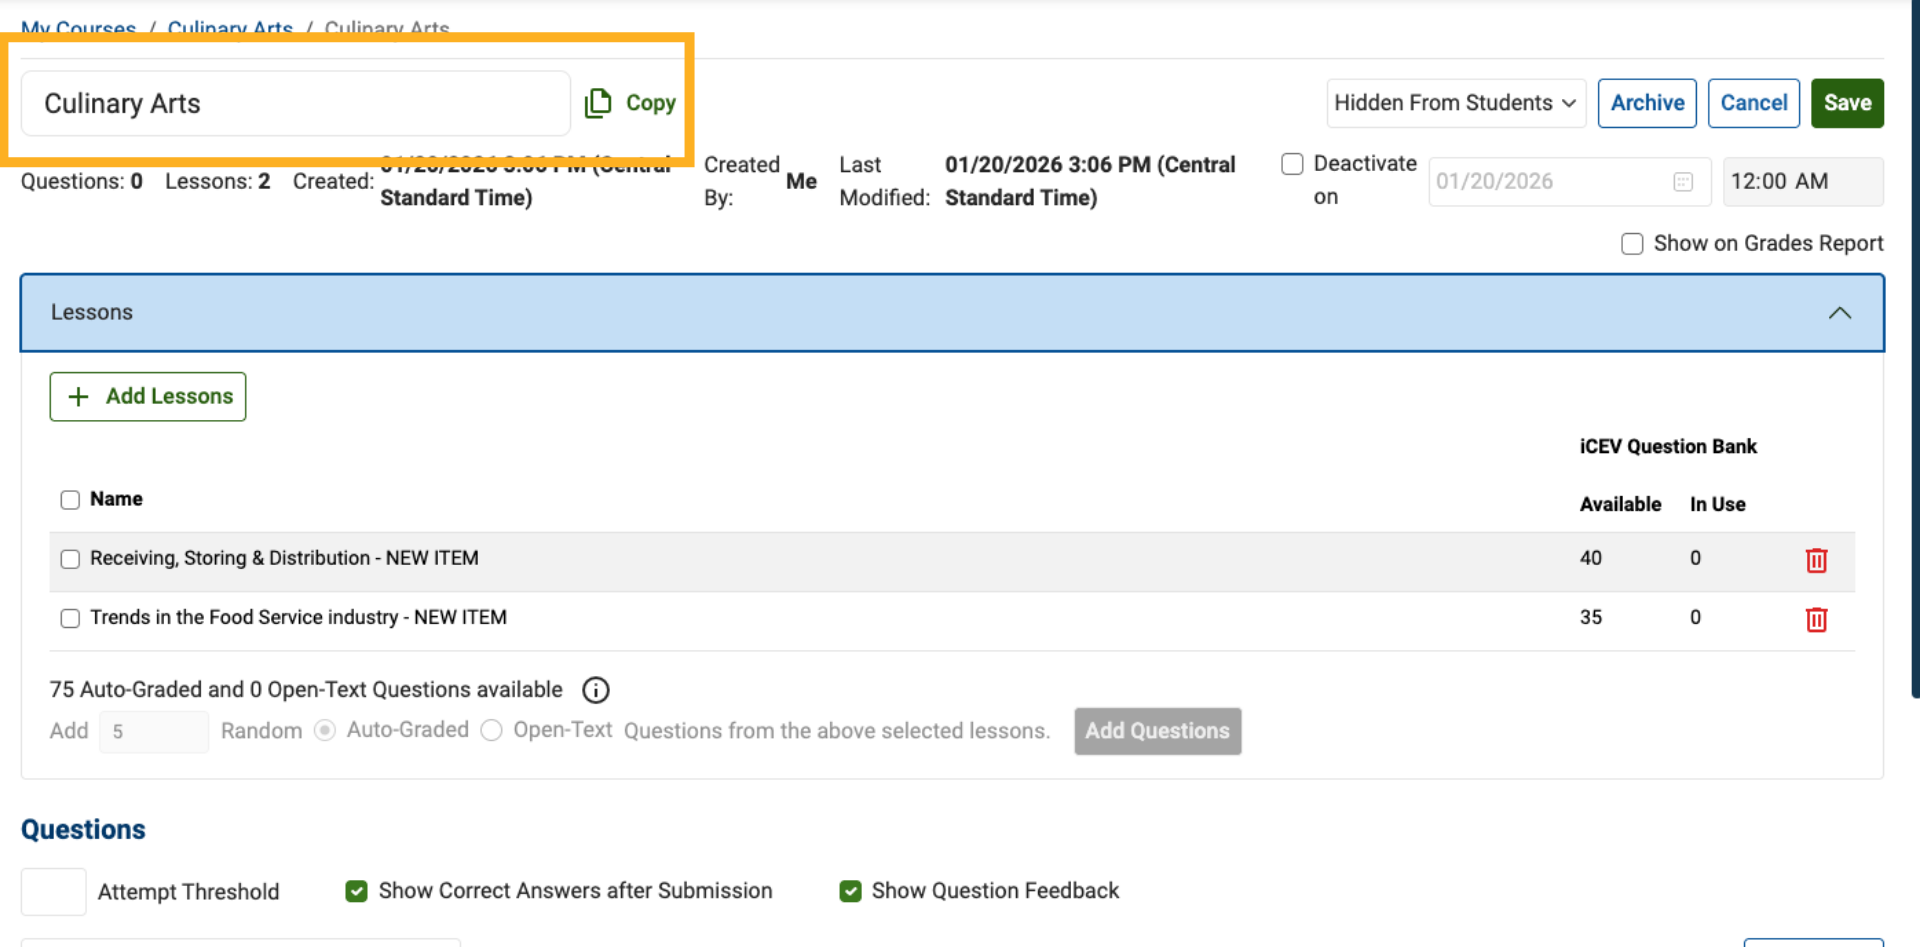
7. Review the Editor Screen
When you first enter the editor, notice that the assessment does not yet have a title.
Several settings may also be left in their default state.
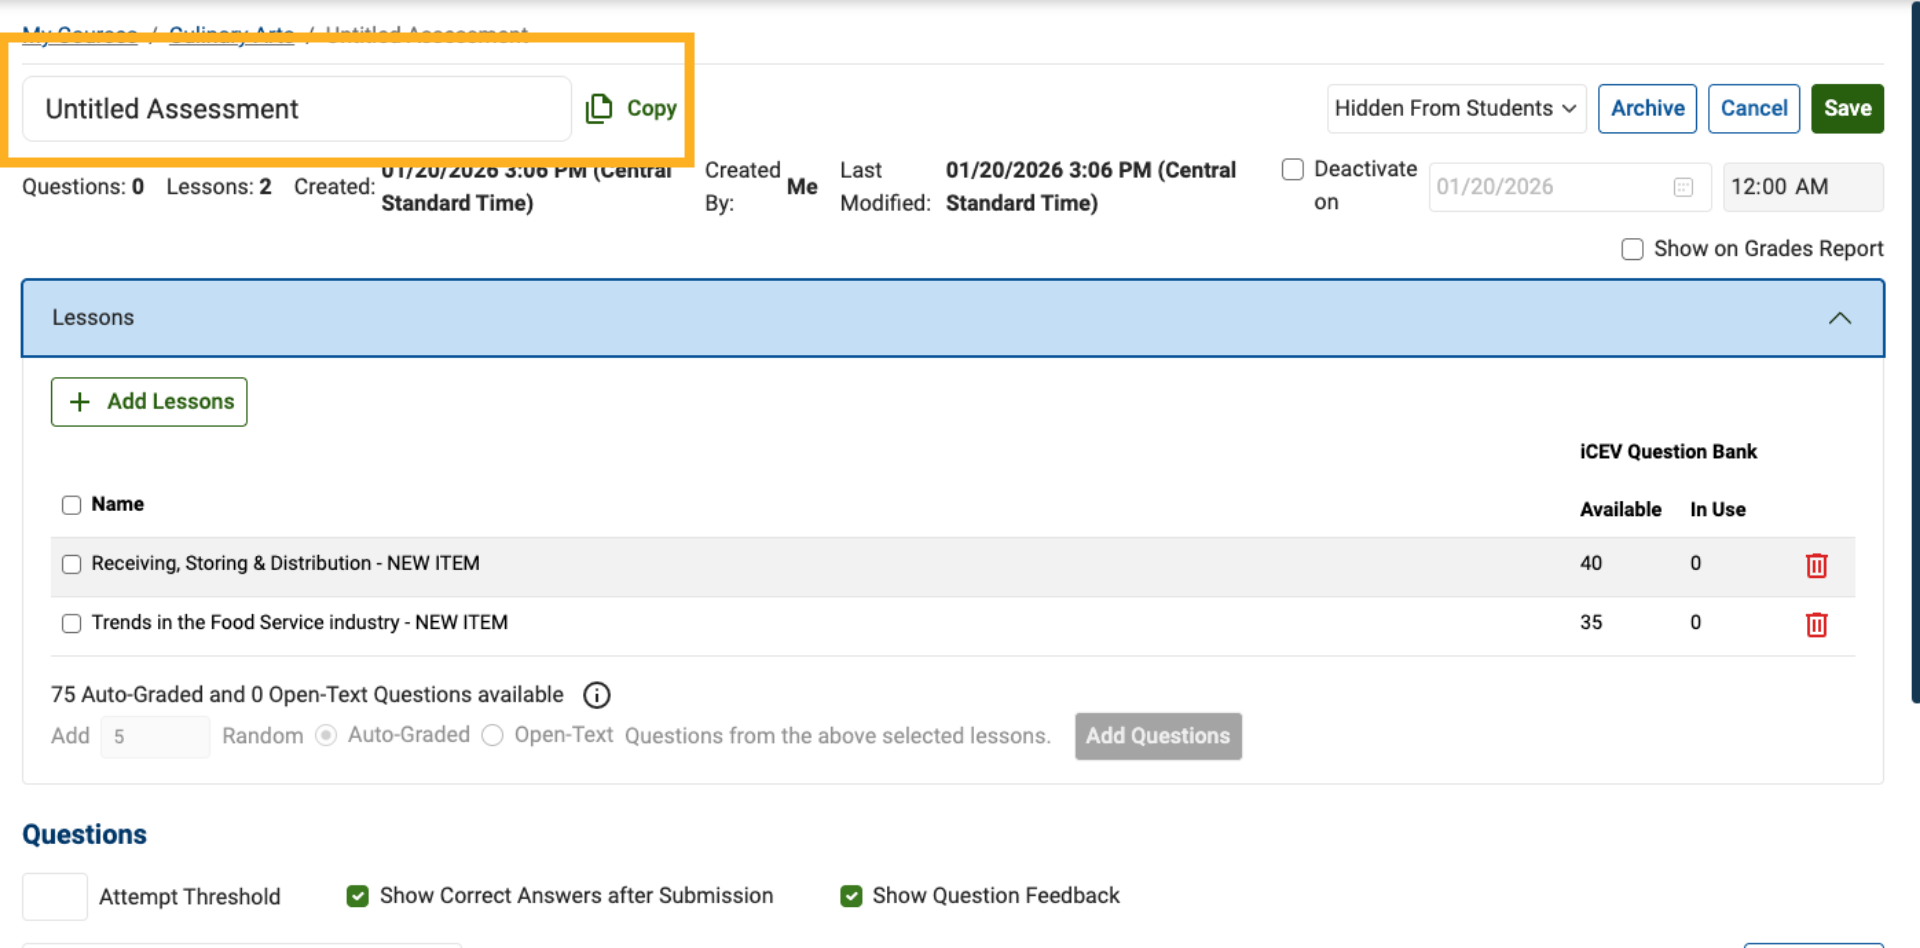
8. Set the Assessment Title
Enter a clear, descriptive title for your custom assessment.
This helps you and other instructors easily identify it later.
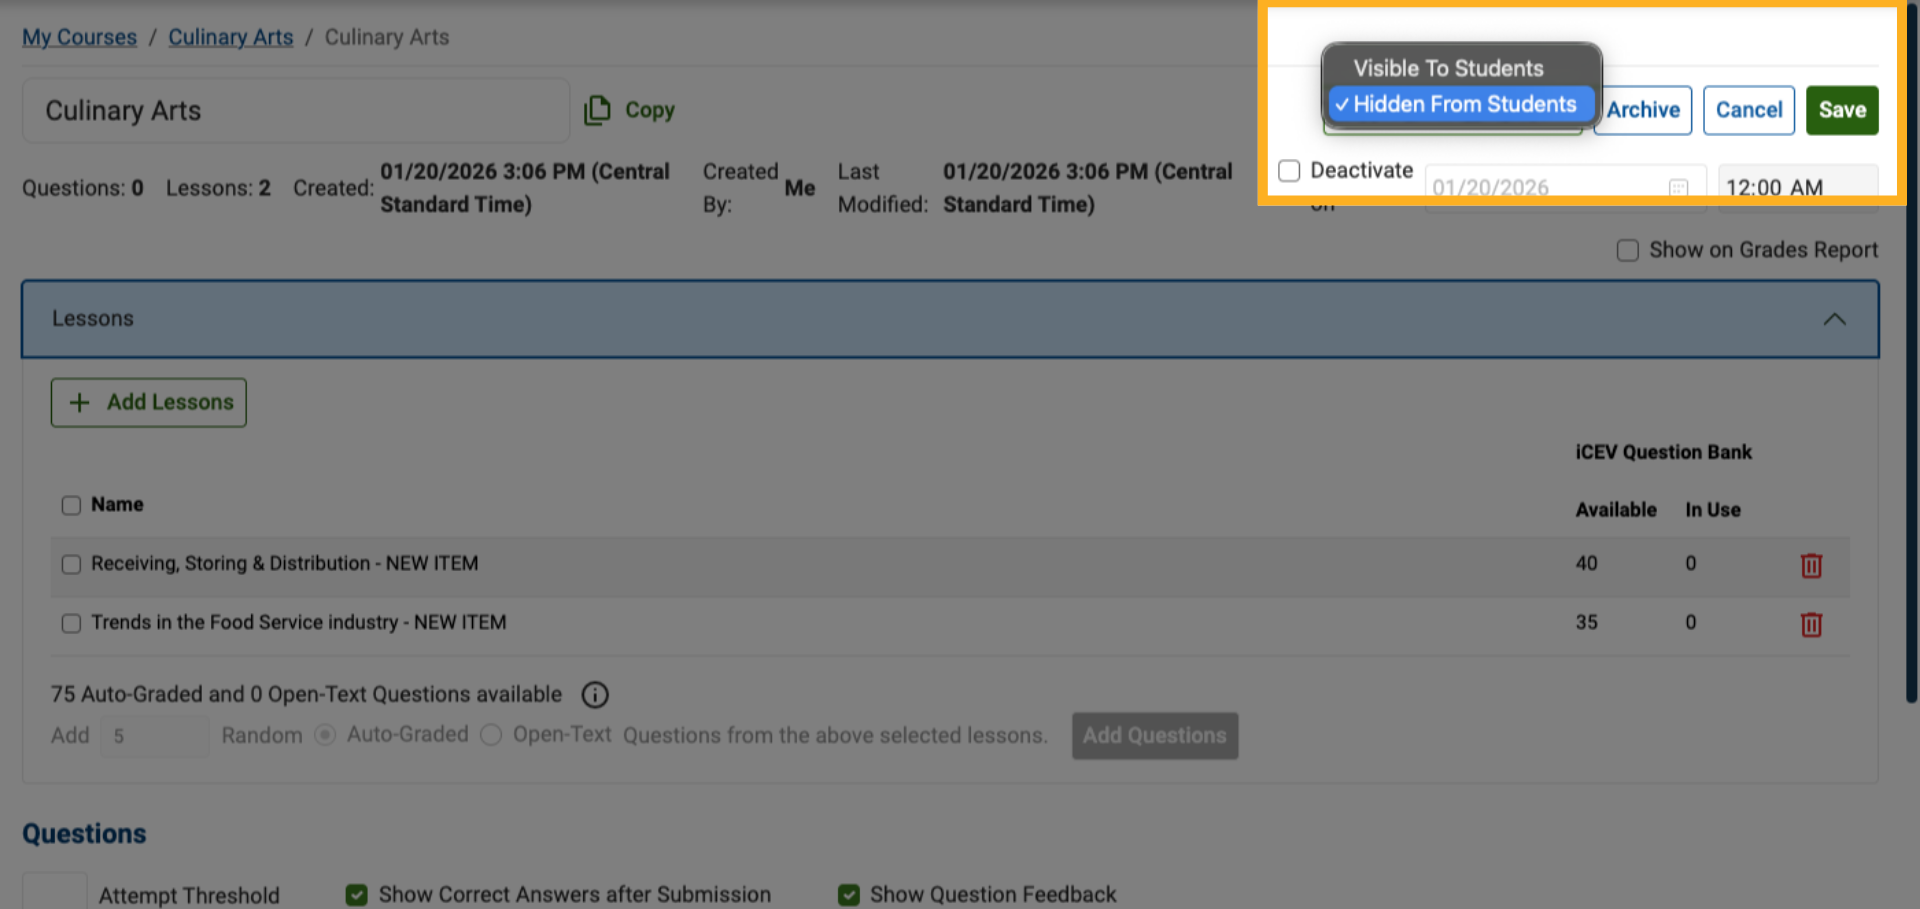
9. Manage Assessment Visibility
Choose whether the assessment should be:
-
Hidden from students while you continue editing, or
-
Visible to students once it is ready for access
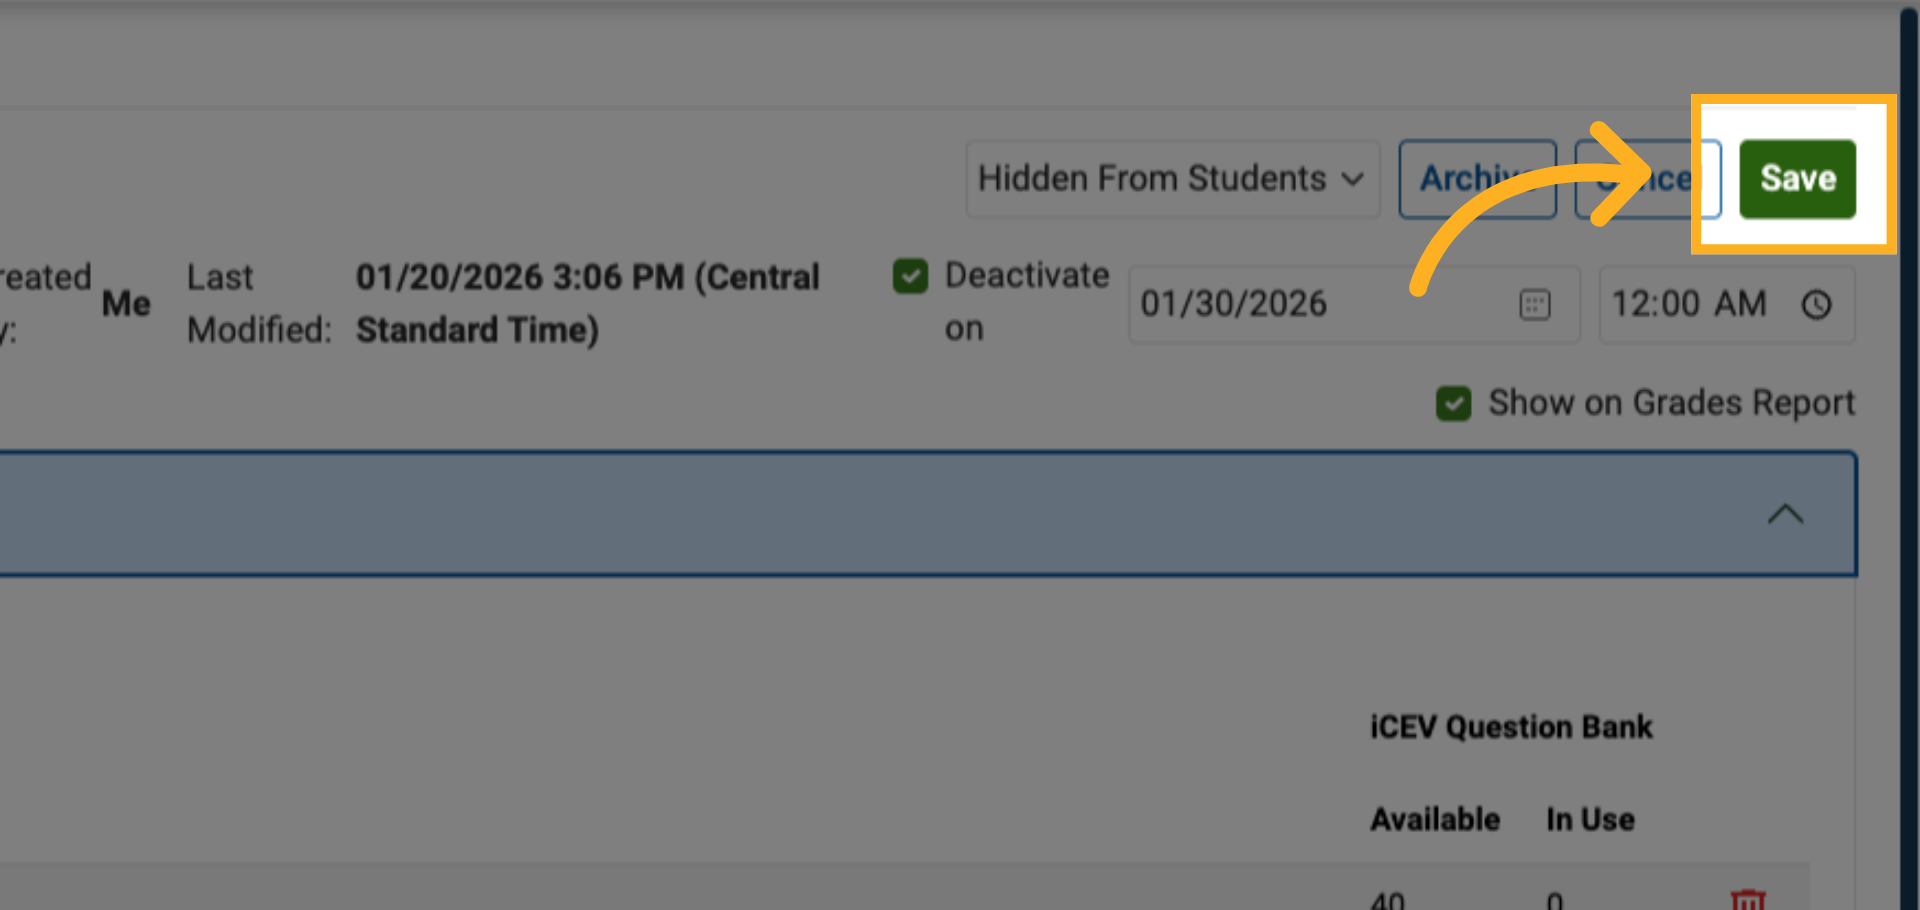
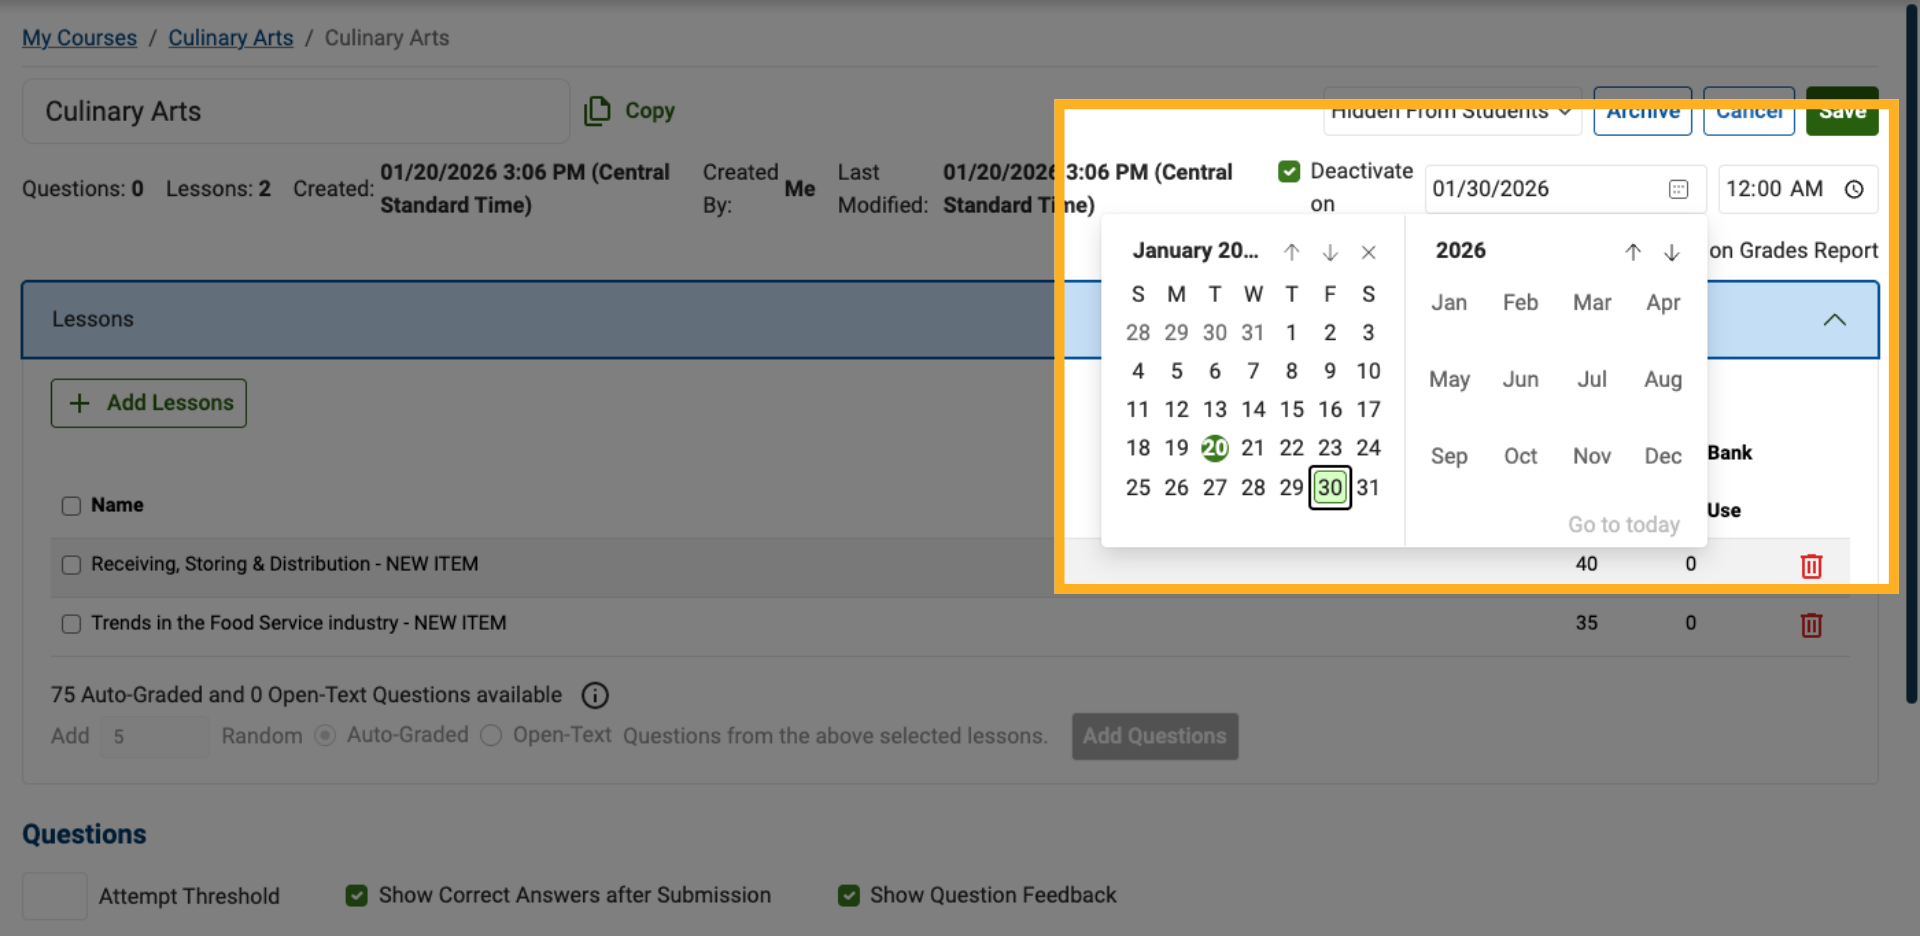
10. Set a Deactivate Date (Optional)
Set a Deactivate Date to automatically prevent students from accessing the assessment after a specific date.
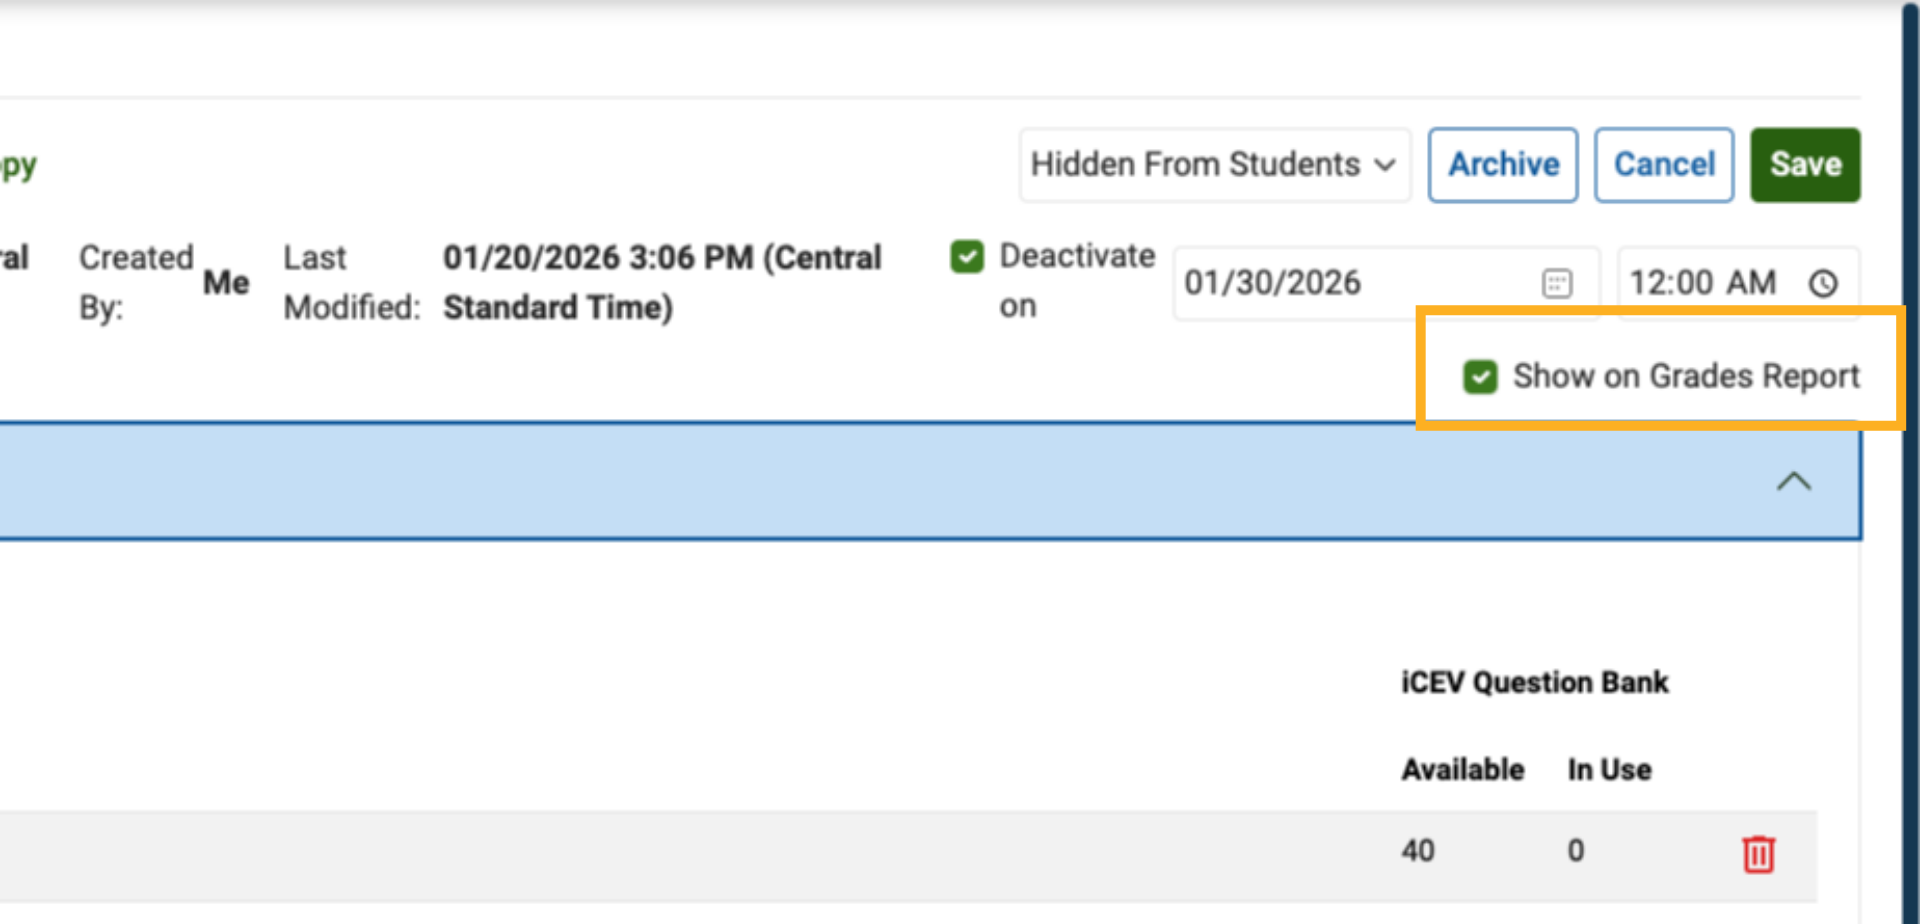
11. Choose Grade Report Visibility
Decide whether the assessment should appear on your Grade Report.
This controls whether student scores are included in reporting.
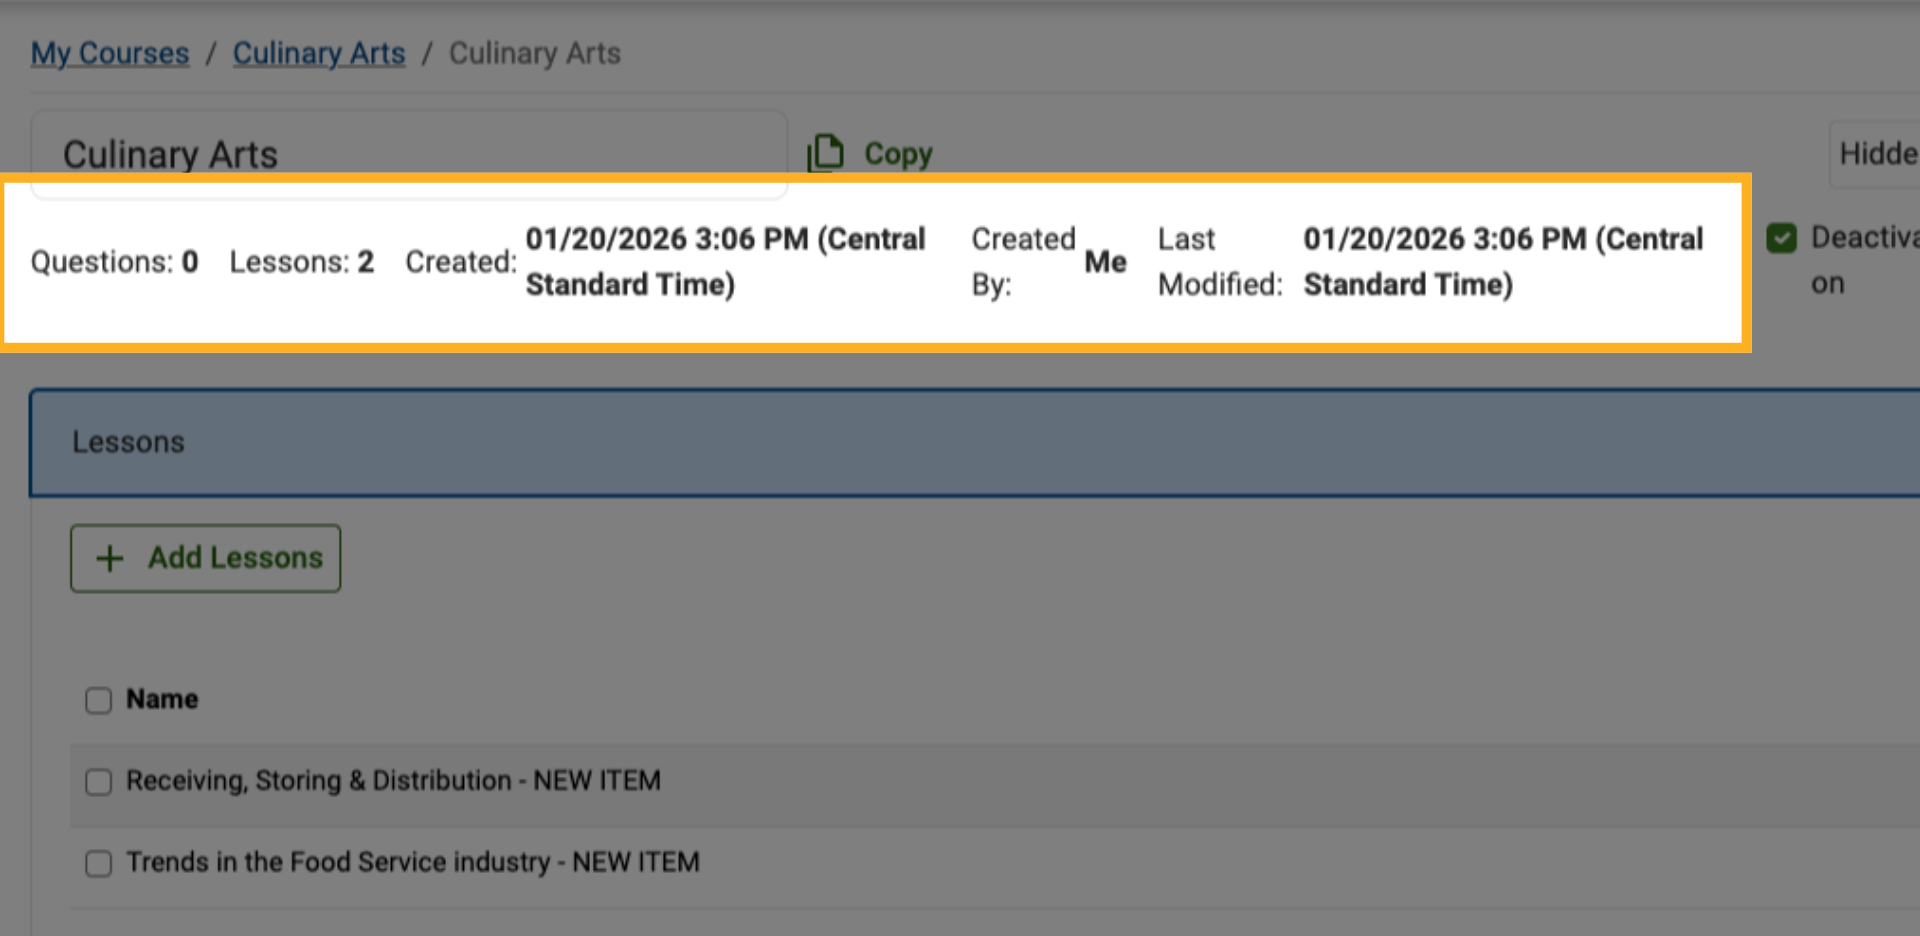
12. Review Assessment Status Information
At the top of the editor, review key assessment details, including:
-
Total question count
-
Number of lessons included
-
Creation date
-
Assessment creator
-
Last modified date and time
This information helps you track the assessment’s progress and history.
13. Save Your Settings
Before leaving the editor or refreshing your browser, be sure to click Save to preserve all changes and settings.