


CTE Curriculum
Prepare learners with CTE curriculum aligned to industry standards.


Administrators’ Guide
This process should be completed by the Brightspace Administrator.
LTI 1.1 Integration Guide
- Login to Brightspace
- Click Admin Tools
- Click External Learning Tools
- Click Manage Tool Providers (Legacy)
- Click New Tool Provider and enter the following:
Launch Point: https://login.icevonline.com/LTI
Version: Inherit Global (1.1)
OAuth Signature Method: HMAC-SHA1
Secret: please contact us for this information
Check “Use custom tool consumer information instead of default”
Key: please contact us for this information
Name: iCEV
Description: iCEV
Contact Email: integrationsupport@icevonline.com - Under Visibility, check “Allow users to use this tool provider”
- Under Security Settings, check each of the following:
• Send tool consumer information to tool provider• Send context information to tool provider• Send course information to tool provider• Send course section information to tool provider• Send LTI user ID and LTI role list to tool provider• Send username to tool provider• Send user email to tool provider• Send system Org Defined ID to tool provider• Send link title to tool provider• Send link description to tool provider
- Under Make tool provider available to, check the appropriate Org Units for your organization, and select the courses that will use iCEV content, making certain all applicable courses are selected
Creating a Course and Rostering Users
Part 1: Create a New Course
- Log in to Brightspace with Administrator permissions
- Click the Admin Tools gear icon in the navigation bar
- Select Course, then click Create Course
- Complete the required course information, including course name, course code, department, and semester or term, and configure any additional settings your organization requires
- Click Save or Create
Part 2: Roster a Teacher to the Course
- Navigate to the newly created course and click Classlist from the Course Administration menu
- Click Add Participants, then Add Existing Users
- Search for the teacher by name, username, or email address, select them from the results, and choose the Instructor role
- Click Enroll Selected Users
Part 3: Roster Students to the Course
- While in the course Classlist, click Add Participants, then Add Existing Users
- Search for students by name, username, or email address and select one or more students
- Choose the Learner role, then click Enroll Selected Users
Part 4: Verify Enrollments
- Open the course Classlist and review the list of enrolled users
- Confirm teachers have the Instructor role and students have the Student role
- Make any corrections needed by editing user roles or unenrolling users
LTI 1.3 Integration Guide
This guide walks D2L Brightspace administrators through the process of registering the iCEV Learning Platform as an LTI 1.3 Advantage tool and creating a deployment within Brightspace.
Please note: The D2L Brightspace LTI 1.3 integration setup is not considered complete until the required information listed below has been submitted to integrationsupport@icevonline.com and the customer has received a confirmation email from the iCEV Integrations team.
Part 1: Register the iCEV LTI Tool
- Log in to your D2L Brightspace instance using an administrator account
- Navigate to Admin Tools → Manage Extensibility → LTI Advantage
- Select Register Tool
- Choose Standard as the registration type
- Configure the tool using the following settings:
Enabled: On
Name: iCEV
Description: iCEV Learning Platform
Domain: https://login.icevonline.com
Redirect URLs: https://login.icevonline.com/lti
OpenID Connect Login URL: https://login.icevonline.com/lti
Target Link URI: https://login.icevonline.com/lti
Keyset URL: https://login.icevonline.com/lti/.well-known/jwks.json - Under Extensions, enable Assignment and Grade Services
- Under Roles, enable Send Institution Role
- Click Register
Information to Provide to iCEV
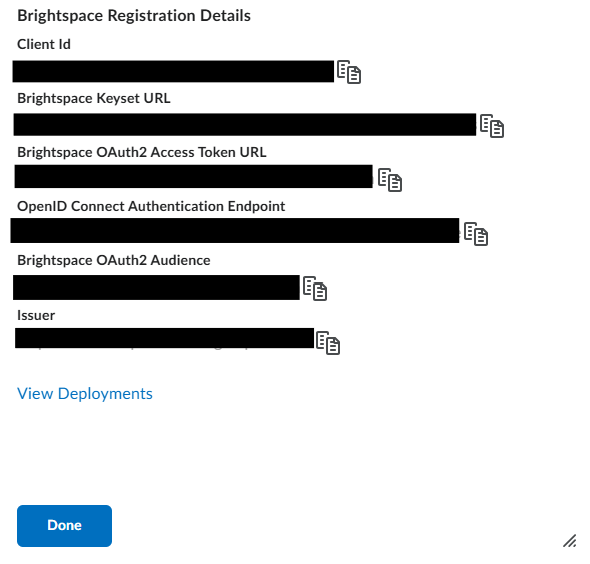
After registering the tool, Brightspace will generate information required to complete the integration within iCEV UMS. Please provide the following values to your iCEV representative:
- Client ID
- Issuer (Recommended)
Part 2: Create the LTI Deployment
Once the tool has been registered, create a deployment to make iCEV available within D2L Brightspace.
- Navigate to:
Admin Tools → External Learning Tools → LTI Advantage - Select New Deployment.
- Configure the deployment using the following settings:
• Deploy Tool Settings◦ Enabled: On◦ Auto Migrate Links: On◦ Tool: iCEV (the tool name registered in Part 1)◦ Name: iCEV◦ Description: iCEV Learning Platform◦ Extensions Enable:▪ Assignment and Grade Services◦ Security Settings Enable:▪ User Information◦ Configuration Settings Enable:▪ Open as External Resource▪ Grades created by LTI will be included in Final Grade▪ Auto Create Grade Items◦ Make tool available to:▪ Select Add Org Units.▪ Choose the appropriate organizational unit(s) where iCEV should be available.▪ In most cases, customers select the entire organization.▪ Availability may vary based on your institution's configuration.• Click “Create Deployment”.
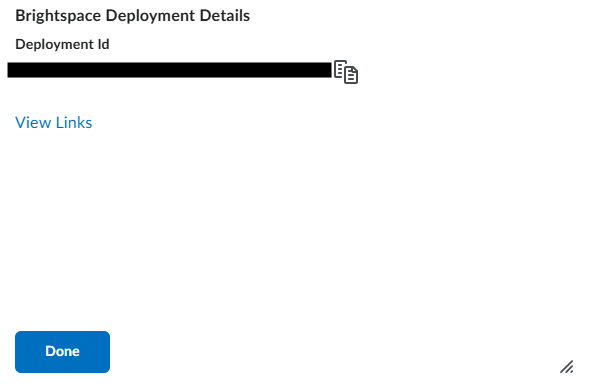
Recommended: Provide the Deployment ID to iCEV. After the deployment is created, Brightspace will generate a Deployment ID. While the Deployment ID is optional for the iCEV configuration, it is recommended to provide it when available.
Submitting Integration Details to iCEV
To complete the integration, please email the following information to integrationsupport@icevonline.com:
Required
- Client ID
- Base URL
Recommended
- Issuer
- Deployment ID
Once this information has been provided, the iCEV team can complete the Brightspace LTI 1.3 configuration within iCEV.
Teachers’ Guide
After the external tool has been set up by the Brightspace Administrator, please follow these steps.
Step 1 - Export Lesson from iCEV
NOTE: It’s recommended to only export one lesson at a time.
- Navigate to Your Course
Go to the Courses page in iCEV and locate the lesson you want to export. Click the blue View button next to that lesson.
- Review Lesson Materials
Inside the lesson, review all materials. Make sure everything you want to include in the export is marked Visible to Students, including:
• Presentations• Instructional materials• Interactive assignments - Click “Export Common Cartridge”
Click the green Export Common Cartridge button in the upper-right corner of the lesson page.
- Select Your LMS
A pop-up window will appear. From the dropdown menu, select the Learning Management System used by your school district.
- Start the Export
Click the green Export button to begin the process.
- Download the IMSCC File
An IMSCC file (Common Cartridge format) will be created and downloaded to your computer.
⚠️ Do not open this file—it’s designed to be imported directly into your LMS.
Step 2: Import into Brightspace
- Open Course Admin
Go into the course and click Course Admin.
- Access Import/Export/Copy Components
Under Site Resources, click Import/Export/Copy Components.
- Select Import Components
Select Import Components, then from a course package, and click Start.
- Upload the Common Cartridge File
Select File and attach the common cartridge file downloaded from iCEV, then click Import All Components.
- View Imported Content
Once the file finishes importing, click View Content.