CTE Curriculum
Prepare learners with CTE curriculum aligned to industry standards.


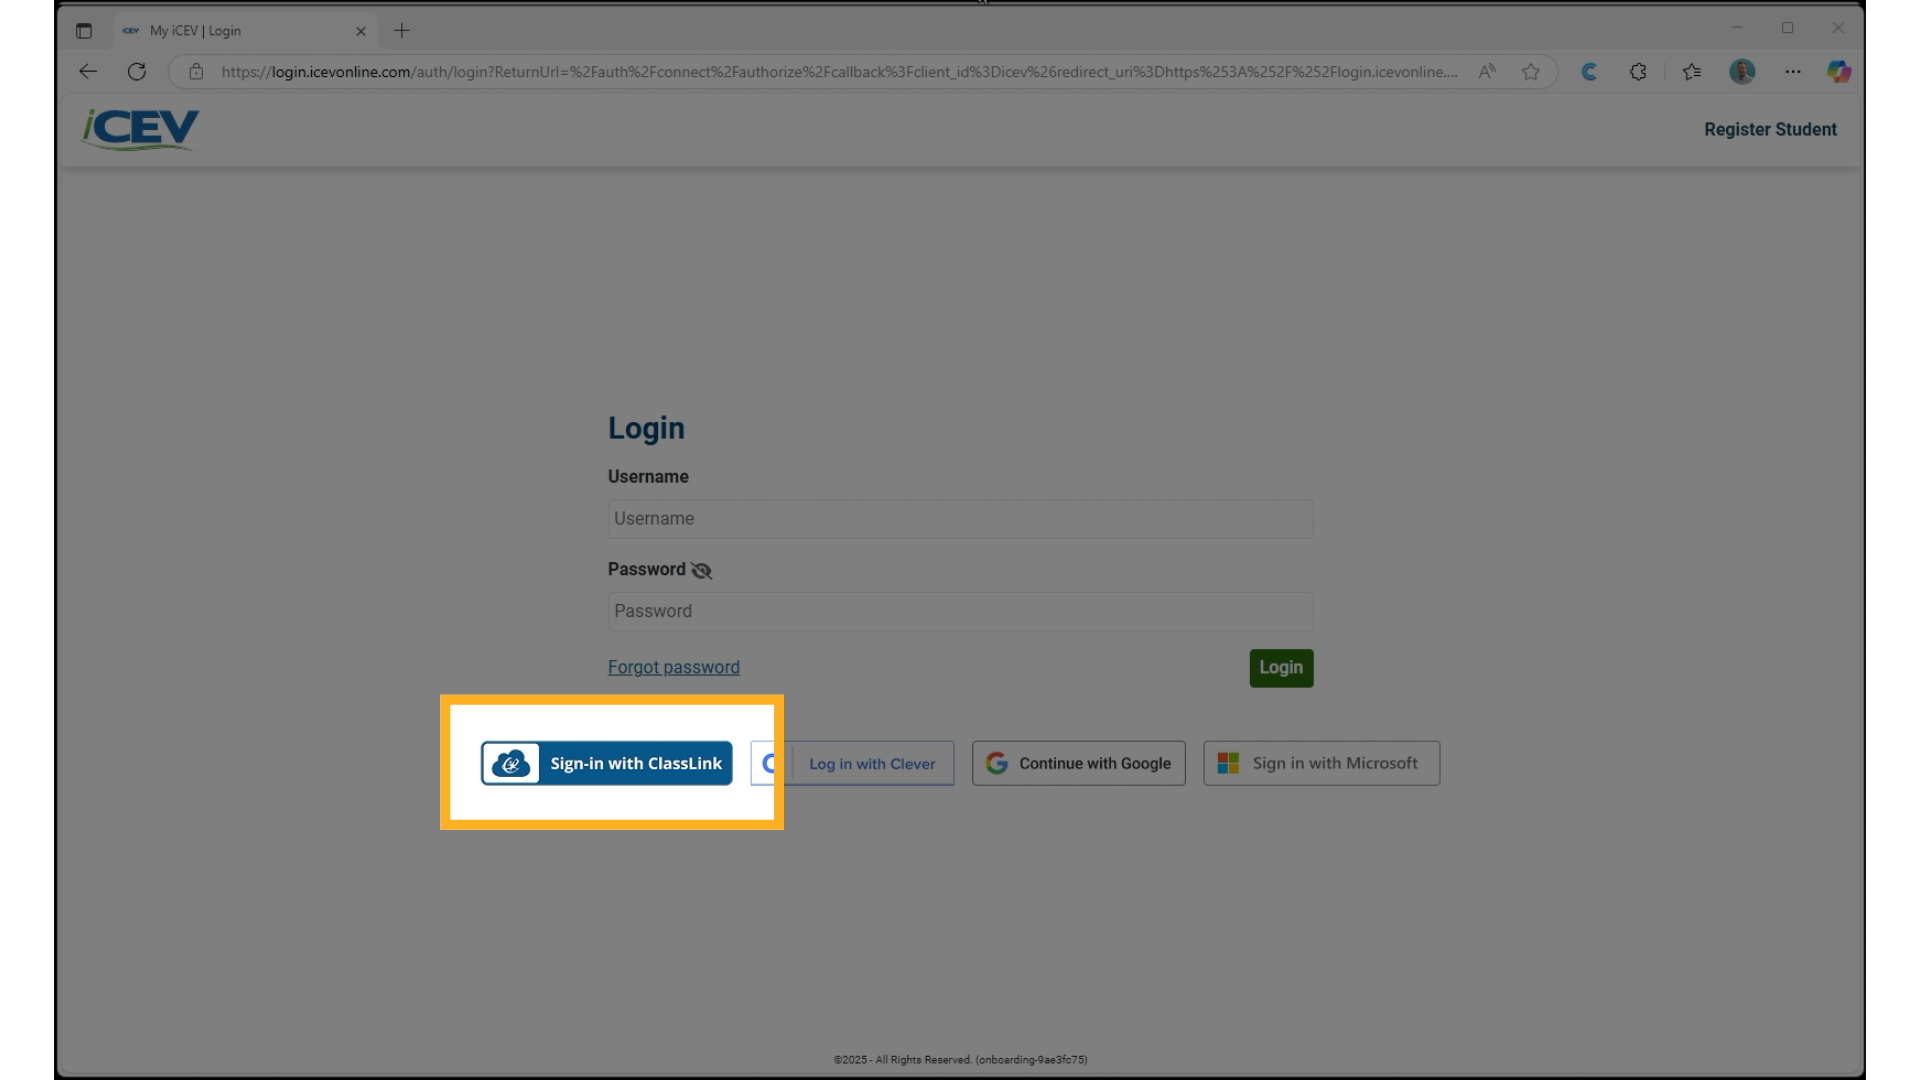
1. Sign In with Clever/ClassLink
-
Begin by navigating to the iCEV login page.
-
Click Sign in with ClassLink or Log In with Clever.
-
Enter your username and password to access your teacher dashboard.
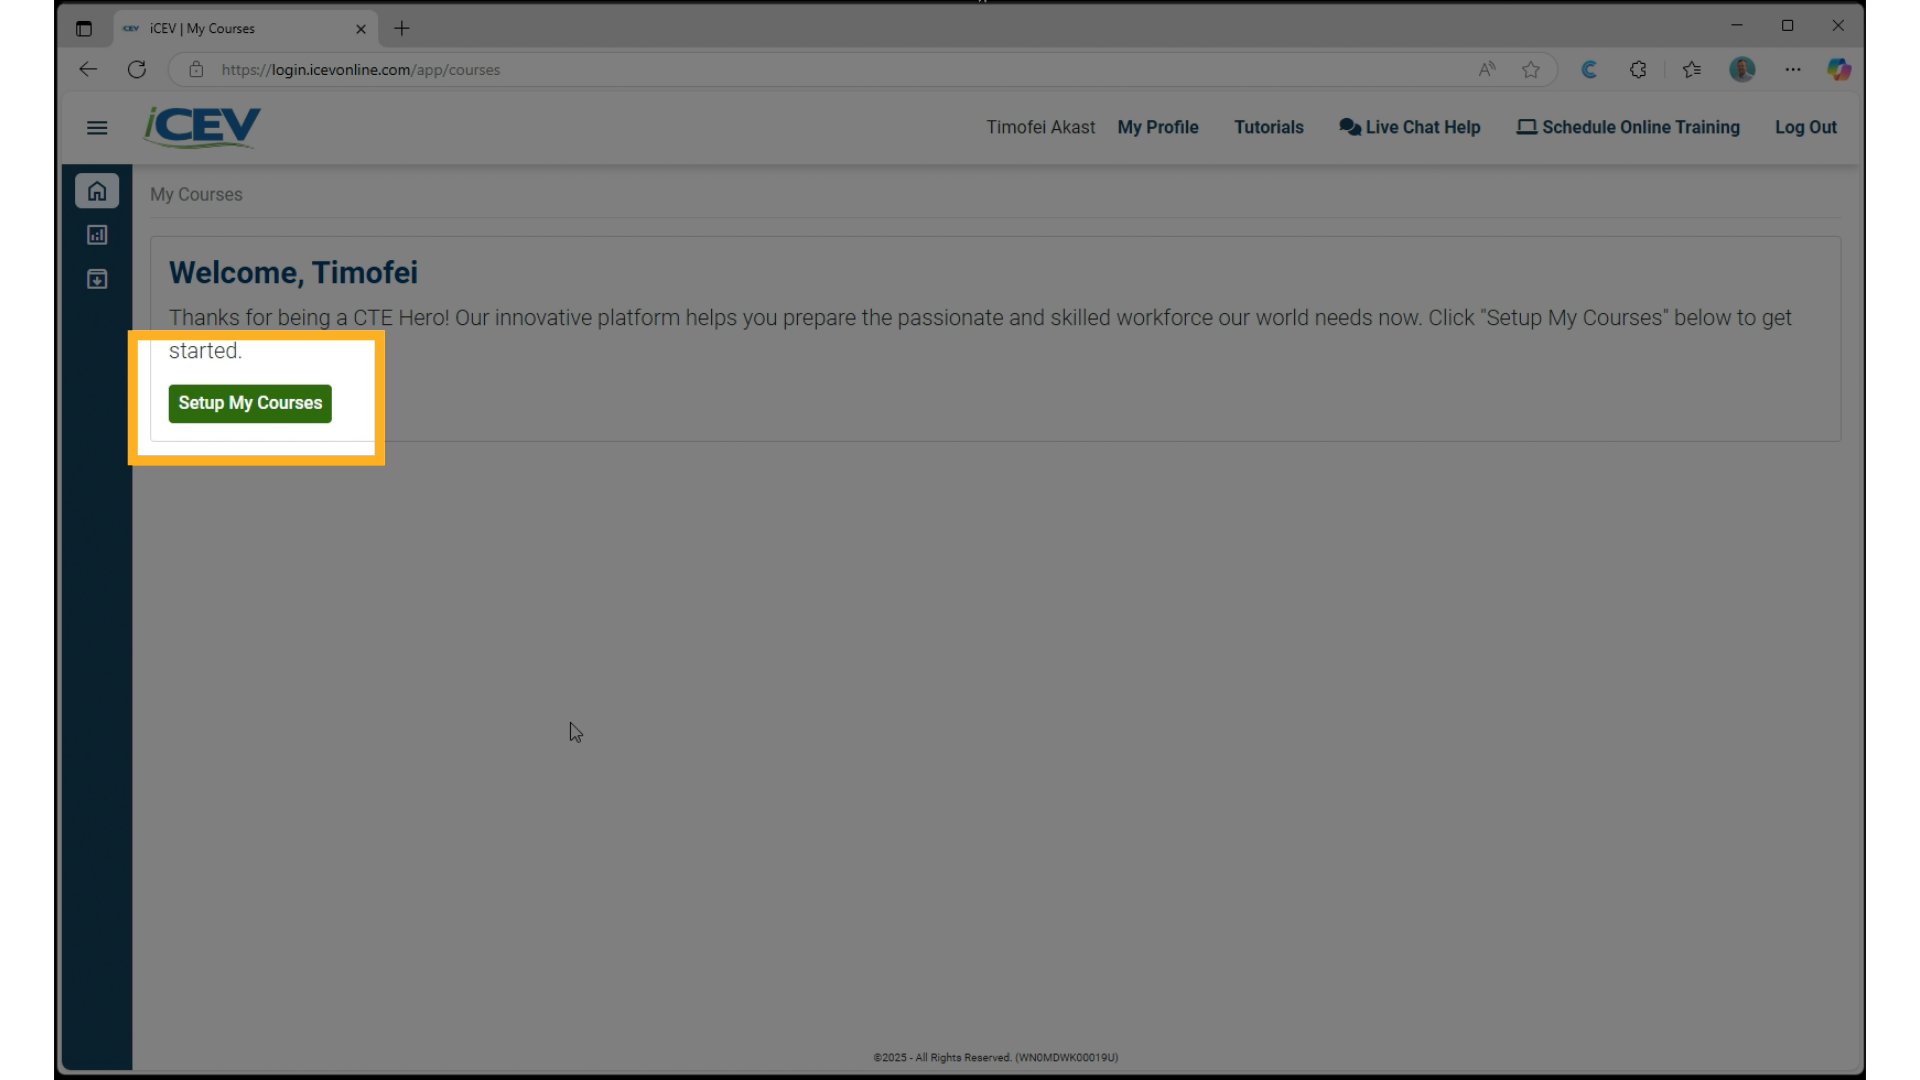
2. Set Up Your Courses
-
After logging in, you’ll be prompted to Set Up My Courses.
-
Click the Set Up My Courses button to begin the course creation process.
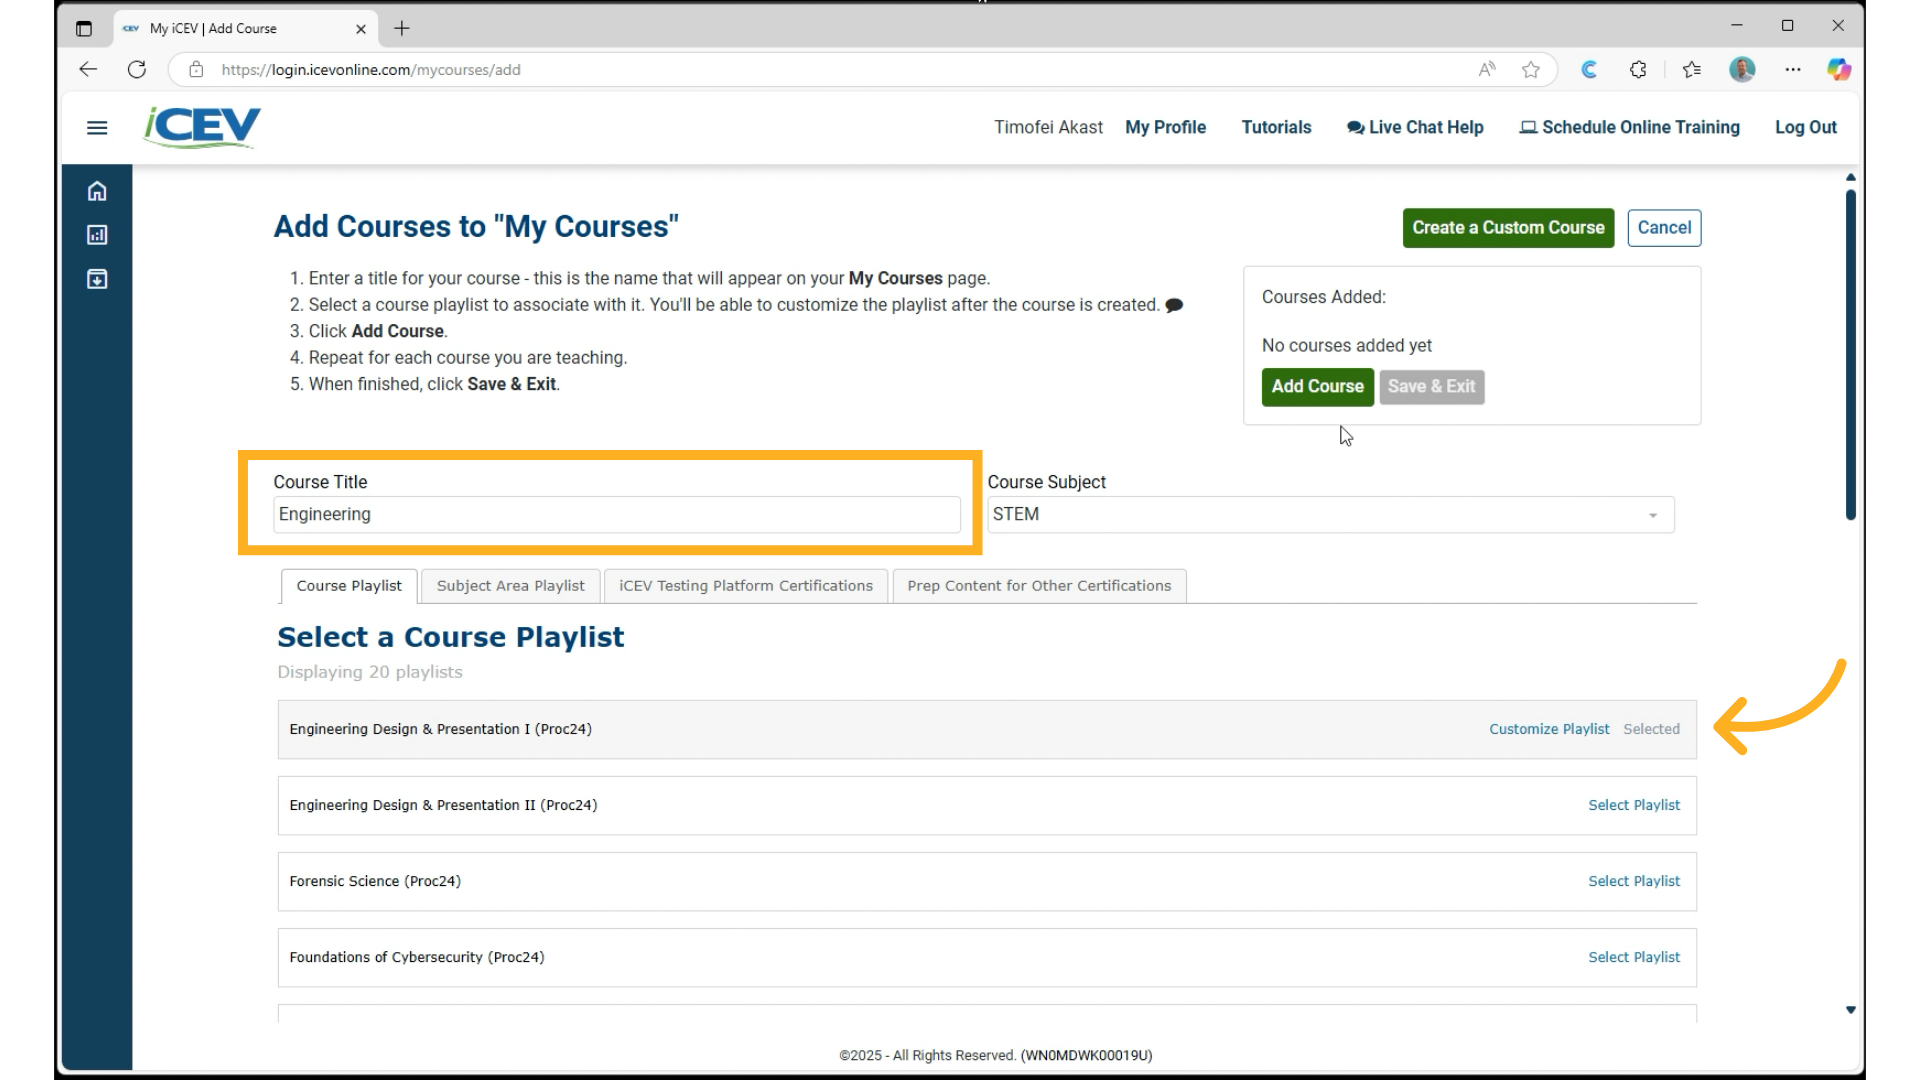
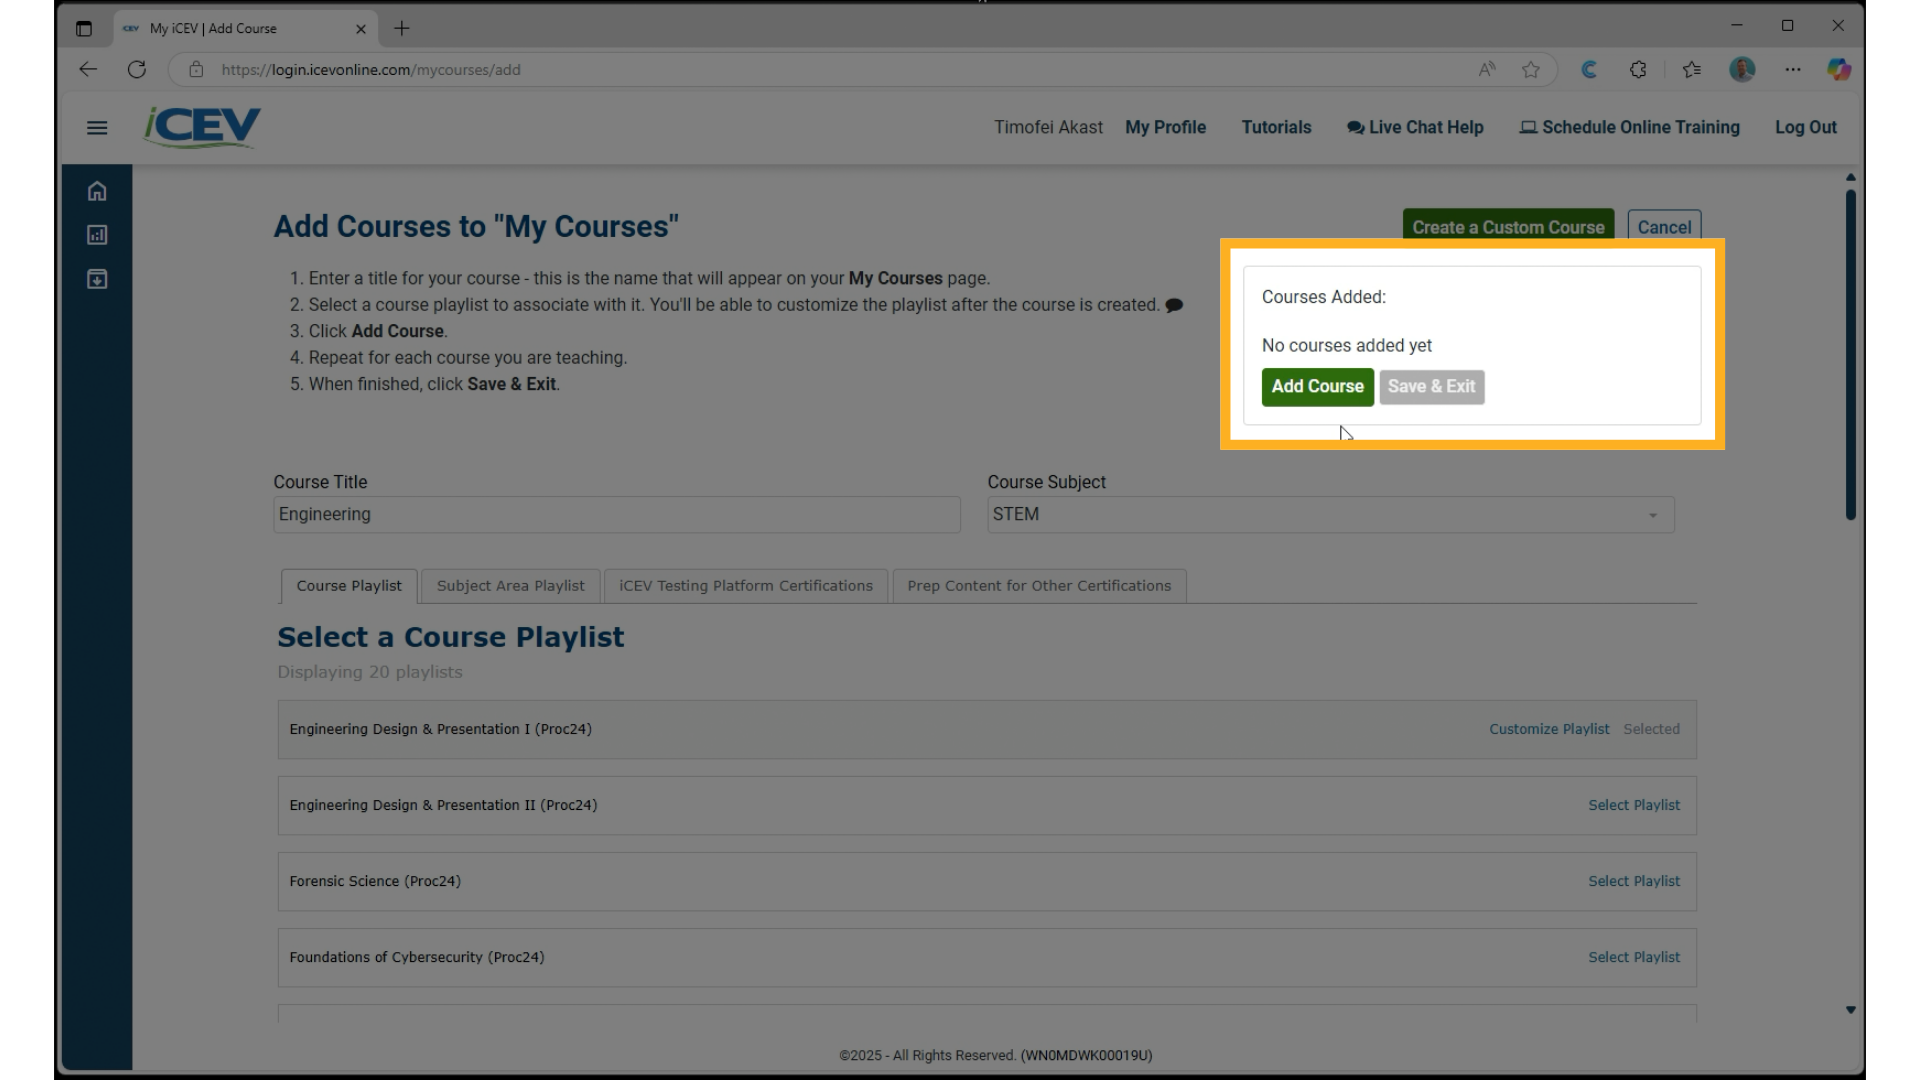
3. Create a New Course
-
Enter a Course Title.
-
Select a Playlist from the iCEV Library to associate with the course.
-
Click Add Course.
4. Add the Course
-
Click Add Course to add the course to the Courses Added list.
5. Save and View Course
-
Click Save and Exit.
-
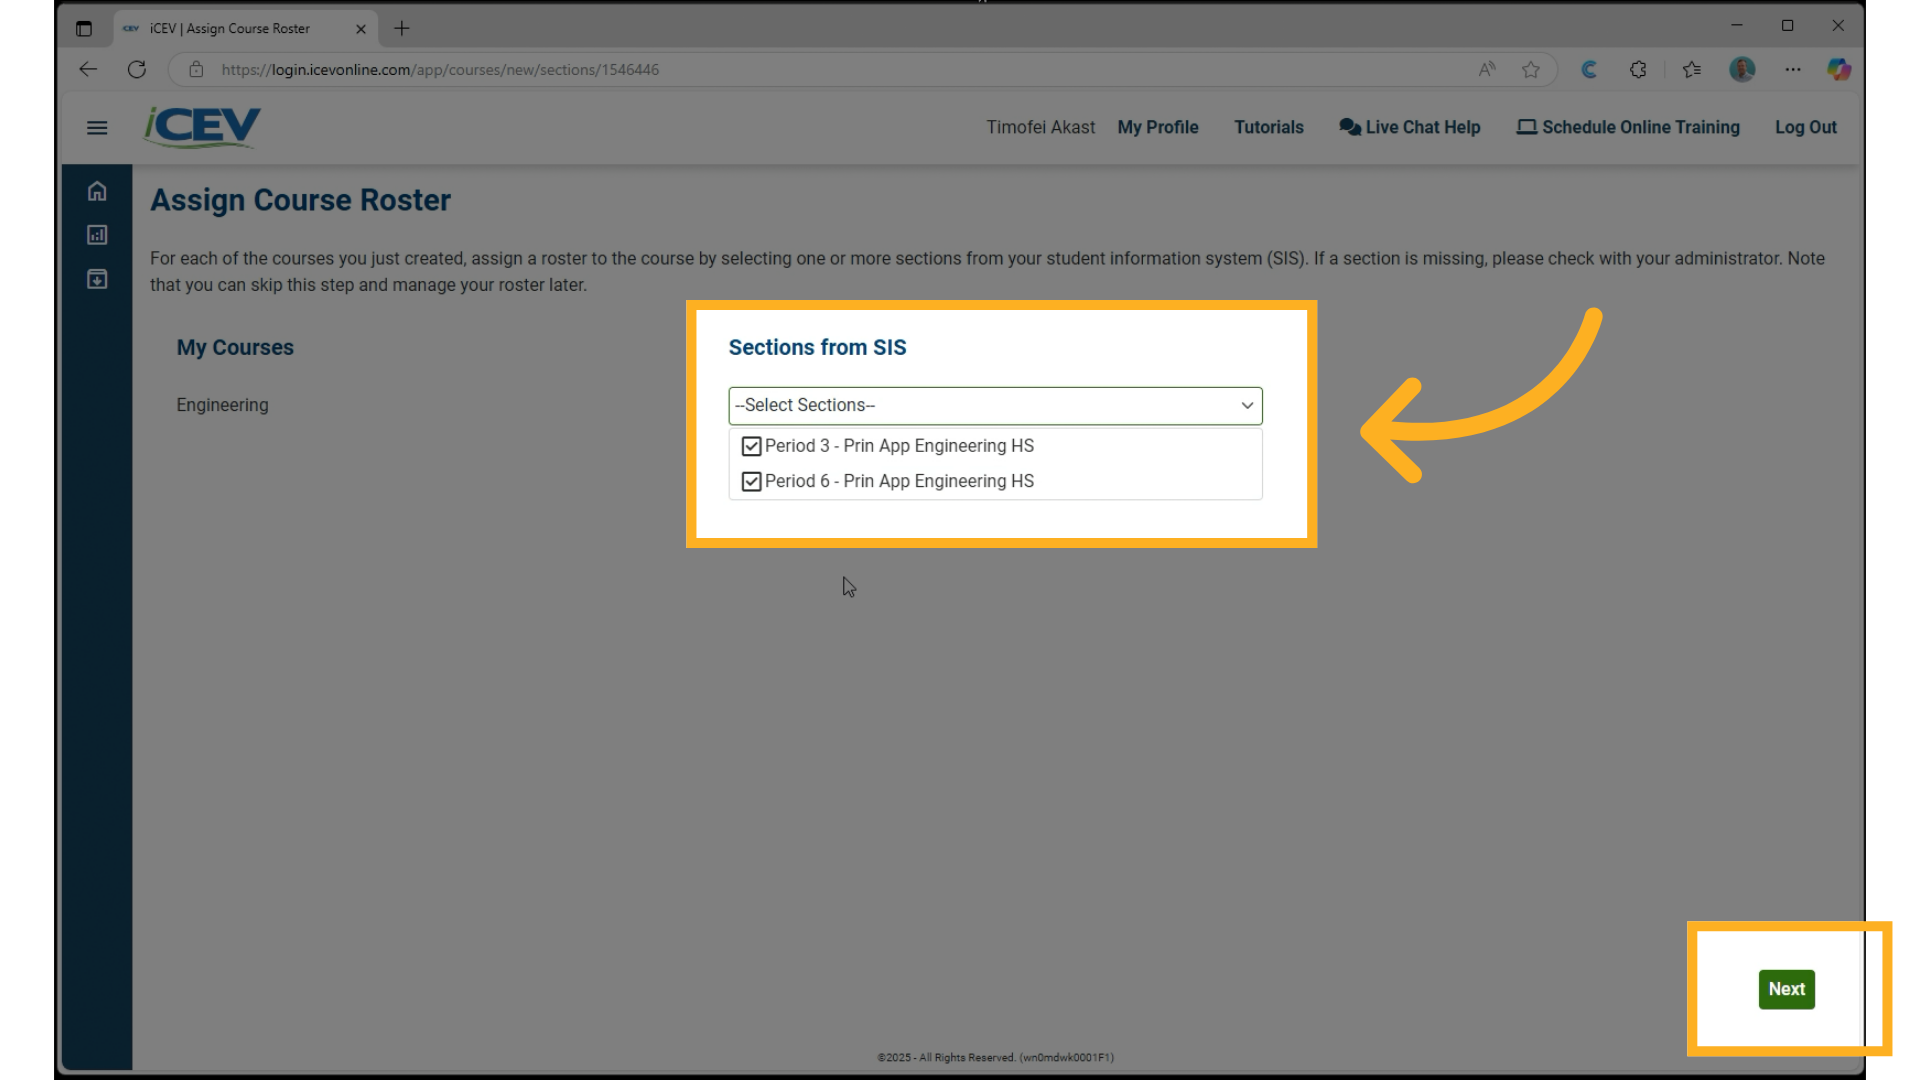
You’ll now see the course you just created, along with a list of sections shared from your SIS via Clever or ClassLink.

6. Roster Students to the Course
-
Select one or more sections to roster to the course.
-
You can assign one section per course or combine multiple sections into one course.
-
-
Click Next to finalize the roster.
-
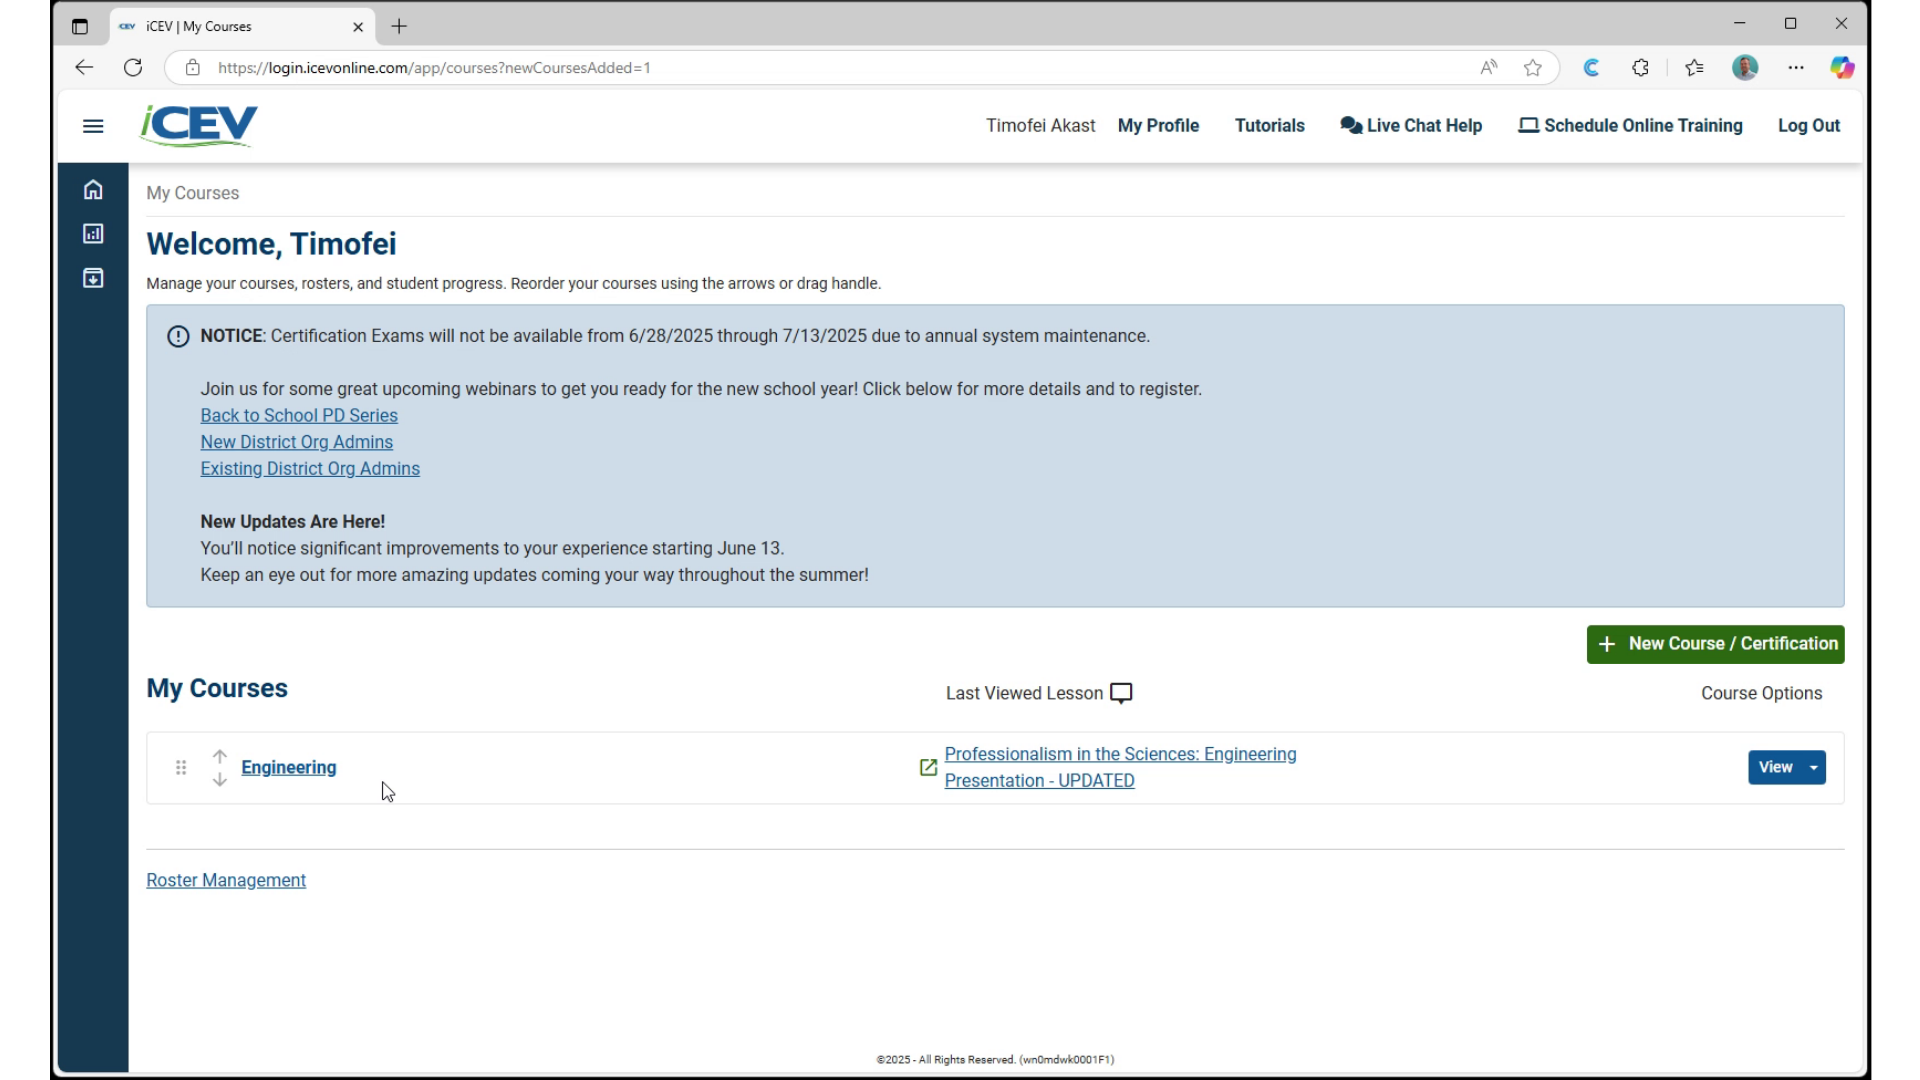
All students from the selected sections will now be added to the course.
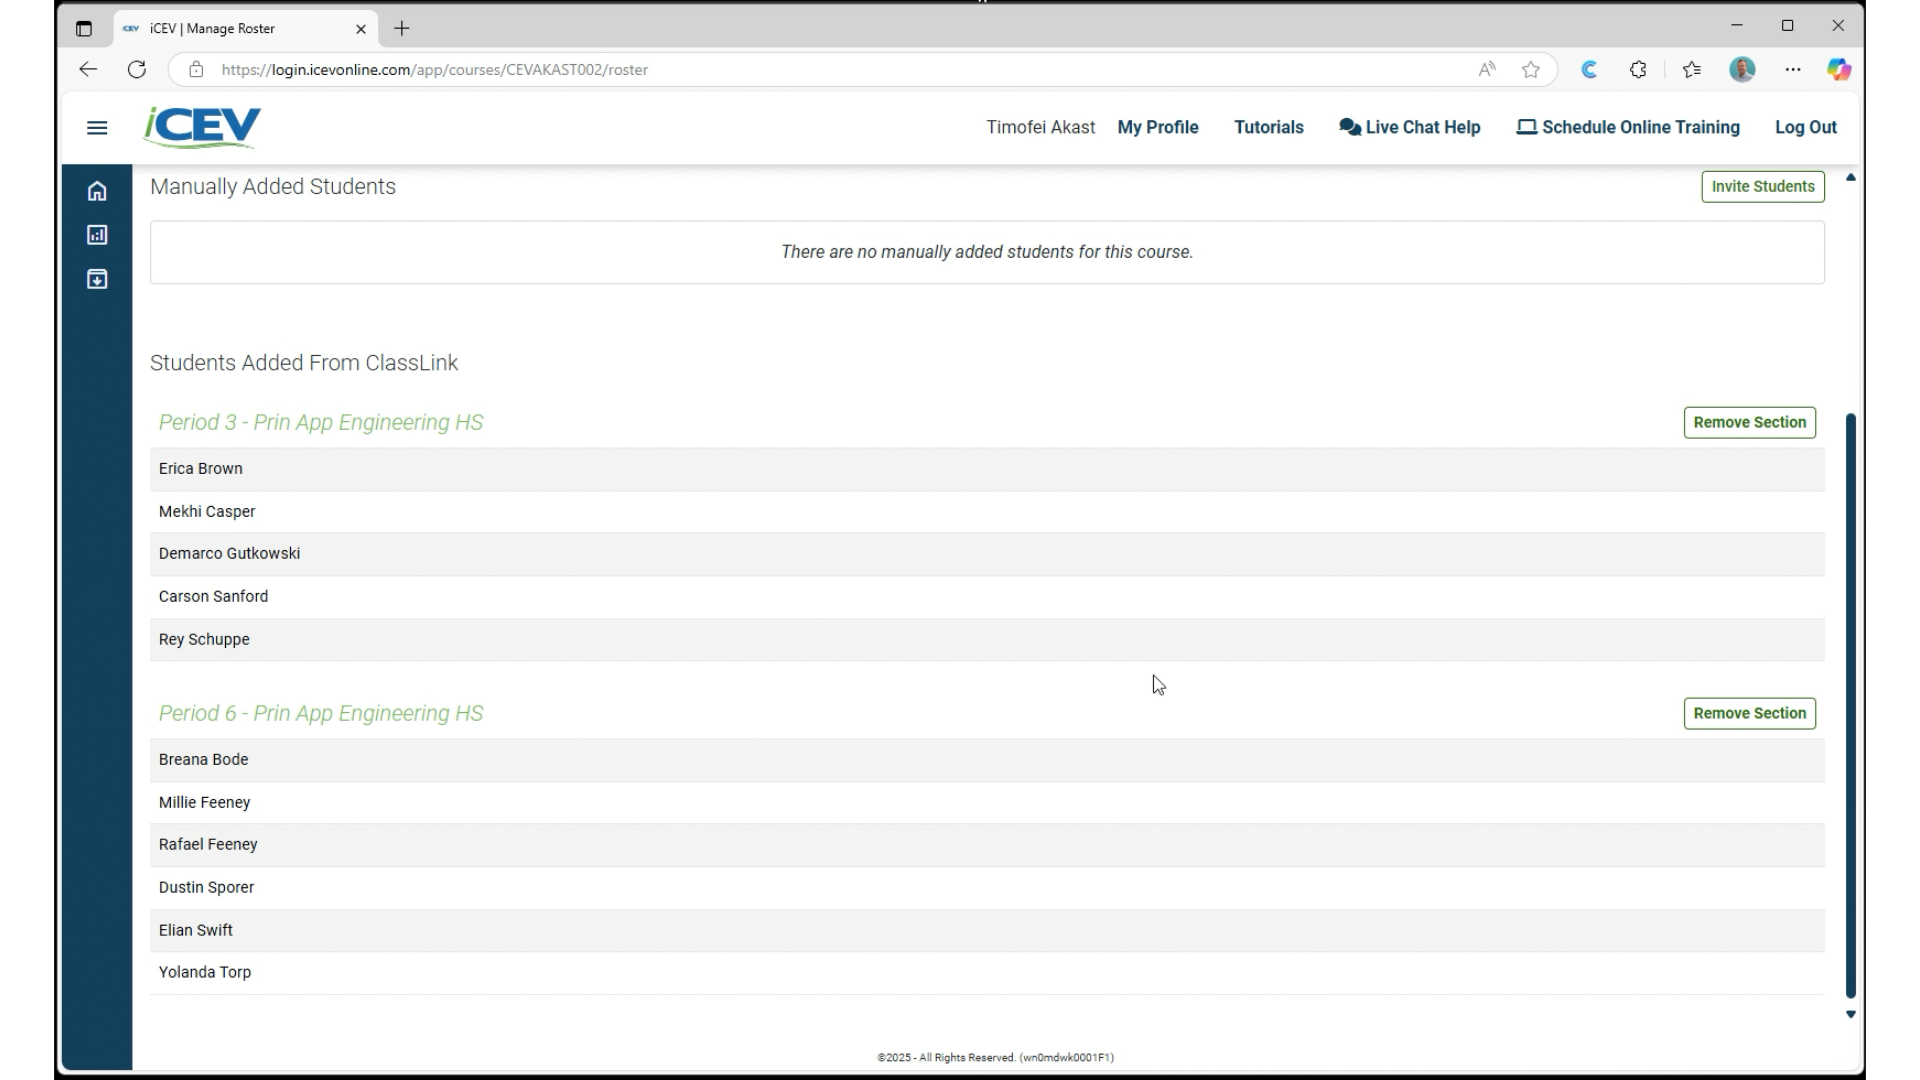
7. View and Manage Roster
-
Click View next to the course.
-
Select Manage Roster to see all students from the rostered sections.
8. Student Roster
Here you can view all the students from the selected sections that have been added to your course.