CTE Curriculum
Prepare learners with CTE curriculum aligned to industry standards.


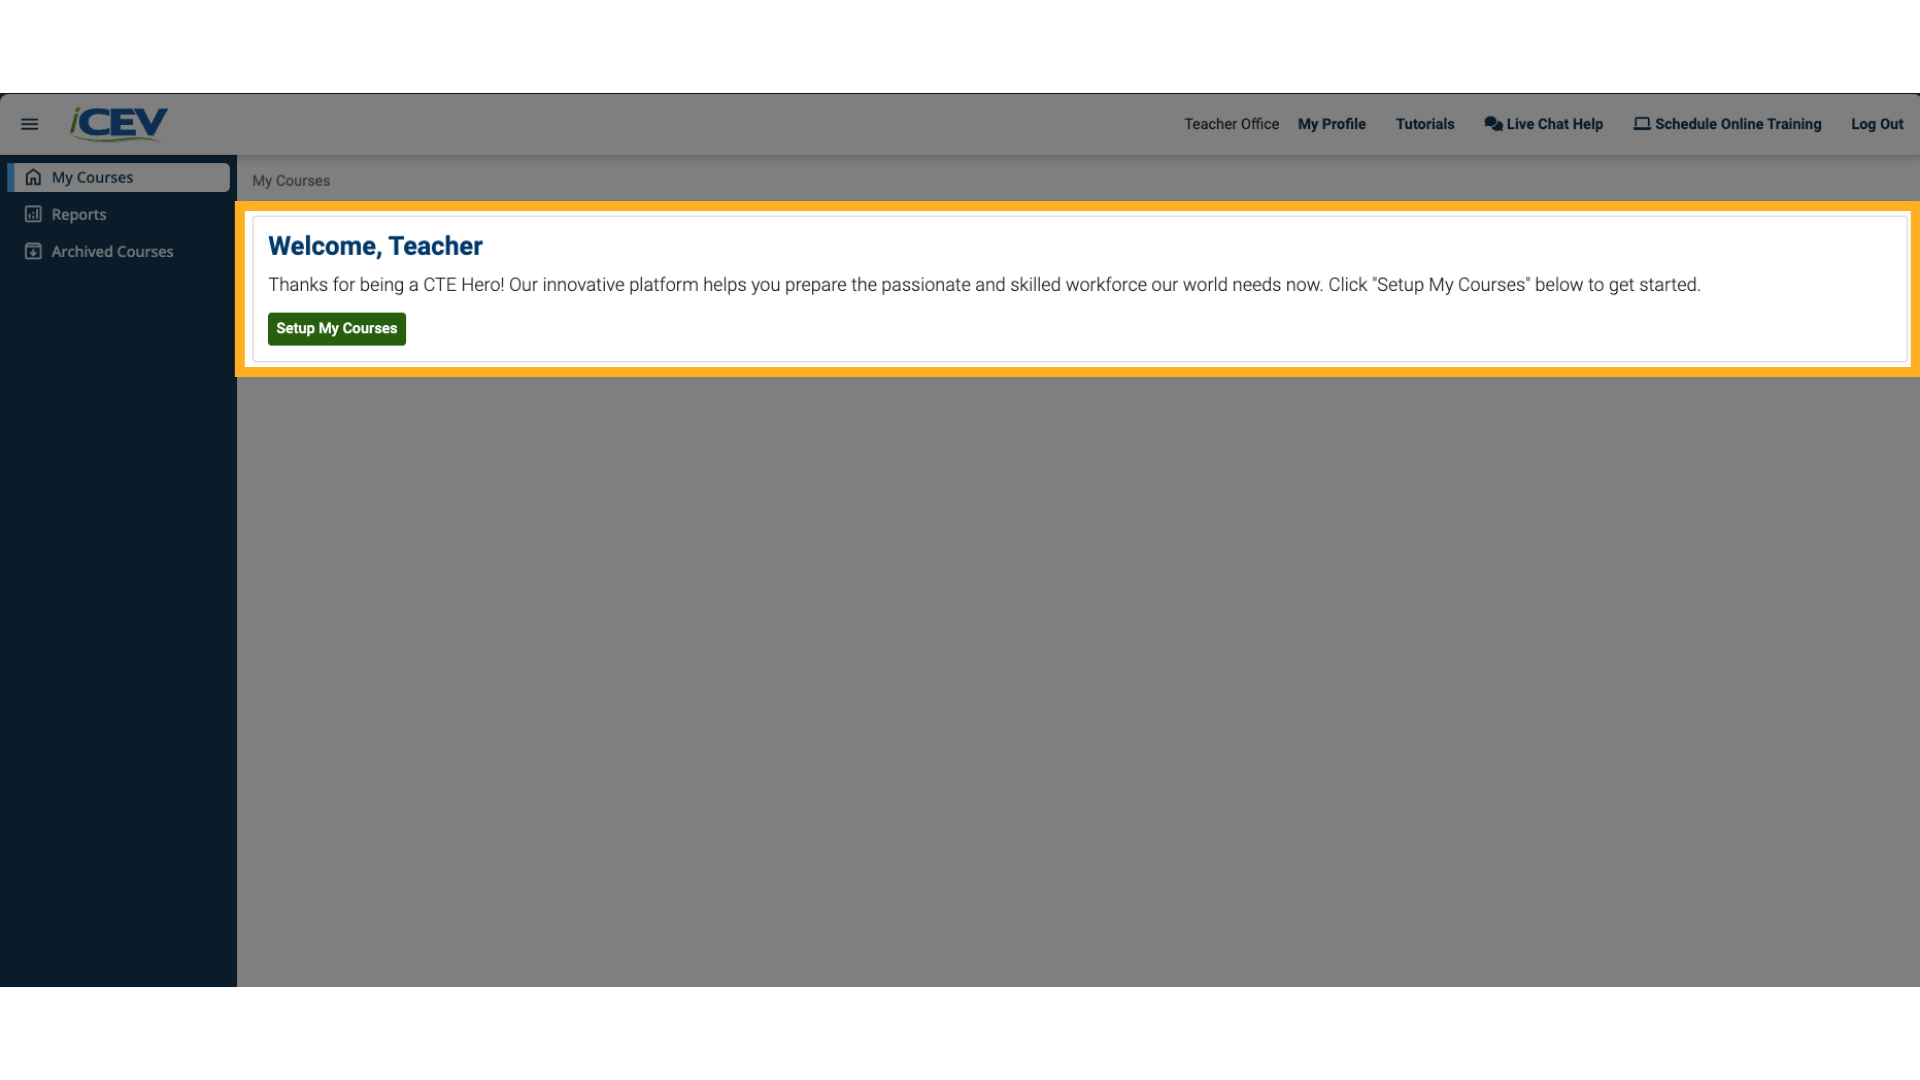
1. First Time Log In
If you're logging in for the first time or haven’t added any courses yet:
-
You’ll see a welcome screen.
-
Click Setup My Courses to begin.
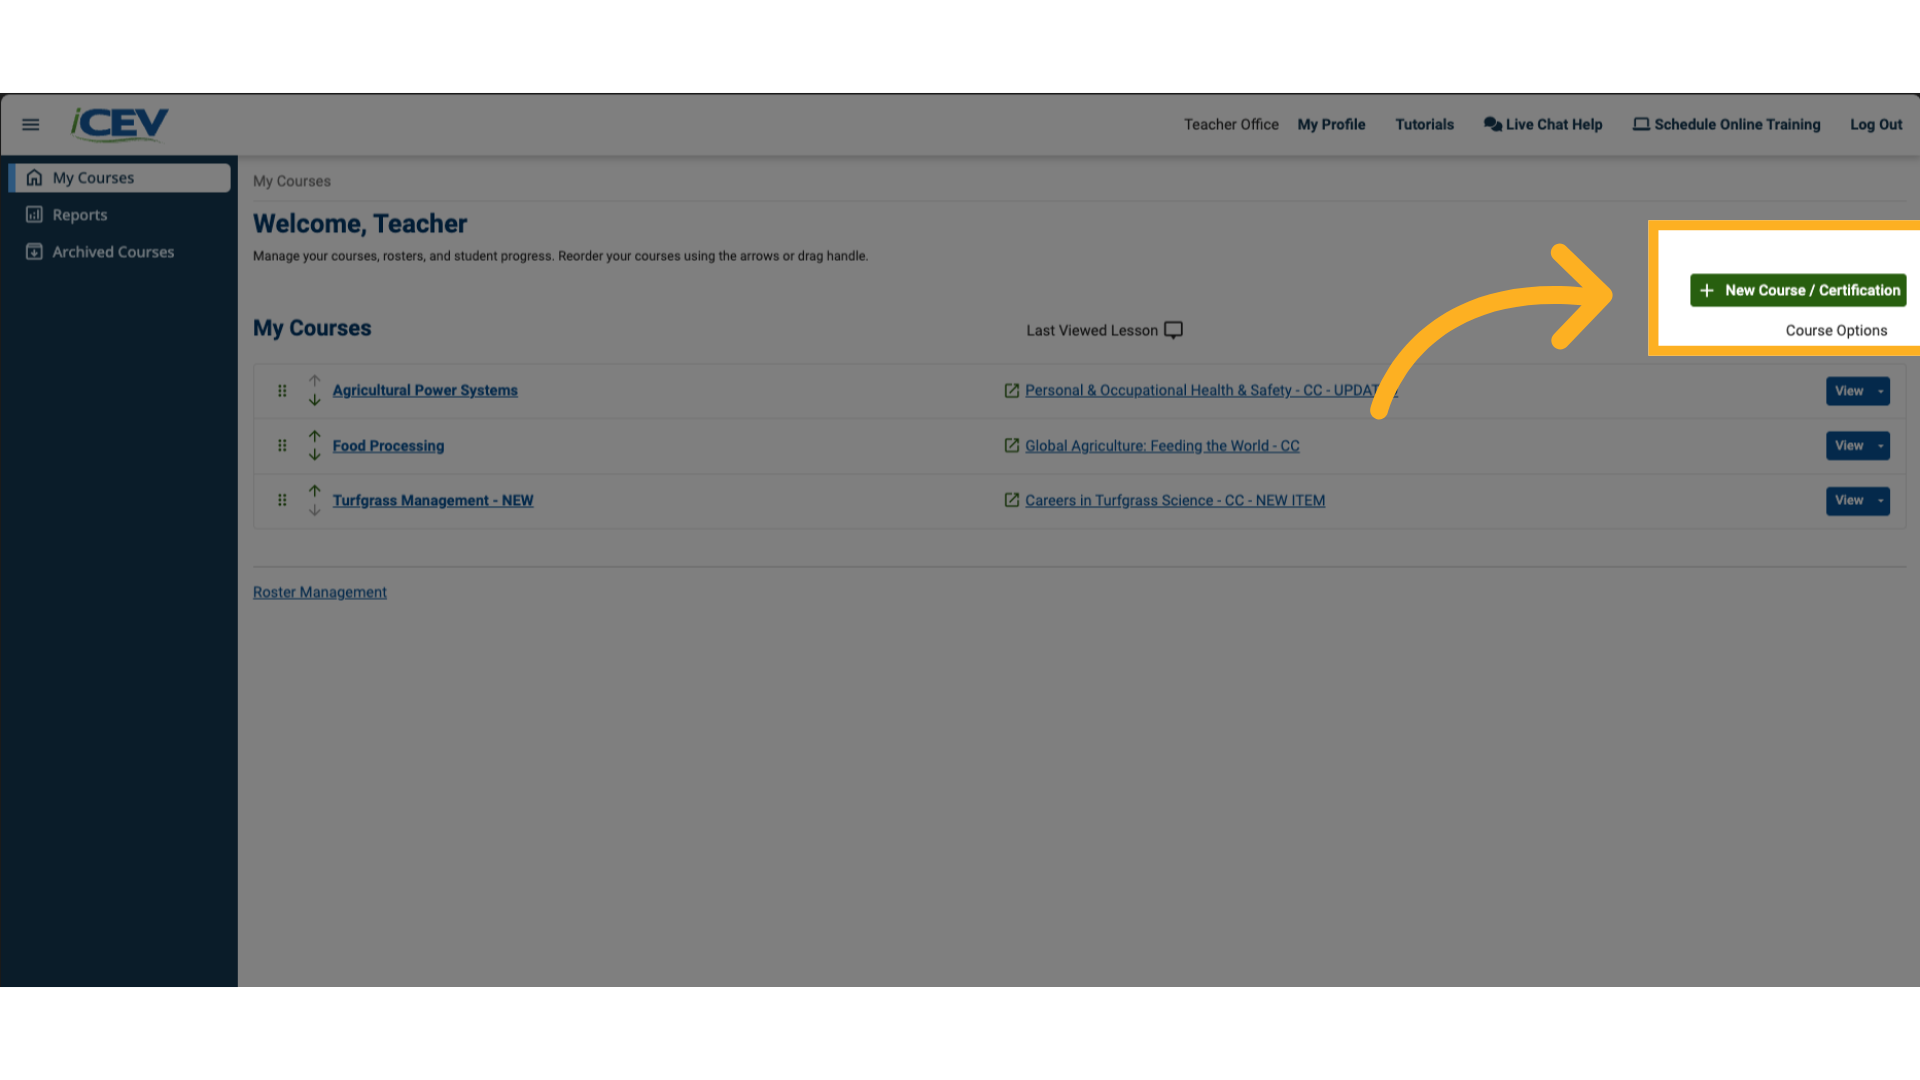
2. Adding a New Course or Certification
If you’ve used iCEV before:
-
Go to your My Courses page.
-
Click the +New Course / Certification button in the top-right corner.
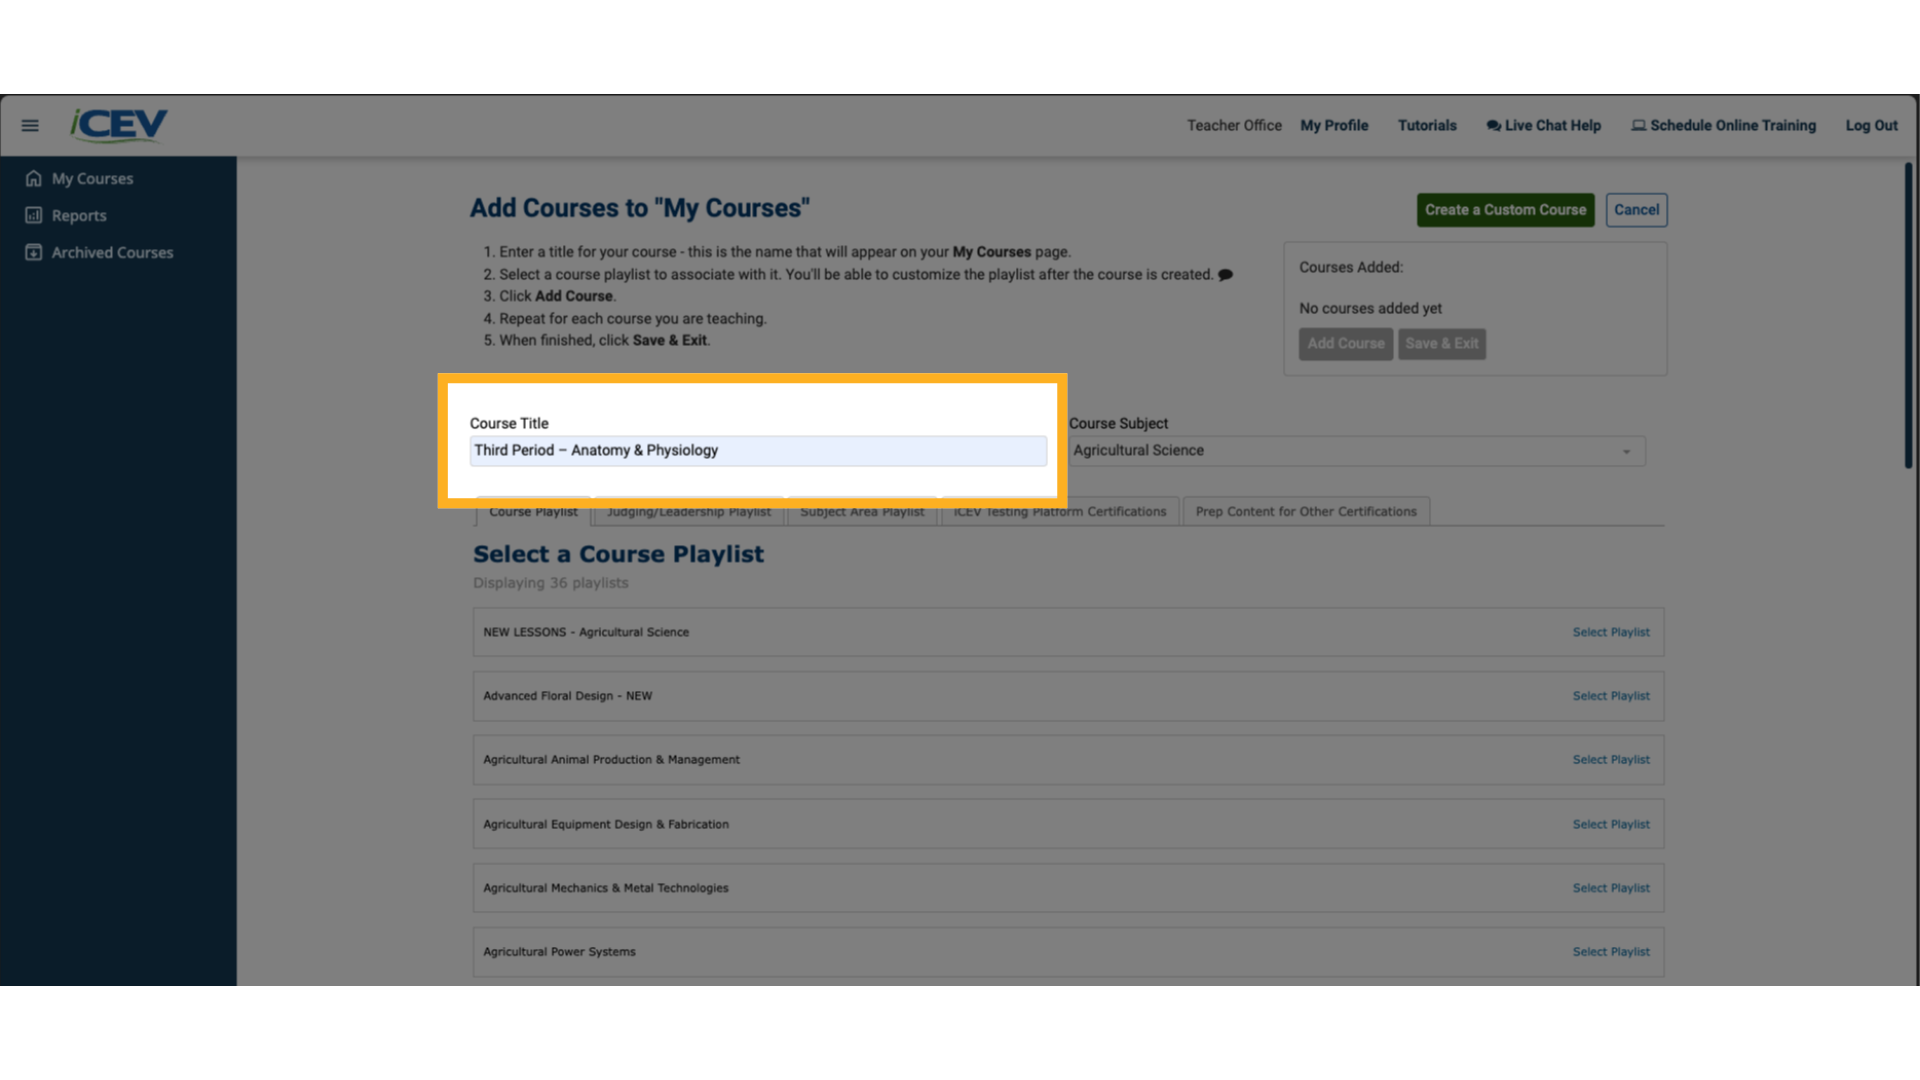
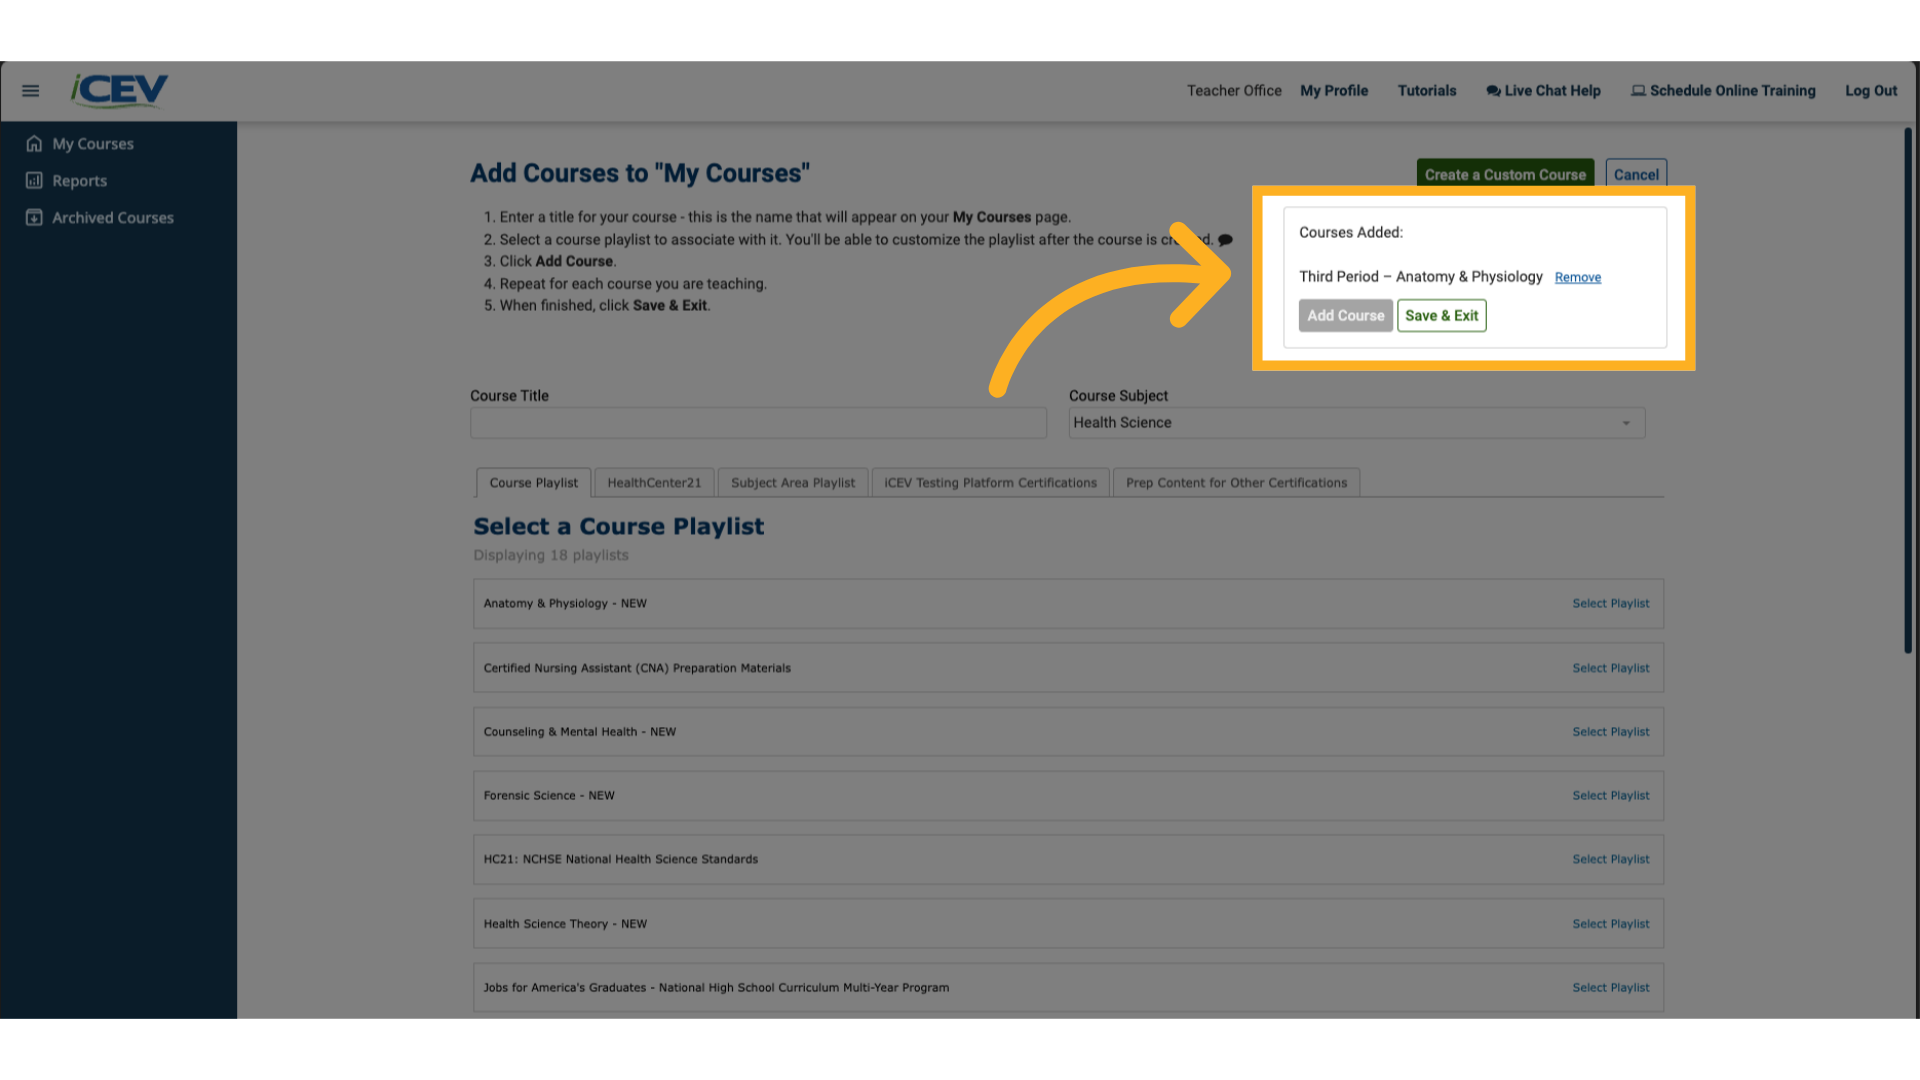
3. Entering a Course Title
-
Type a name for your course.
For example: "Third Period – Anatomy and Physiology"
🔔 A course title must be entered before you can add a playlist.
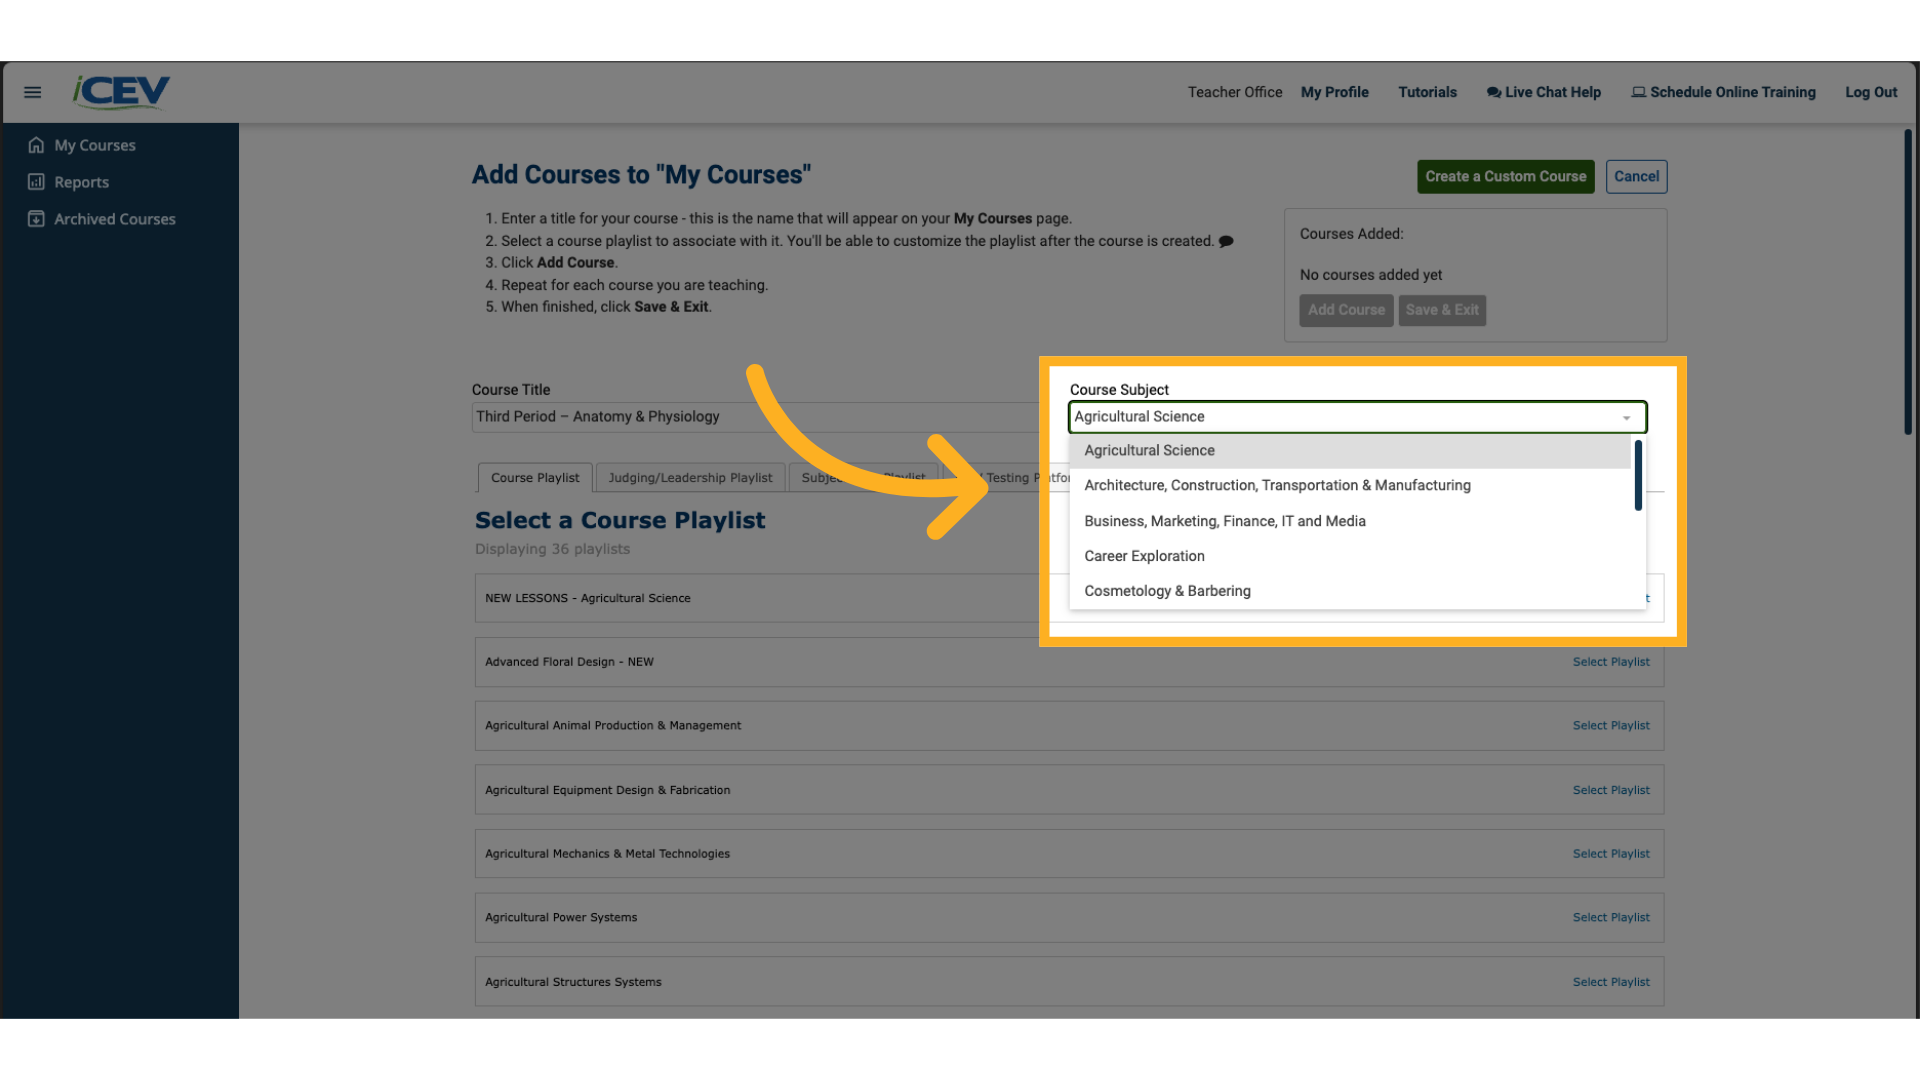
4. Selecting a Subject Area
-
If you're subscribed to multiple subject areas, use the Course Subject dropdown to filter your options.
(Example: Select “Health Science” for this tutorial.)
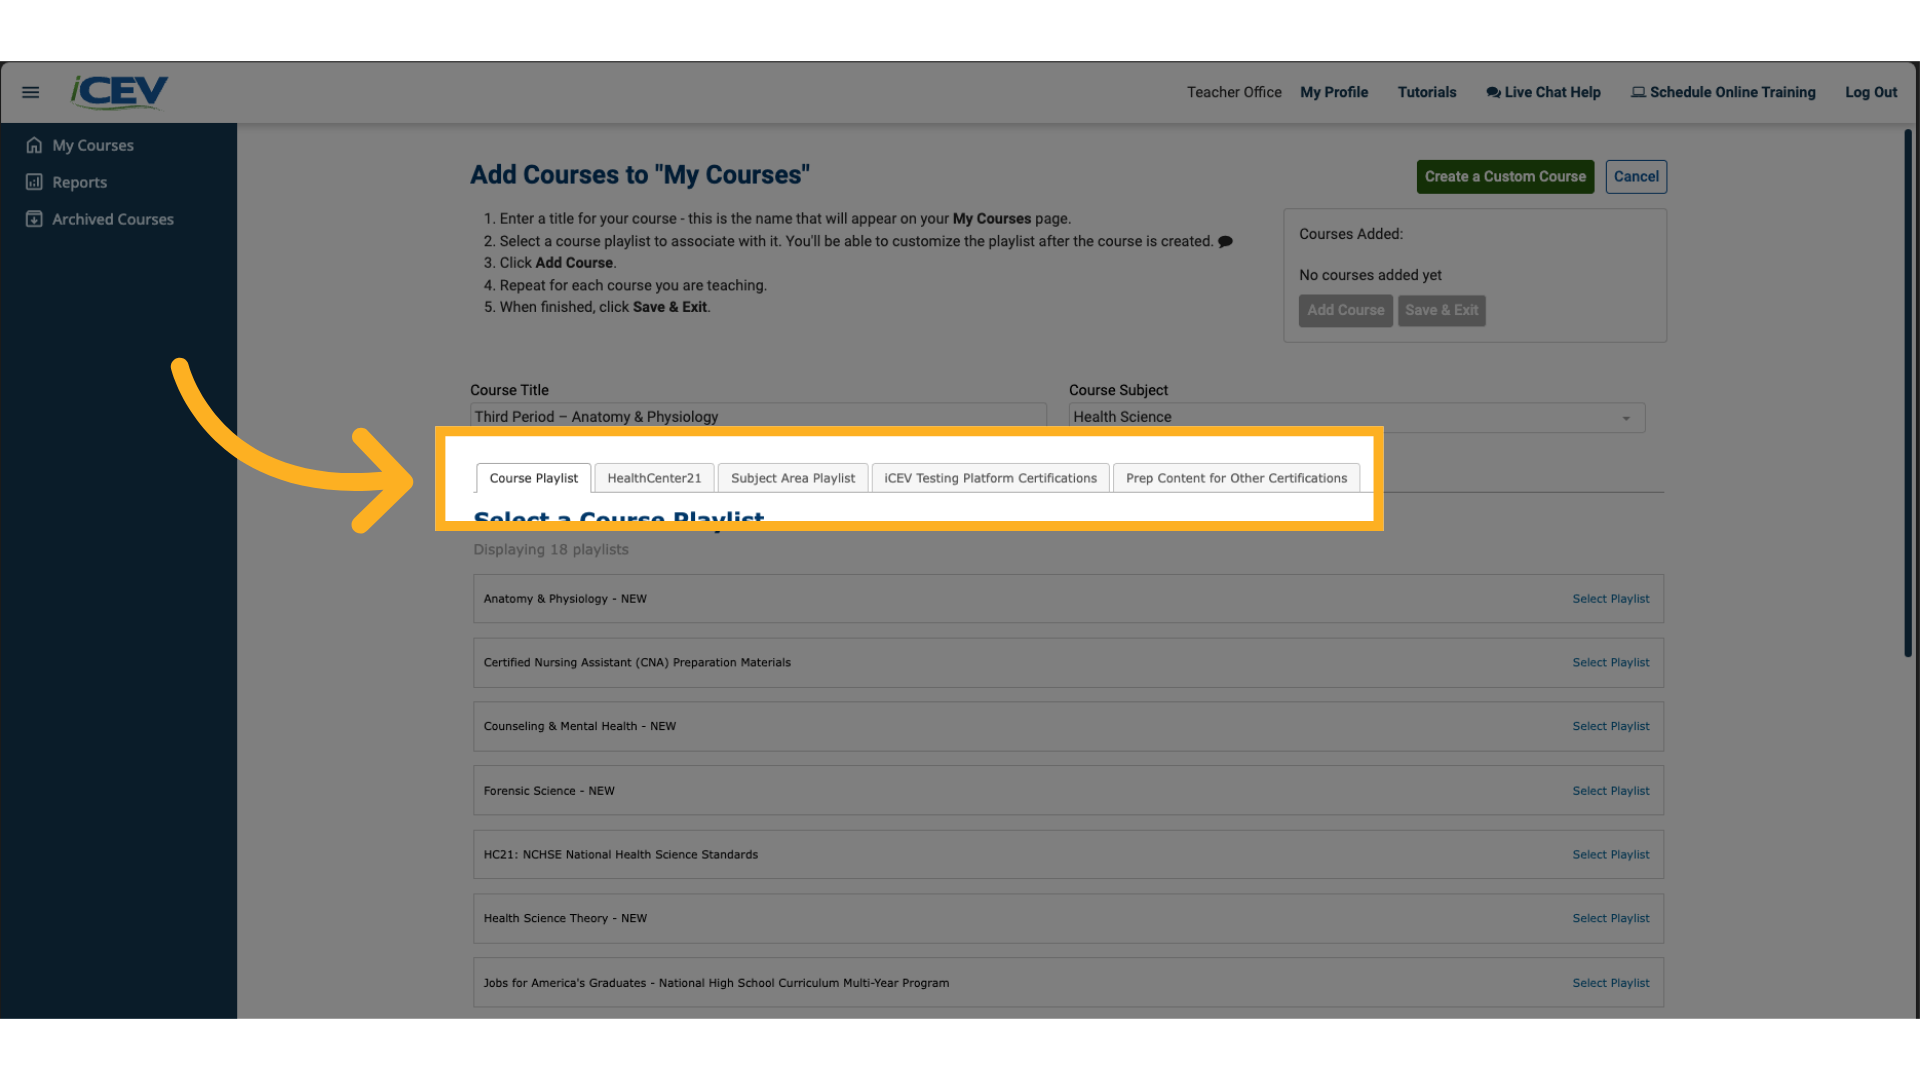
5. Selecting a Playlist Tab
-
Select a Playlist Tab to view available course or certification playlists.
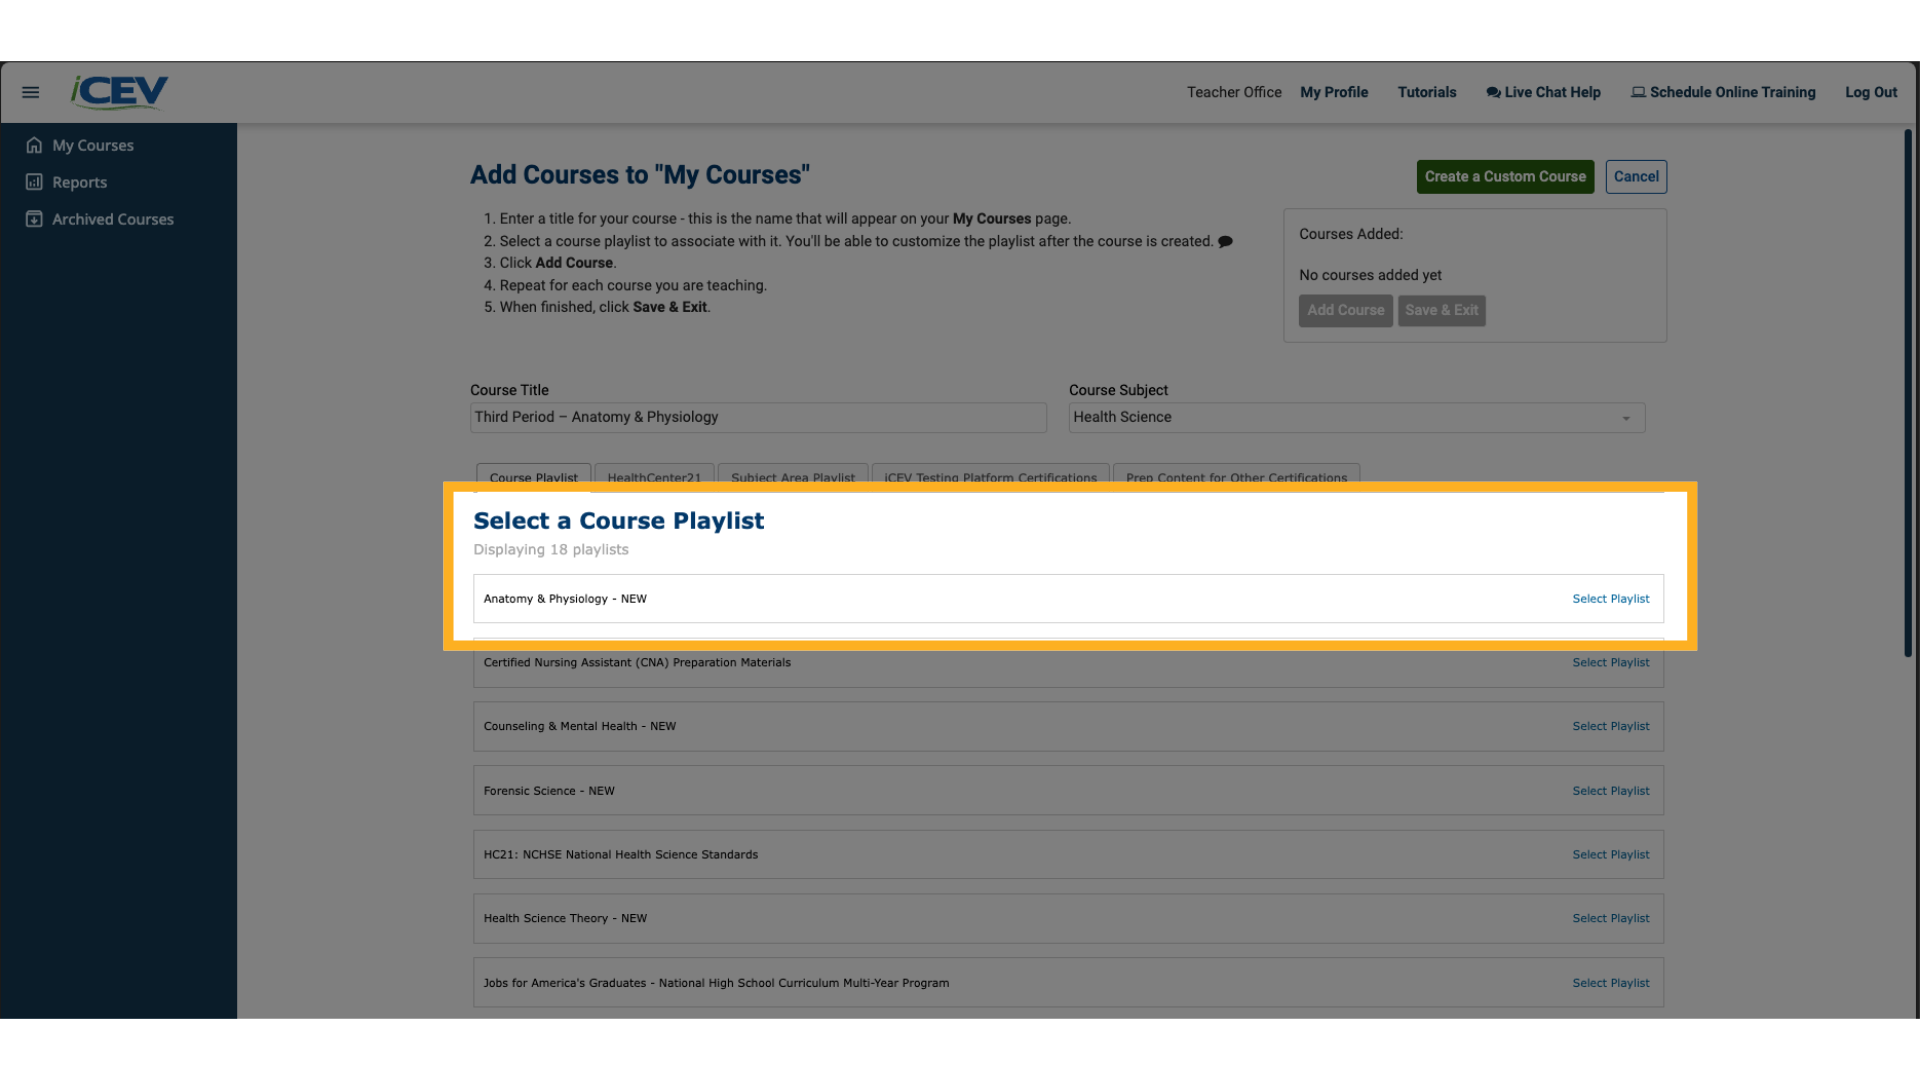
6. Choosing a Course Playlist
-
Scroll through the list and select the playlist that best matches your course.
-
If you don’t see an exact match, choose the one that’s most similar.
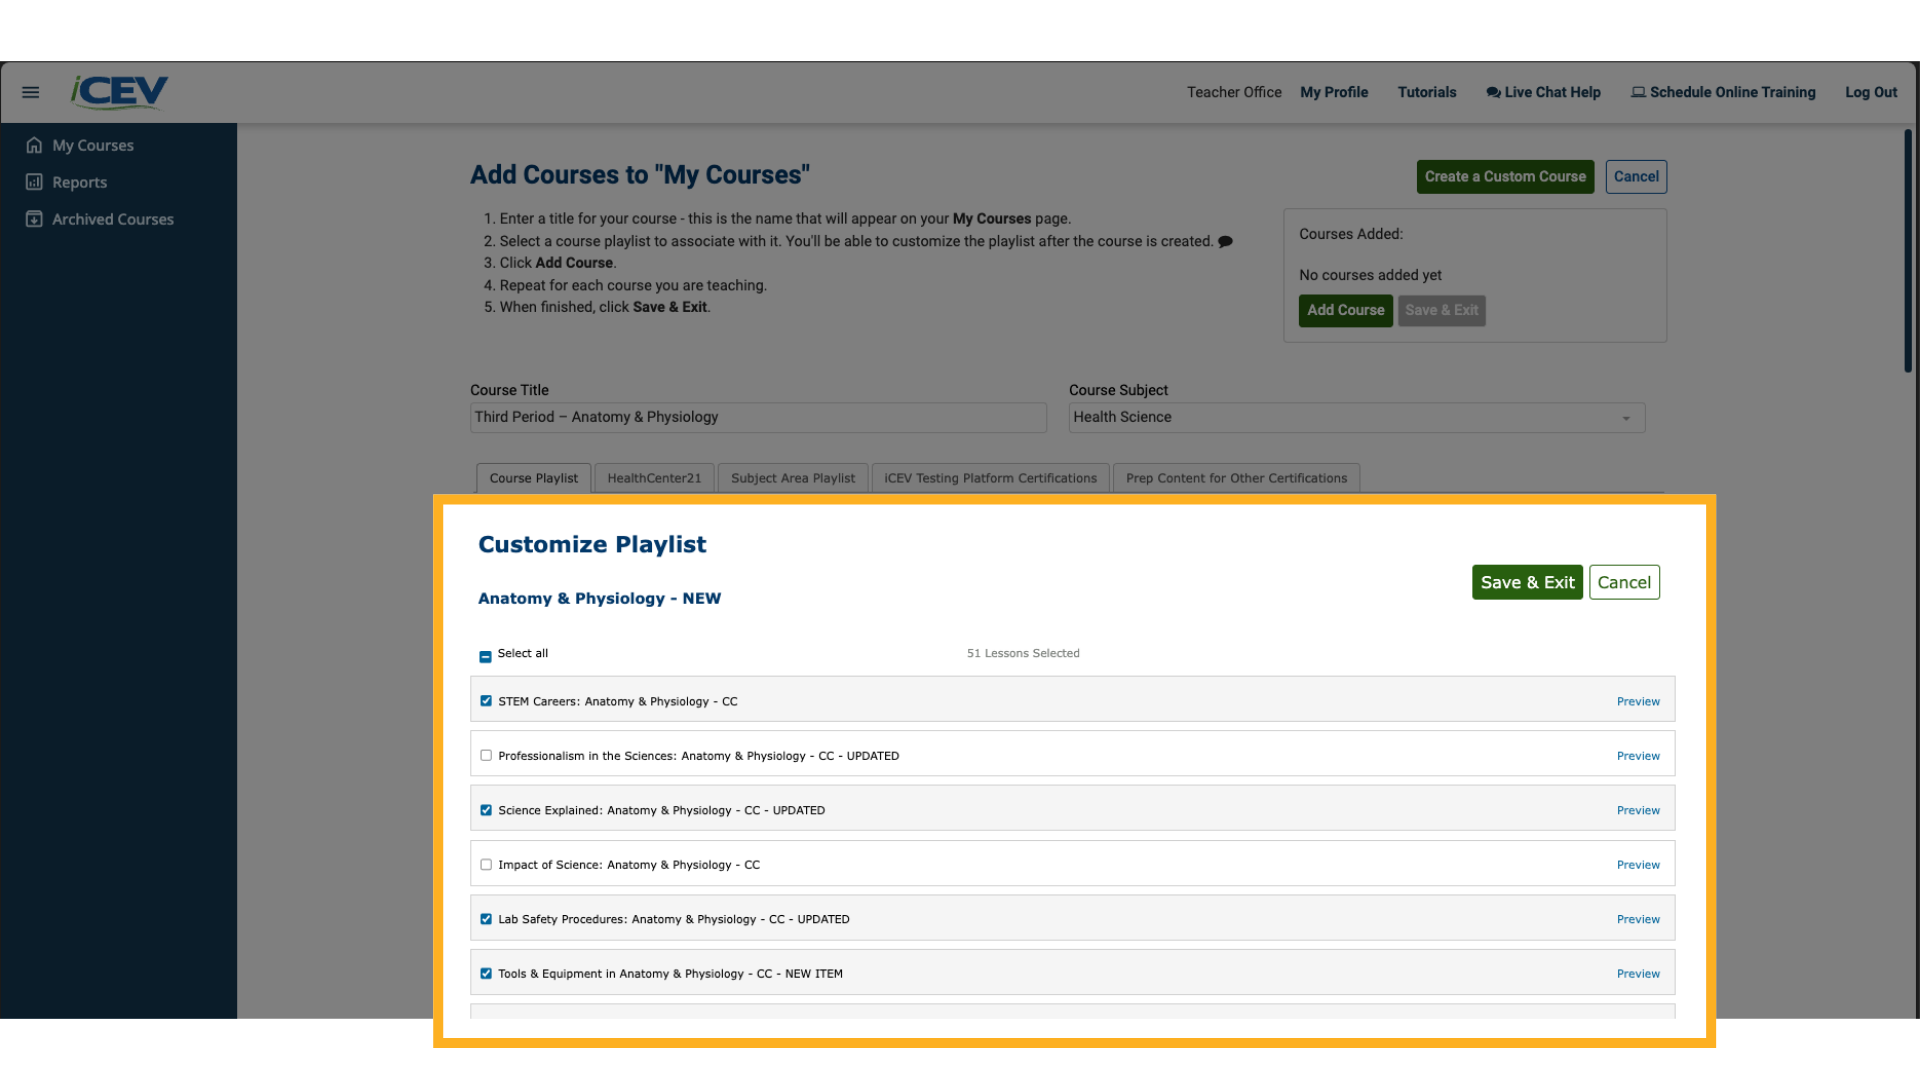
7. Customizing Your Playlist (Optional)
-
After selecting a playlist, click Customize Playlist to tailor the content.
-
Use the checkboxes to select or remove lessons.
-
When finished, click Save & Exit.
8. Adding the Course
-
Click the Add Course button.
-
Your course will appear under the Courses Added section.
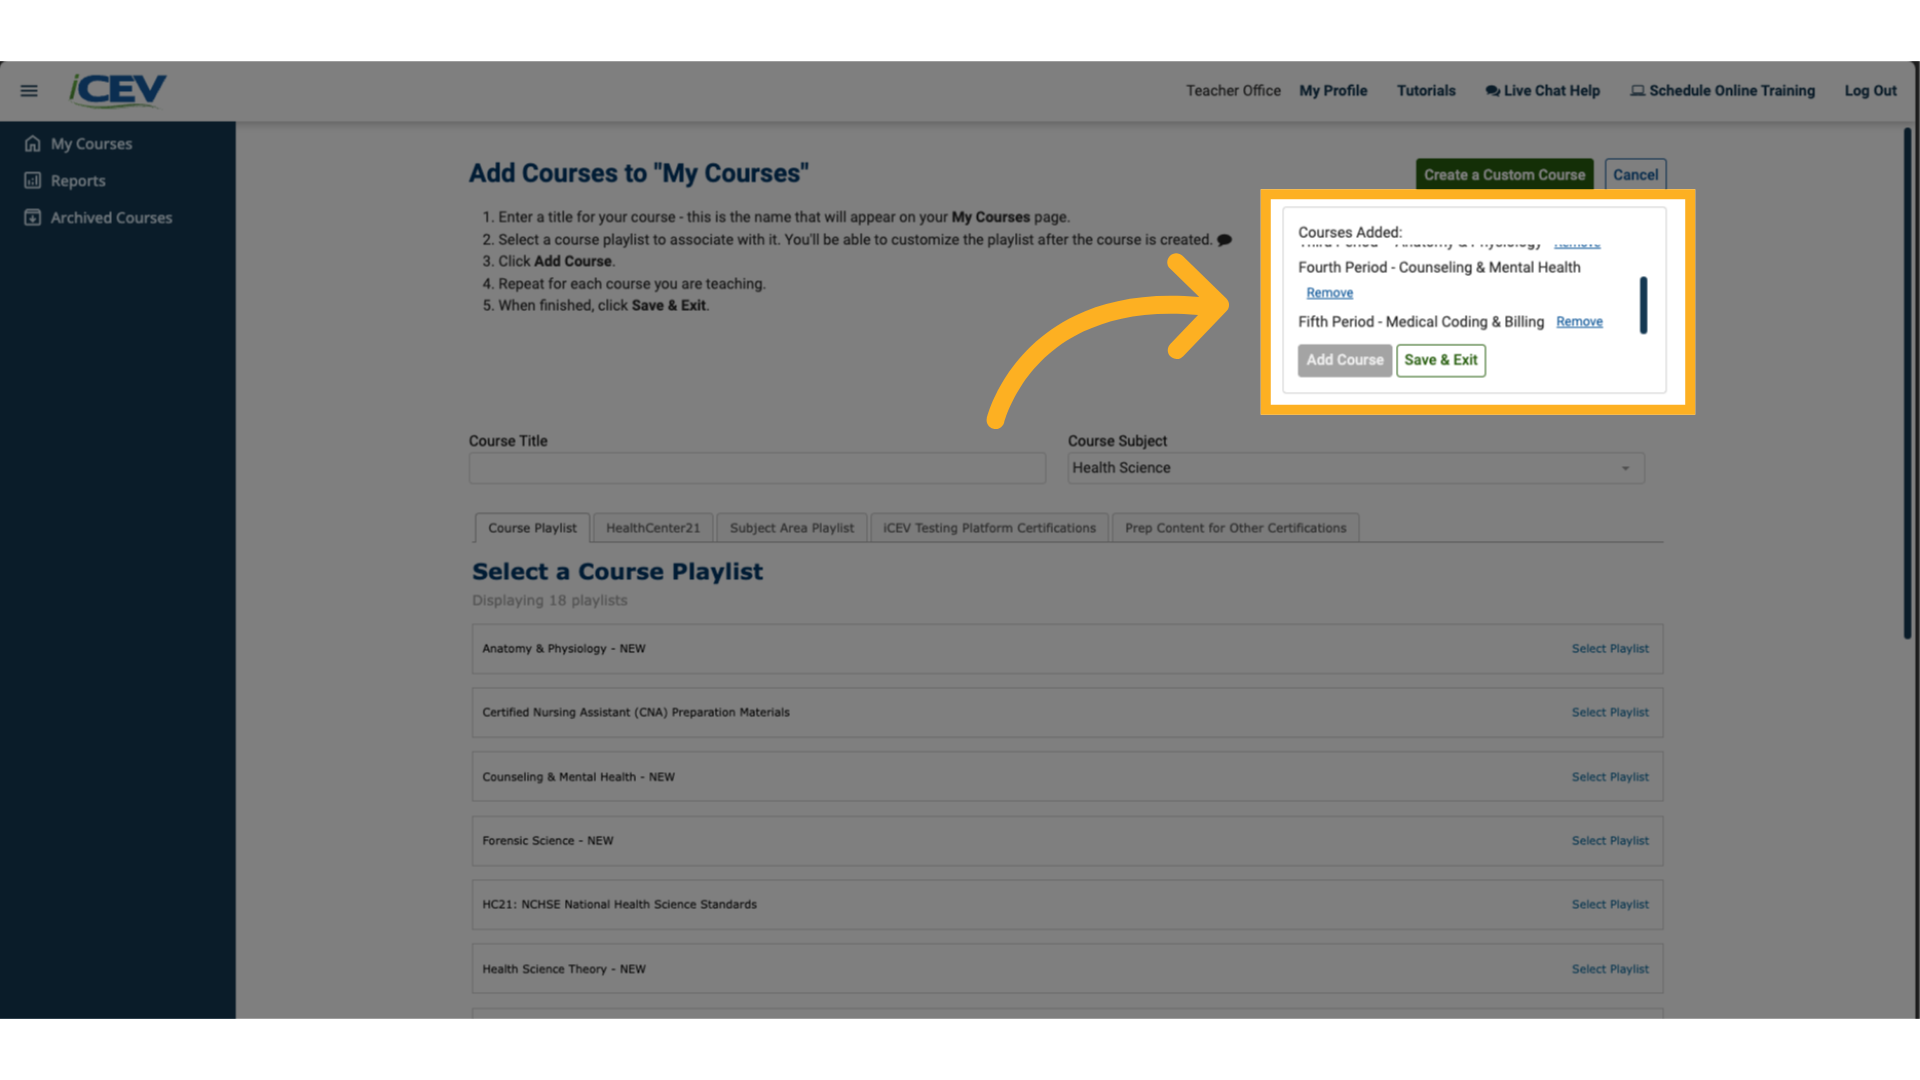
9. Adding More Courses (Optional)
-
Repeat the steps above to build out your full schedule.
-
When you’re done, click Save and Exit.
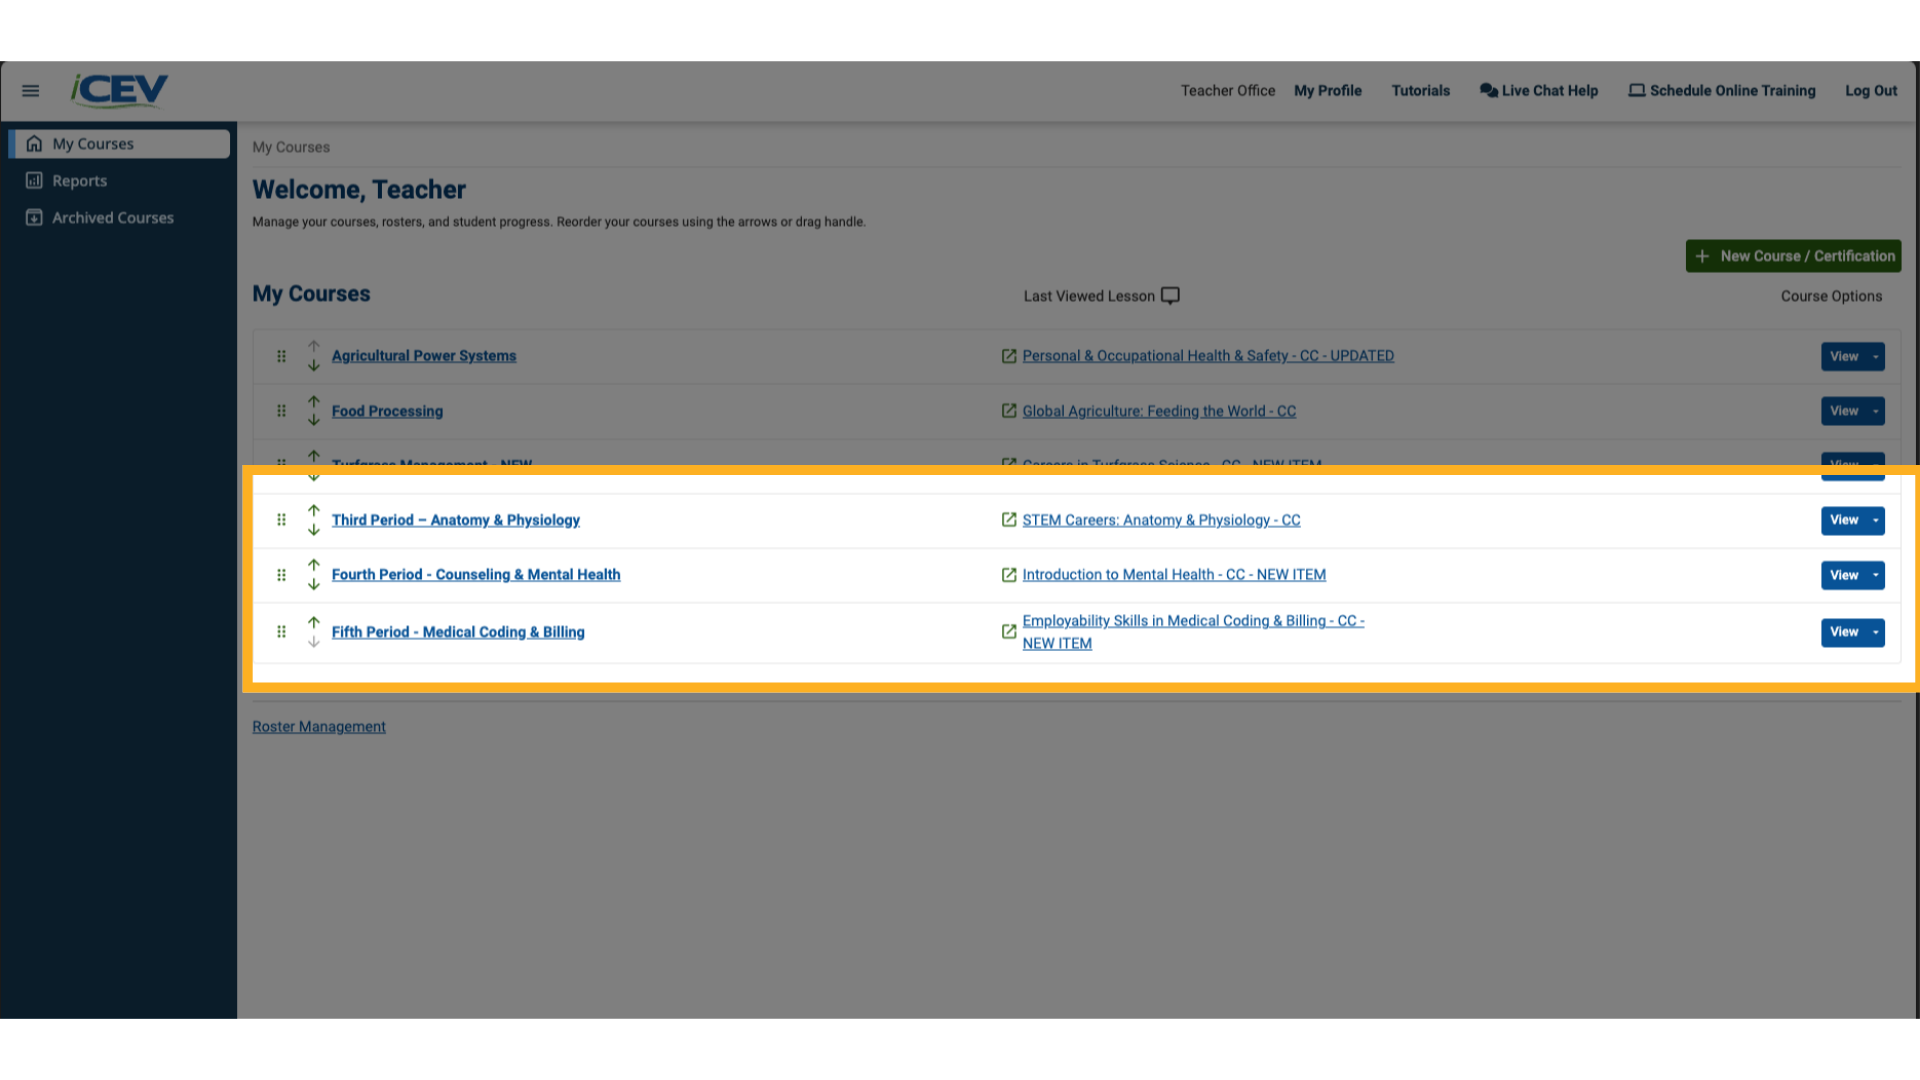
10. View Your Courses
-
Your newly created courses will now appear on your My Courses page—ready for further customization if needed.