CTE Curriculum
Prepare learners with CTE curriculum aligned to industry standards.


Adding and Rostering a Course from the iCEV Library
1. Open the Course Library
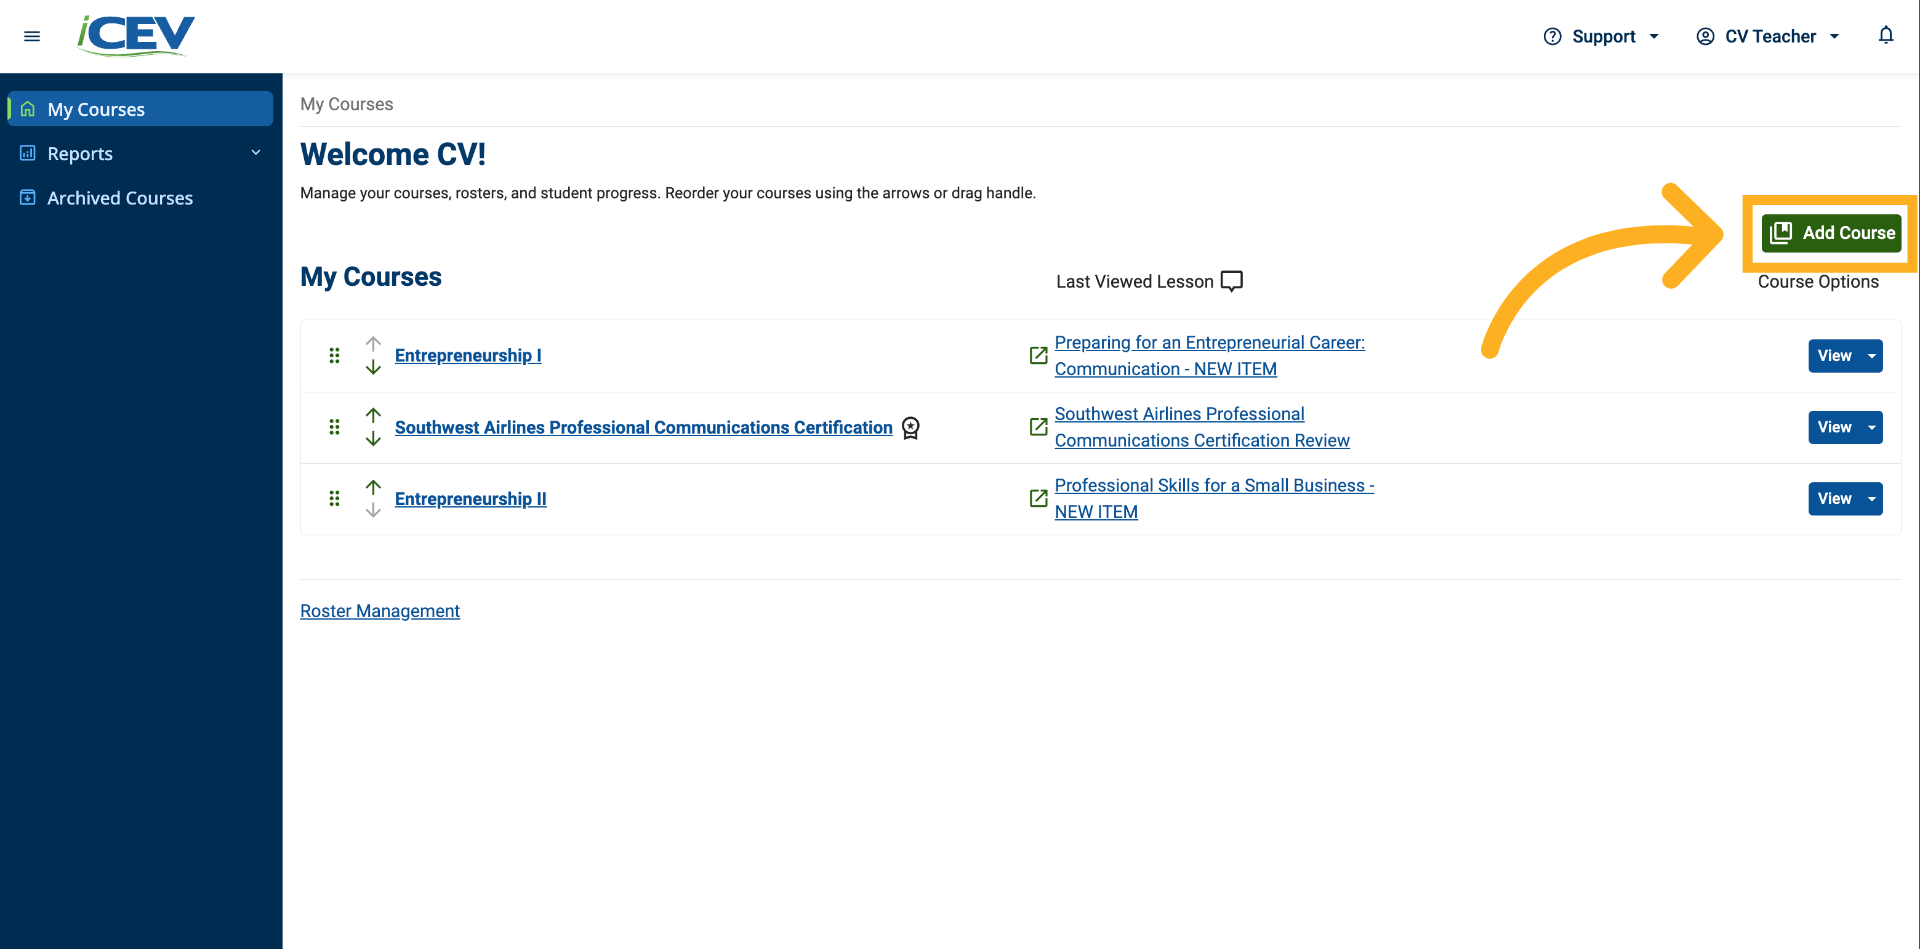
From the My Courses page, click Add Course to begin setting up a course.
2. Browse Available Courses
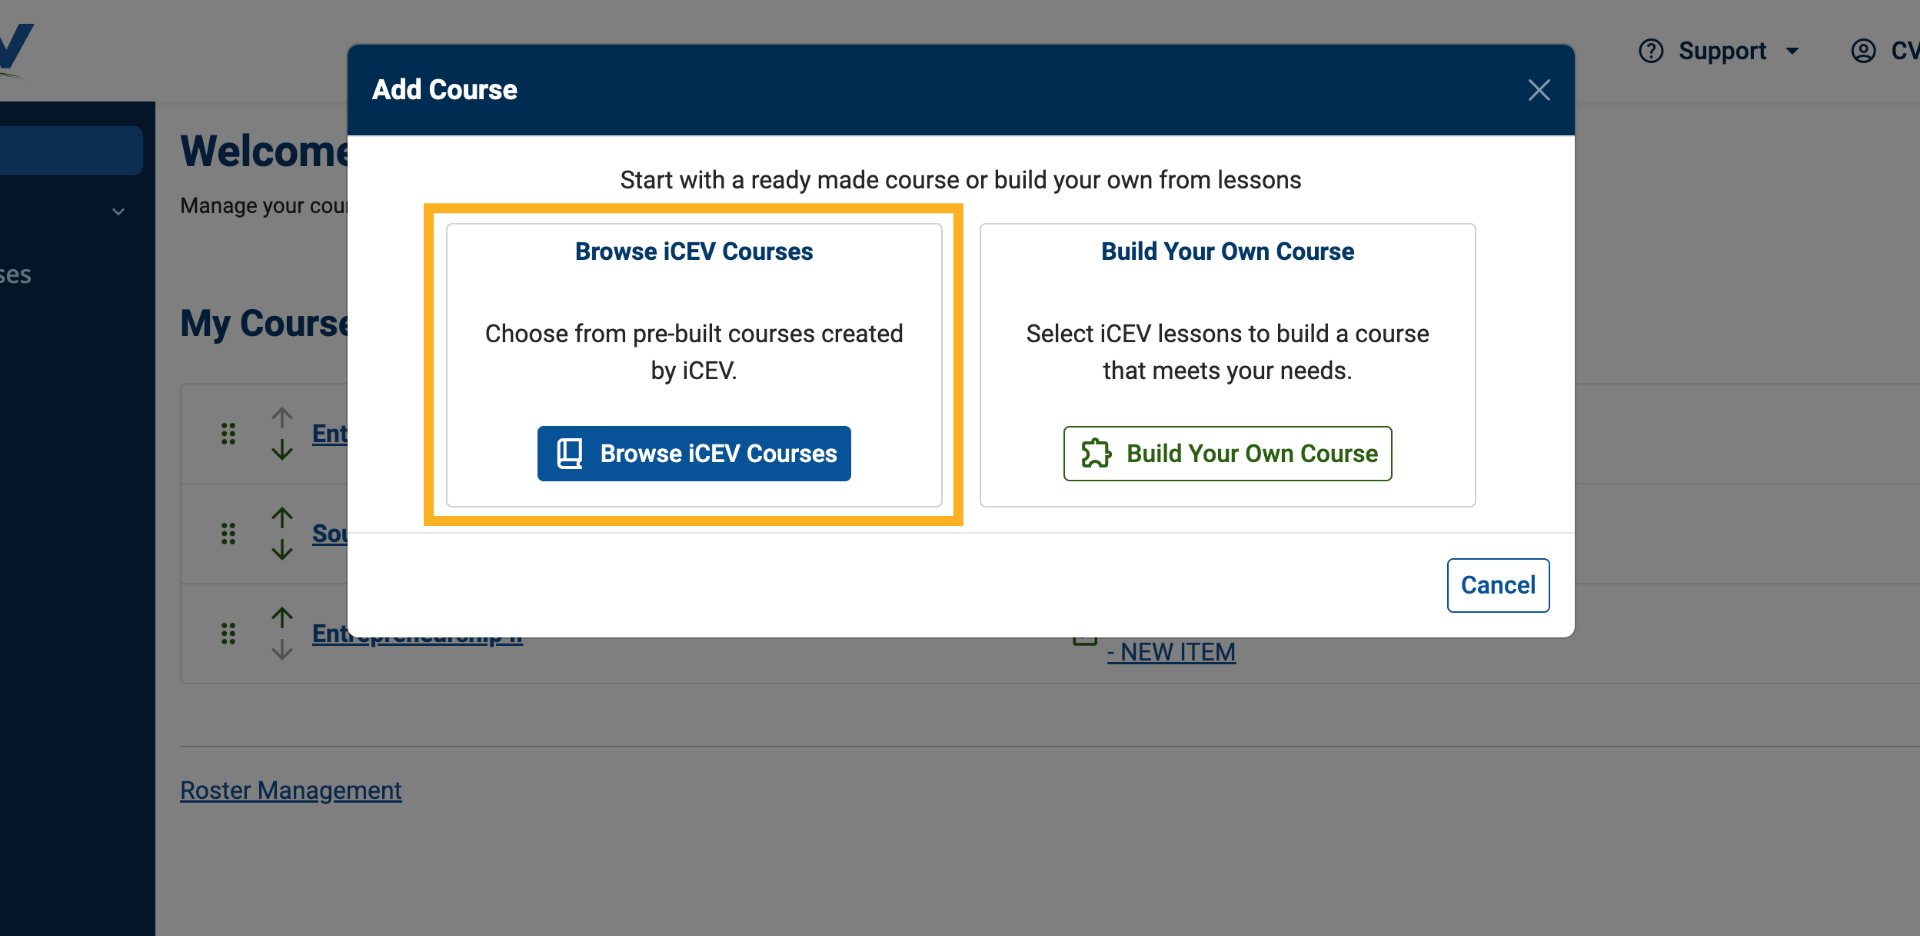
When the course setup window appears, select Browse iCEV Courses.
This opens the Course Library, where you can view all available pre-built iCEV courses.
3. First-Time Course Setup (If Applicable)
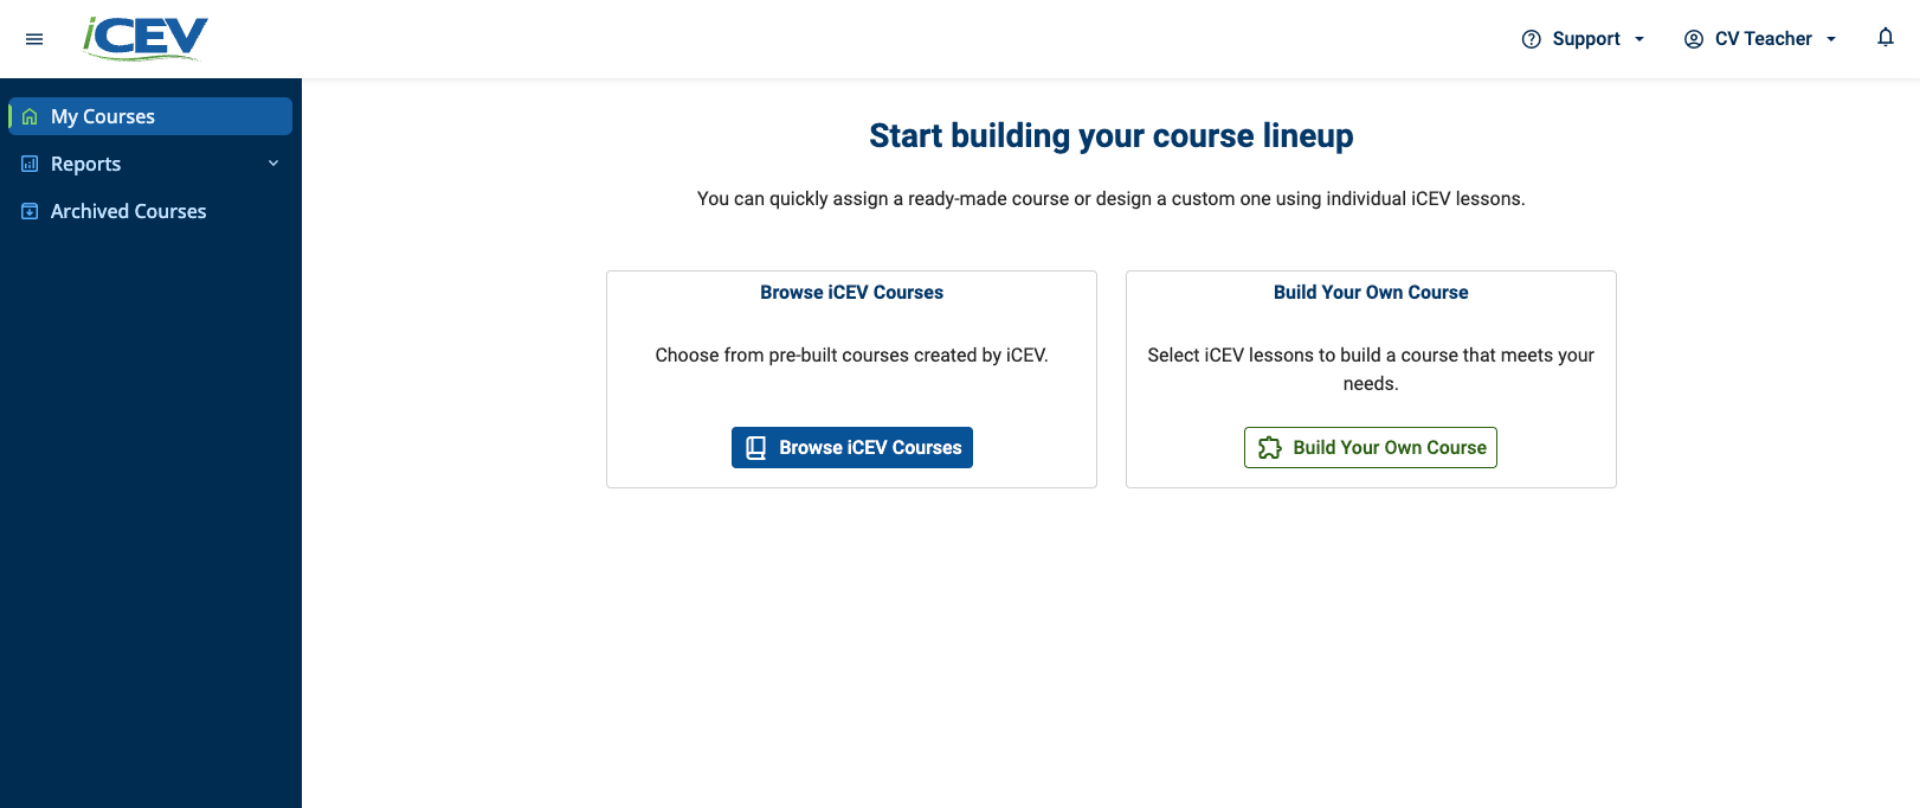
If this is your first time creating a course, you'll see the course-building options on the My Courses page.
Choose Browse Courses to continue.
4. Explore the Course Library
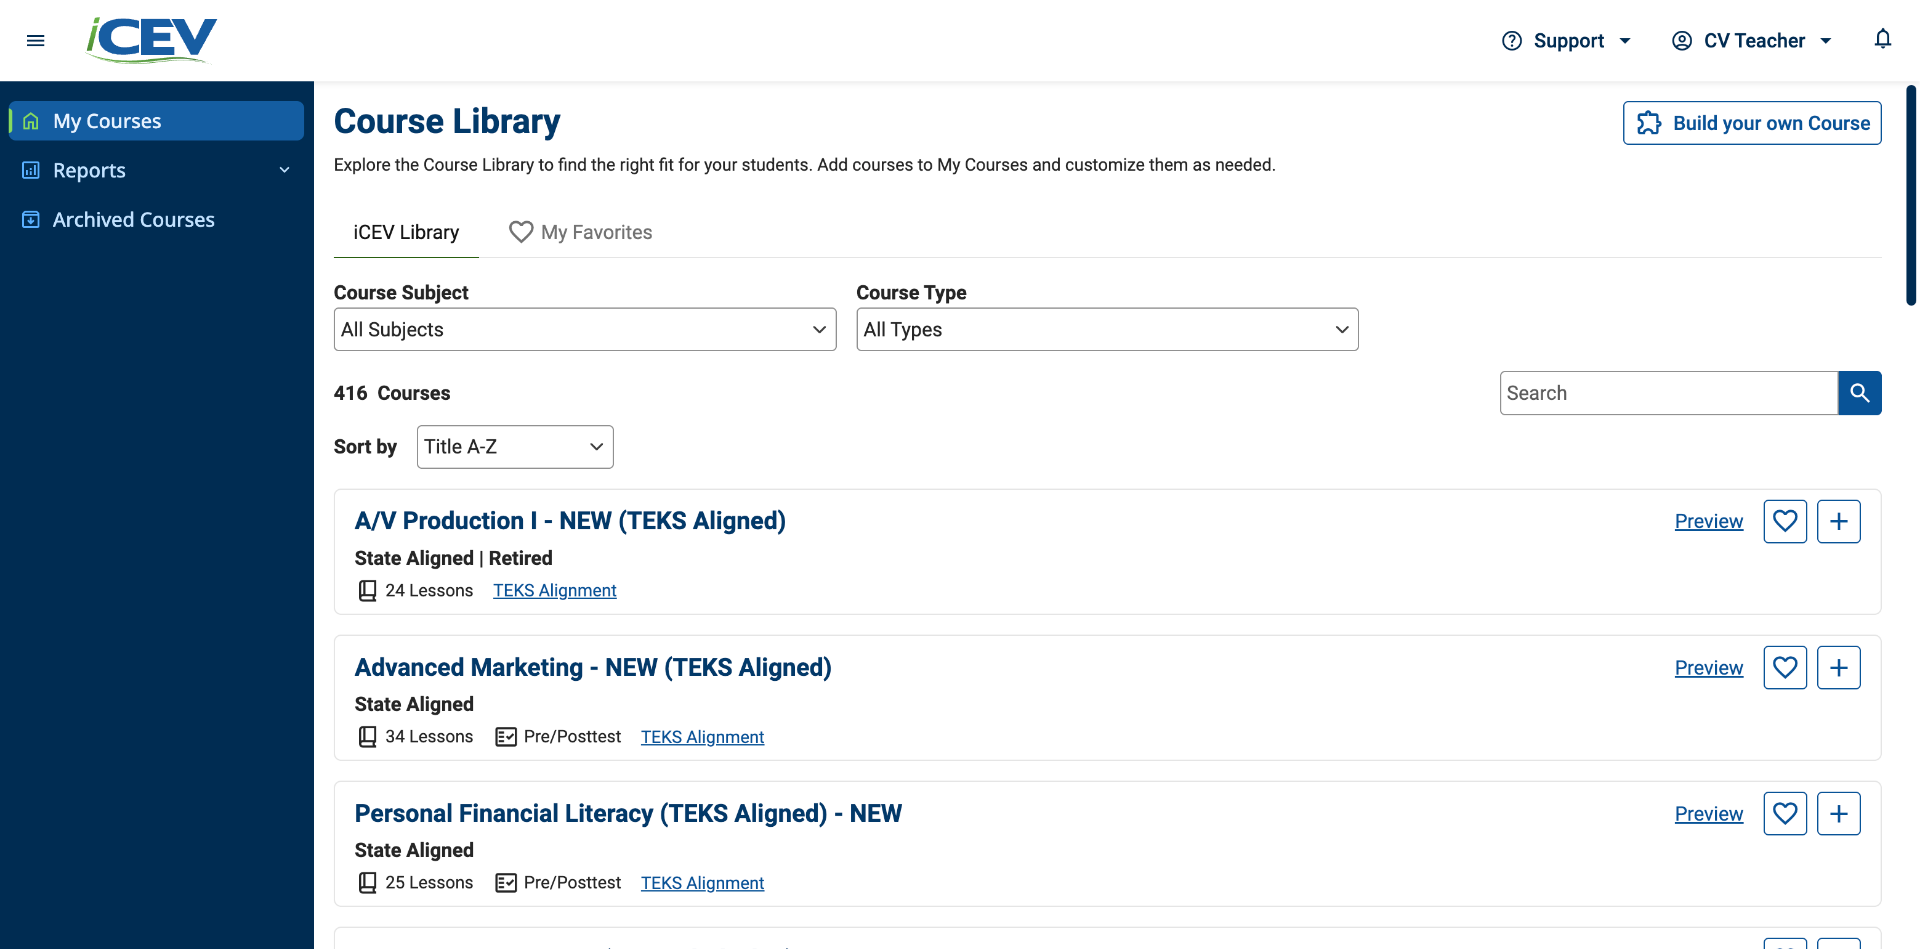
The Course Library displays all courses available based on your organization's licenses and subject area access.
Browse through the available options to find a course that fits your instructional needs.
5. Review Course Information
Each course card includes important details, such as:
-
Number of lessons included
-
Pre-tests and post-tests (if licensed by your organization)
-
Certification alignment
-
Standards alignment documentation (available for select courses)
To view standards alignment, click the provided link to open the document in a new browser tab.
6. Identify New or Updated Courses
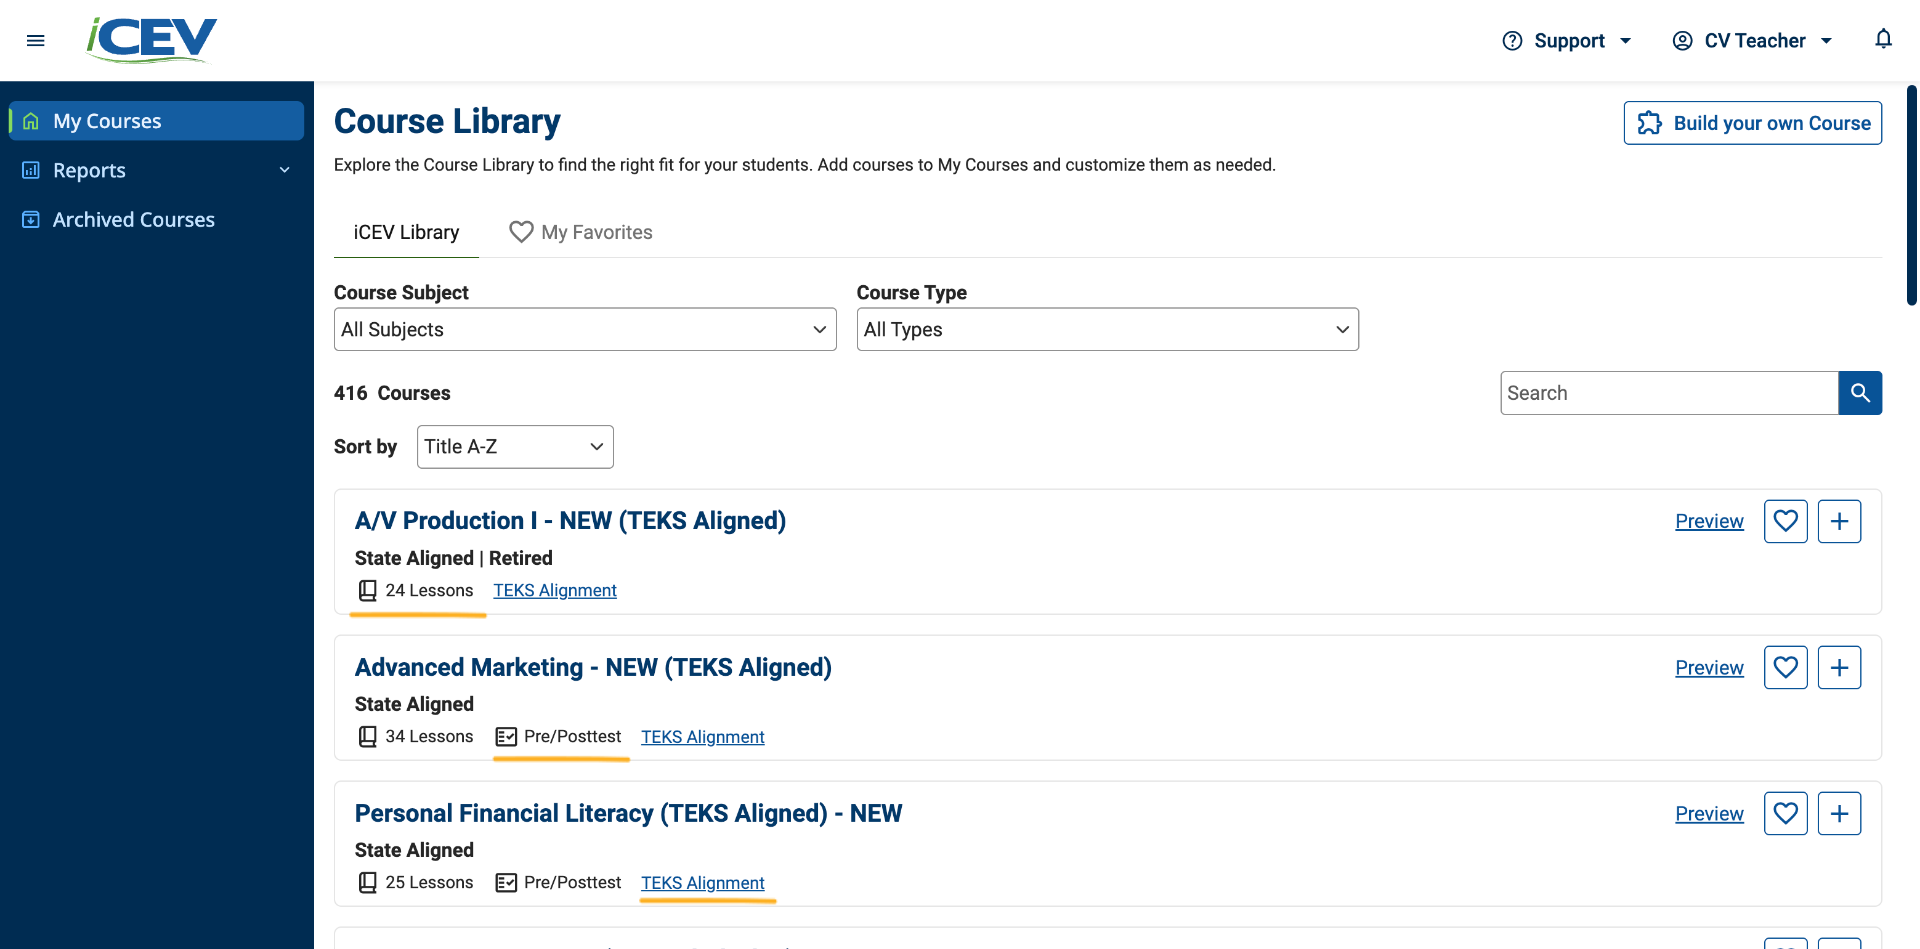
Look for New or Updated badges on course cards to quickly identify recently added or revised content.
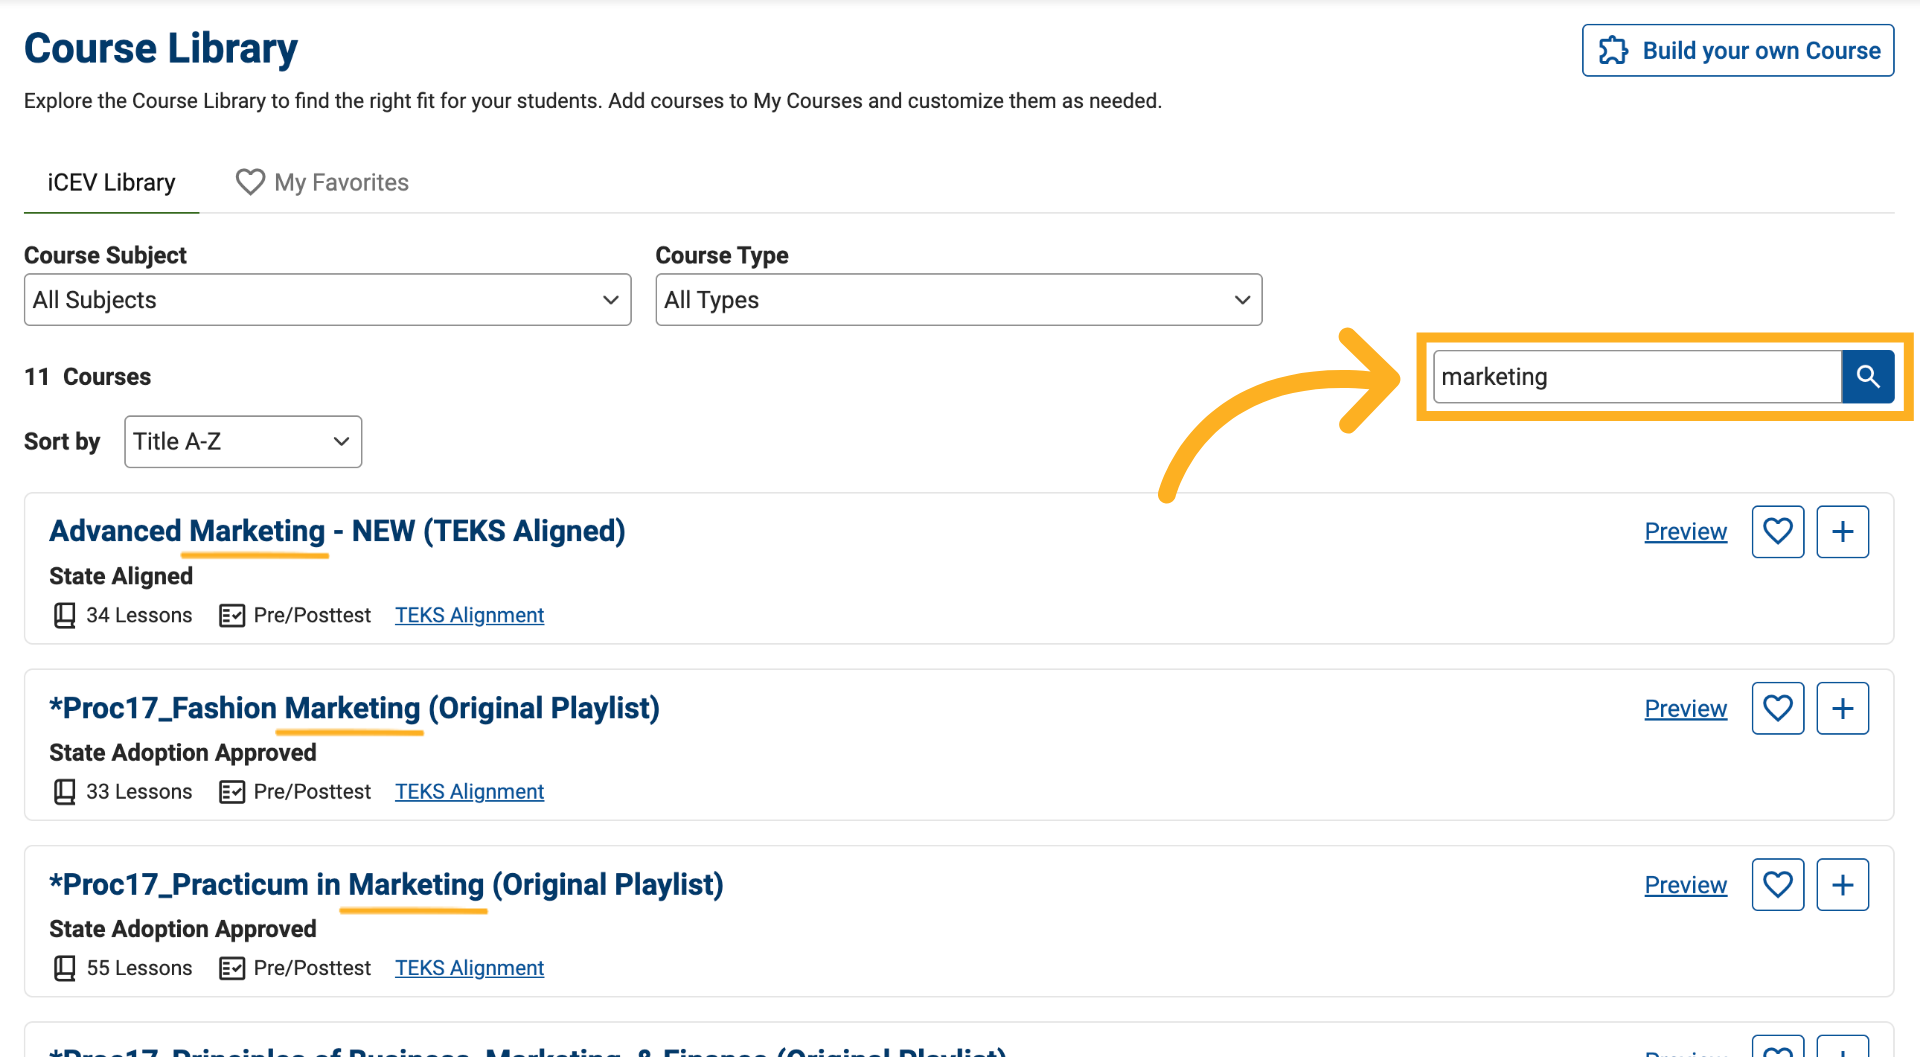
7. Search for a Course
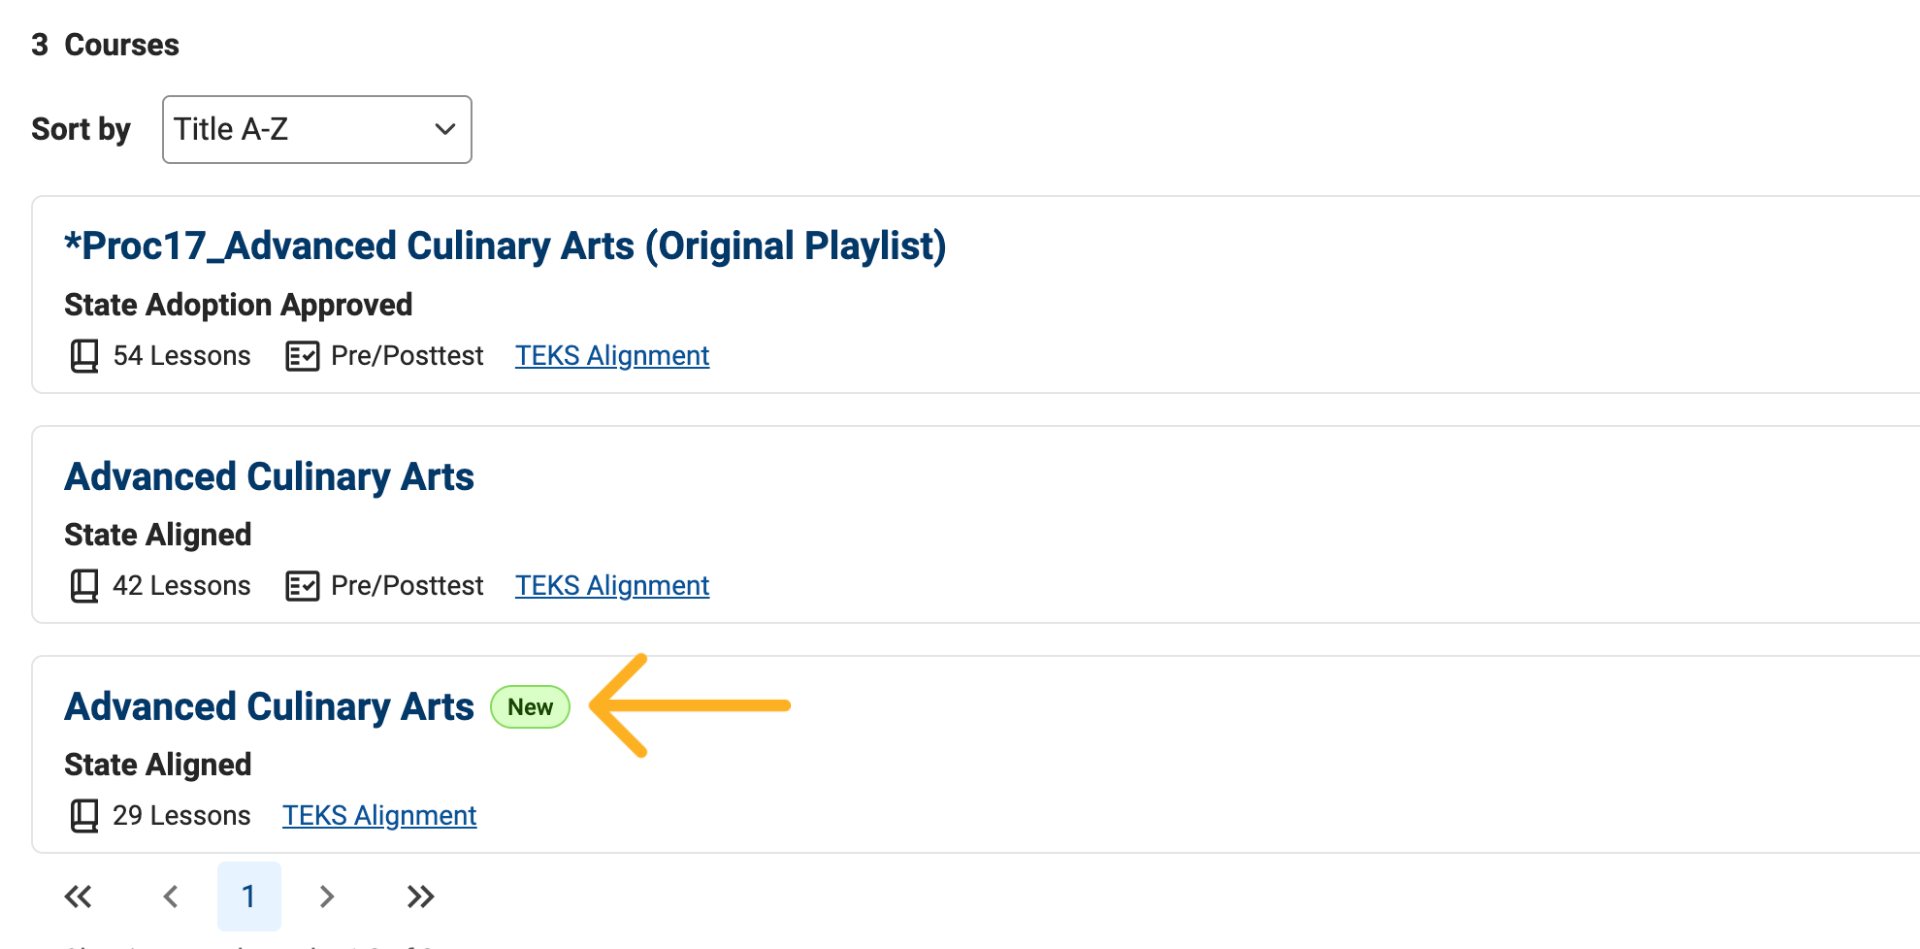
Use the Search bar to find a specific course.
Enter a keyword, and results will be filtered based on course titles.
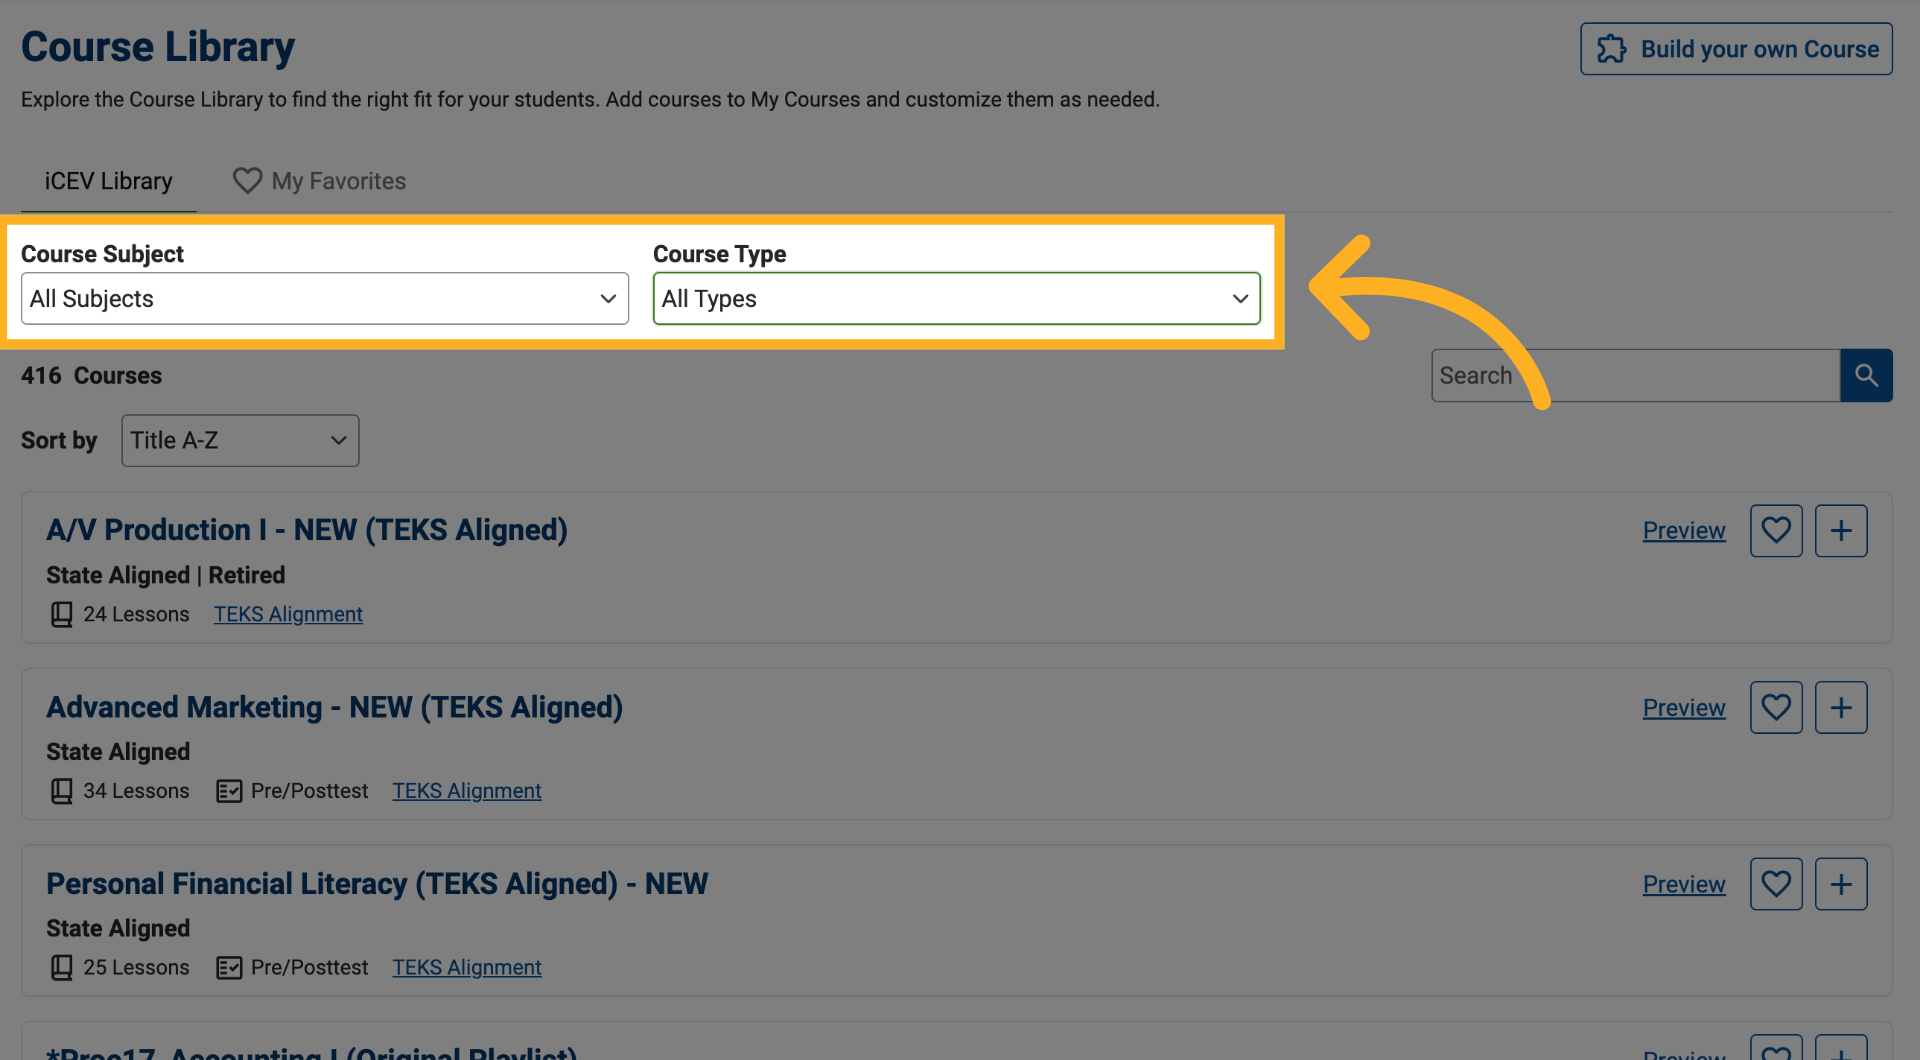
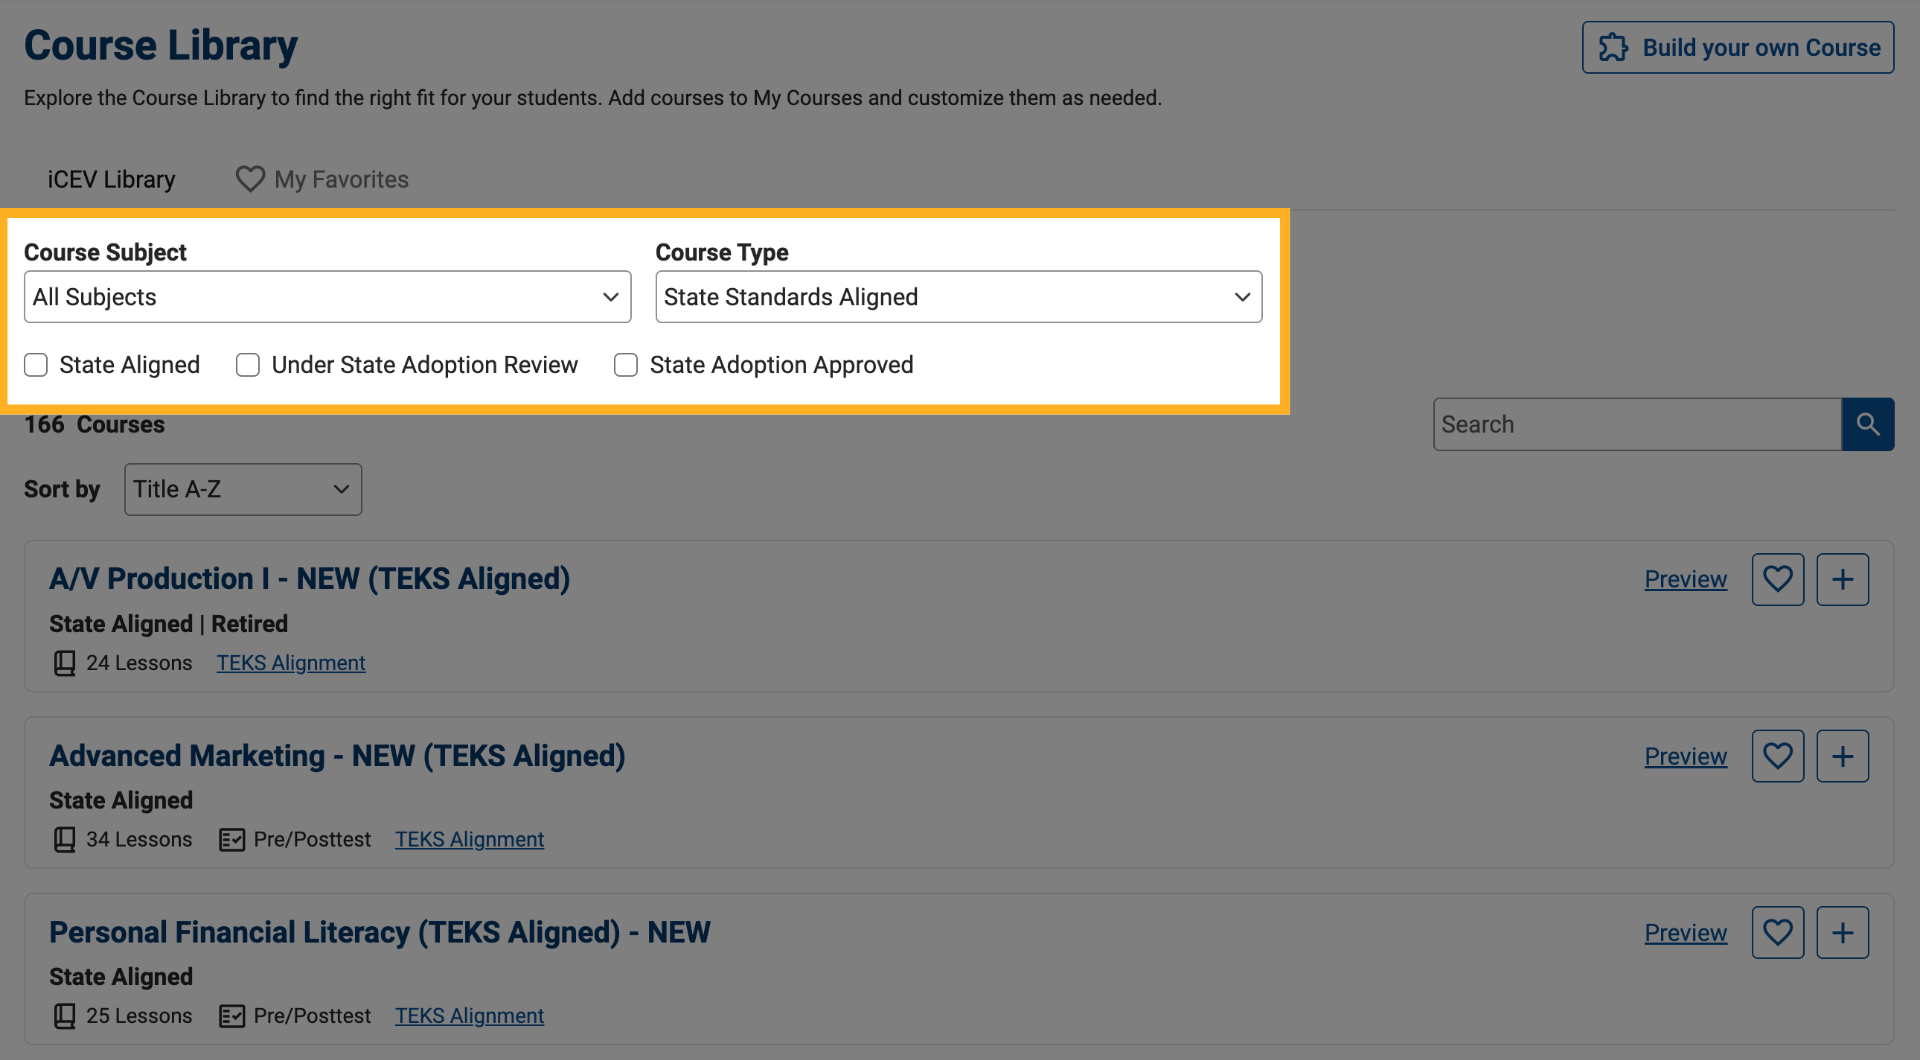
8. Use Course Filters
You can narrow your search using the available filter menus.
Filter options may vary depending on your organization's licenses.
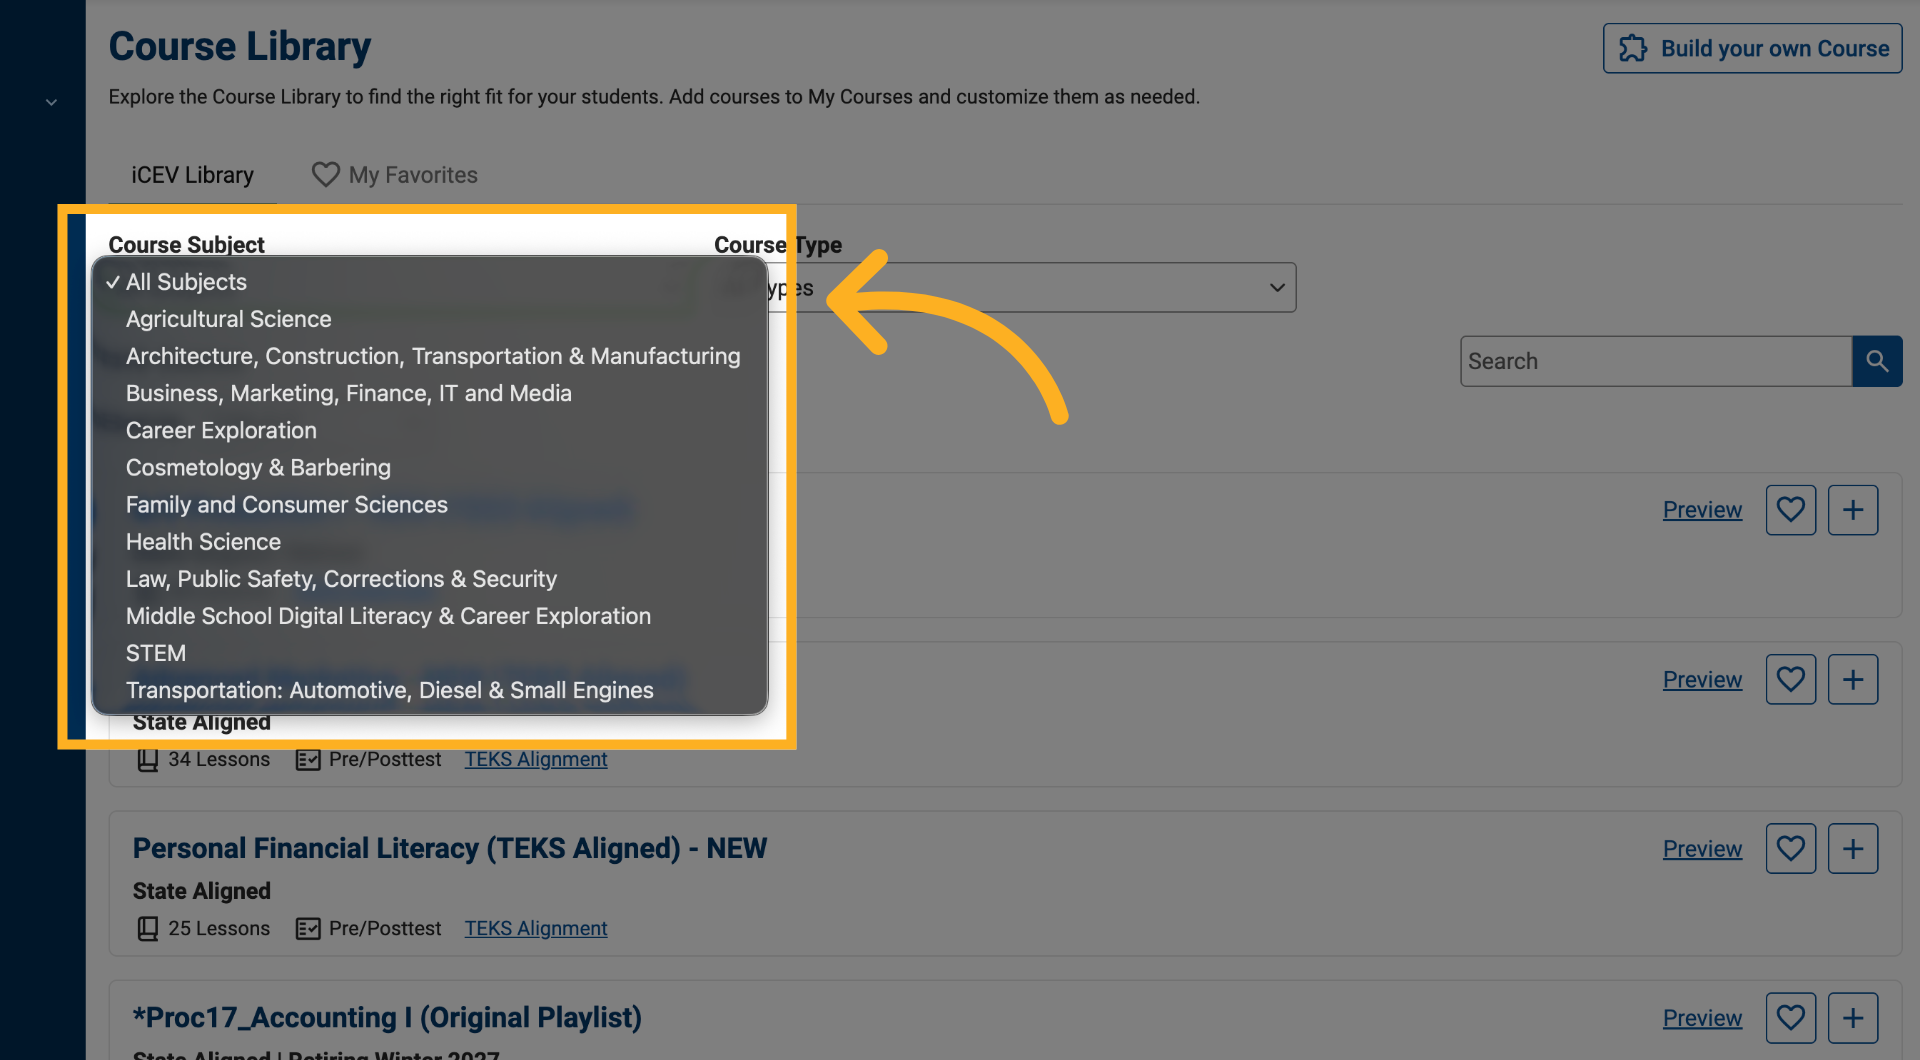
9. Filter by Subject Area
Use the Subject Area filter to display courses within specific content areas you are licensed to access.
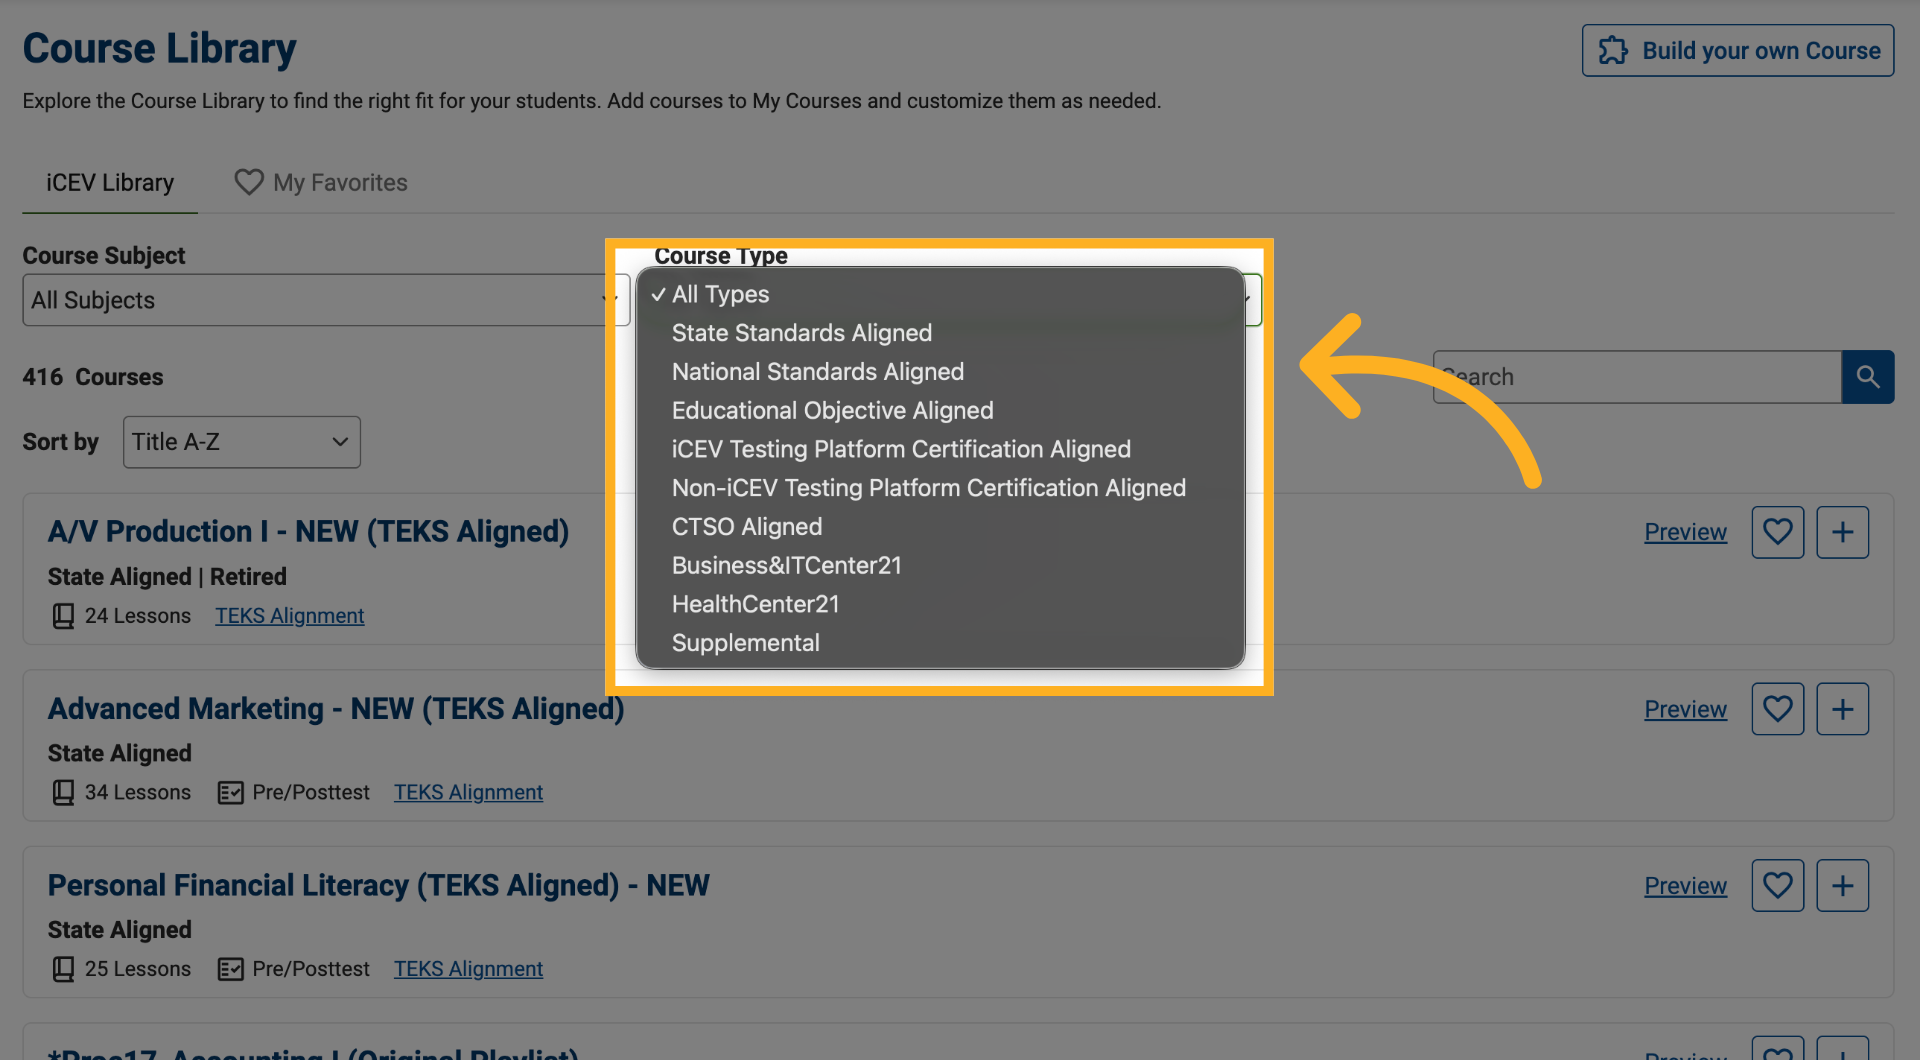
10. Filter by Course Type
Use the Course Type filter to refine results based on:
-
State standards alignment
-
National standards alignment
-
Educational objectives
-
Certification alignment
-
Supplemental content
-
Other available course categories
11. Apply Additional Alignment Filters
Some course type selections may display additional filtering options, such as state-specific alignment filters.
Select the desired criteria to further narrow your results.
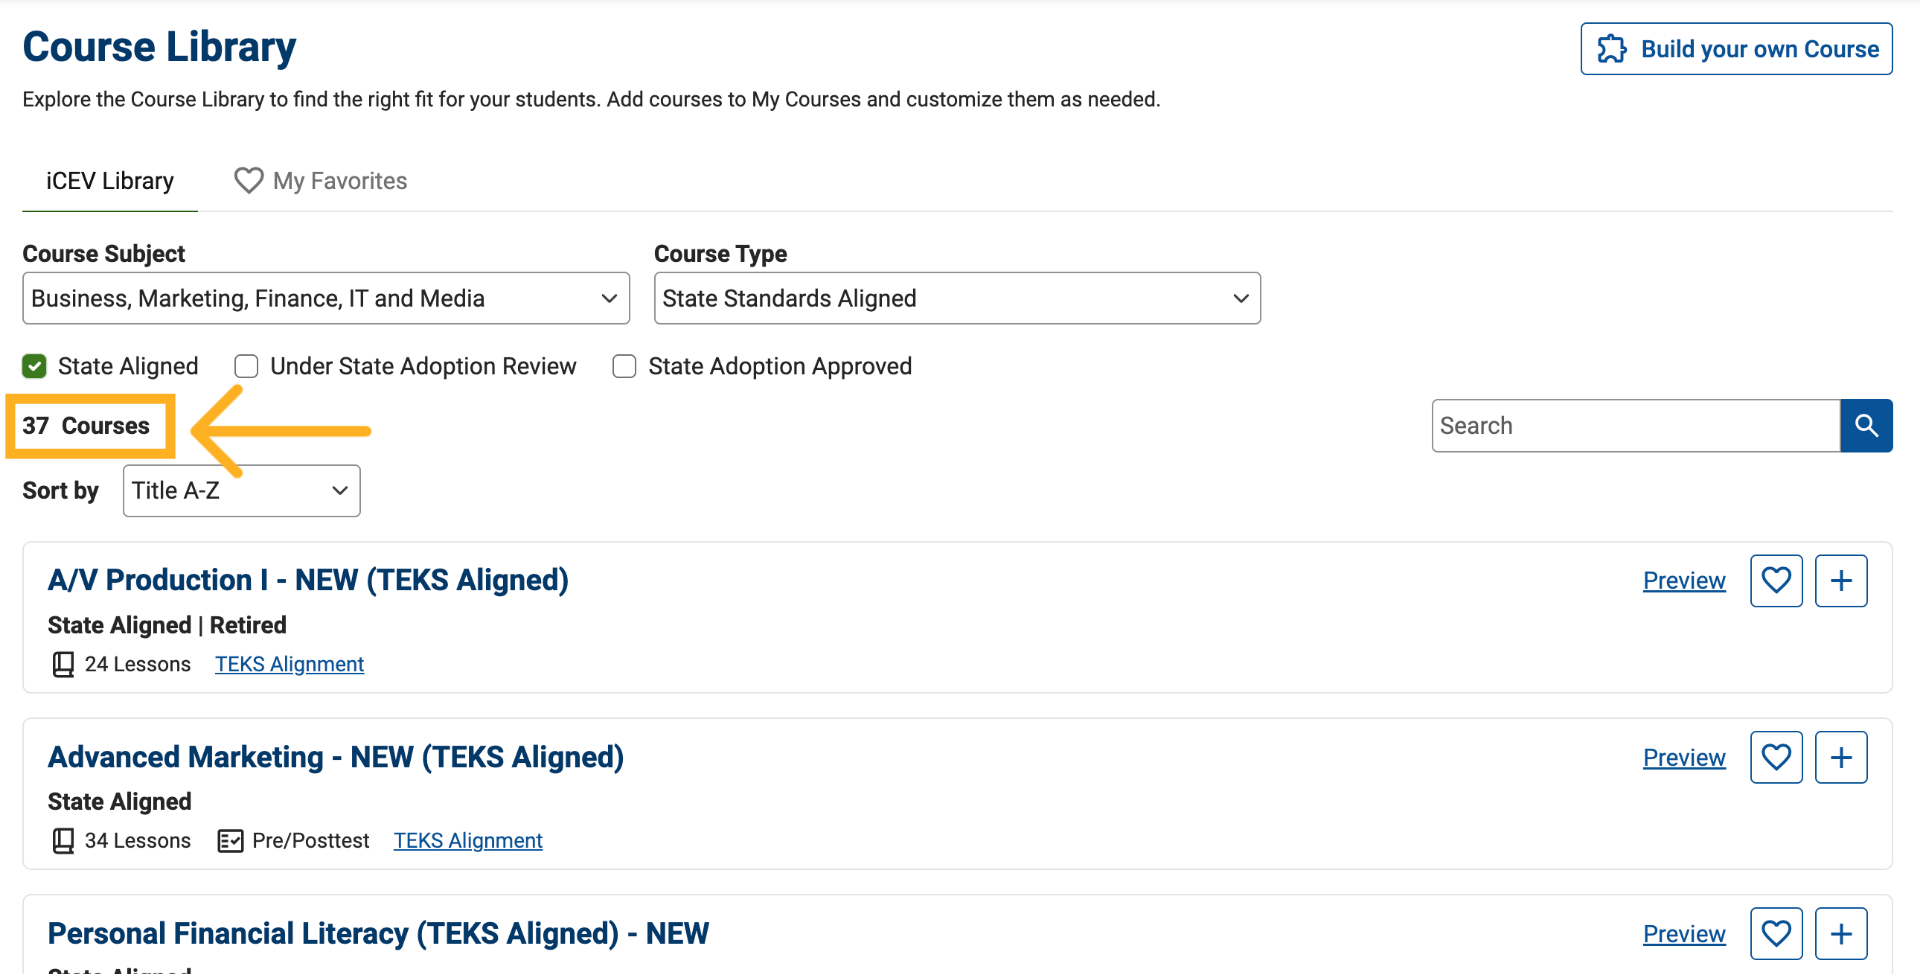
12. View Filtered Course Results
As filters are applied, the course count automatically updates to show the number of matching courses.
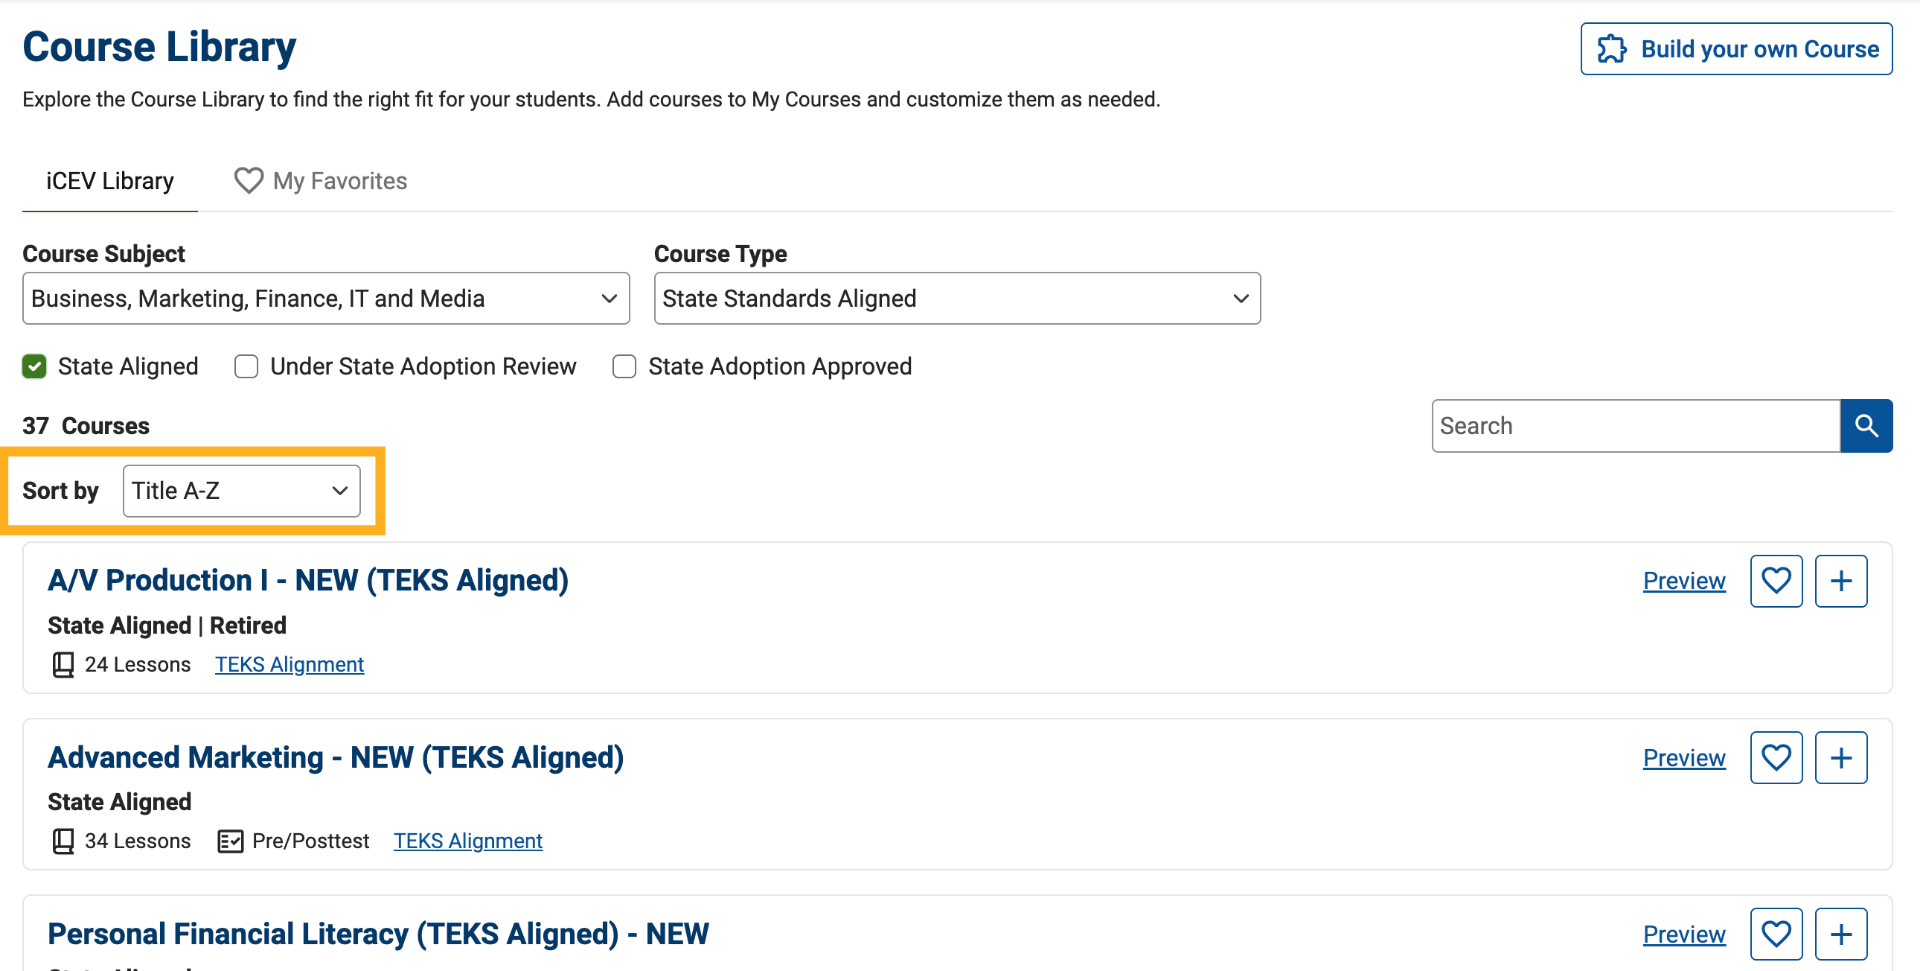
13. Sort Courses
Sort courses alphabetically by selecting:
-
Title A-Z (ascending)
-
Title Z-A (descending)
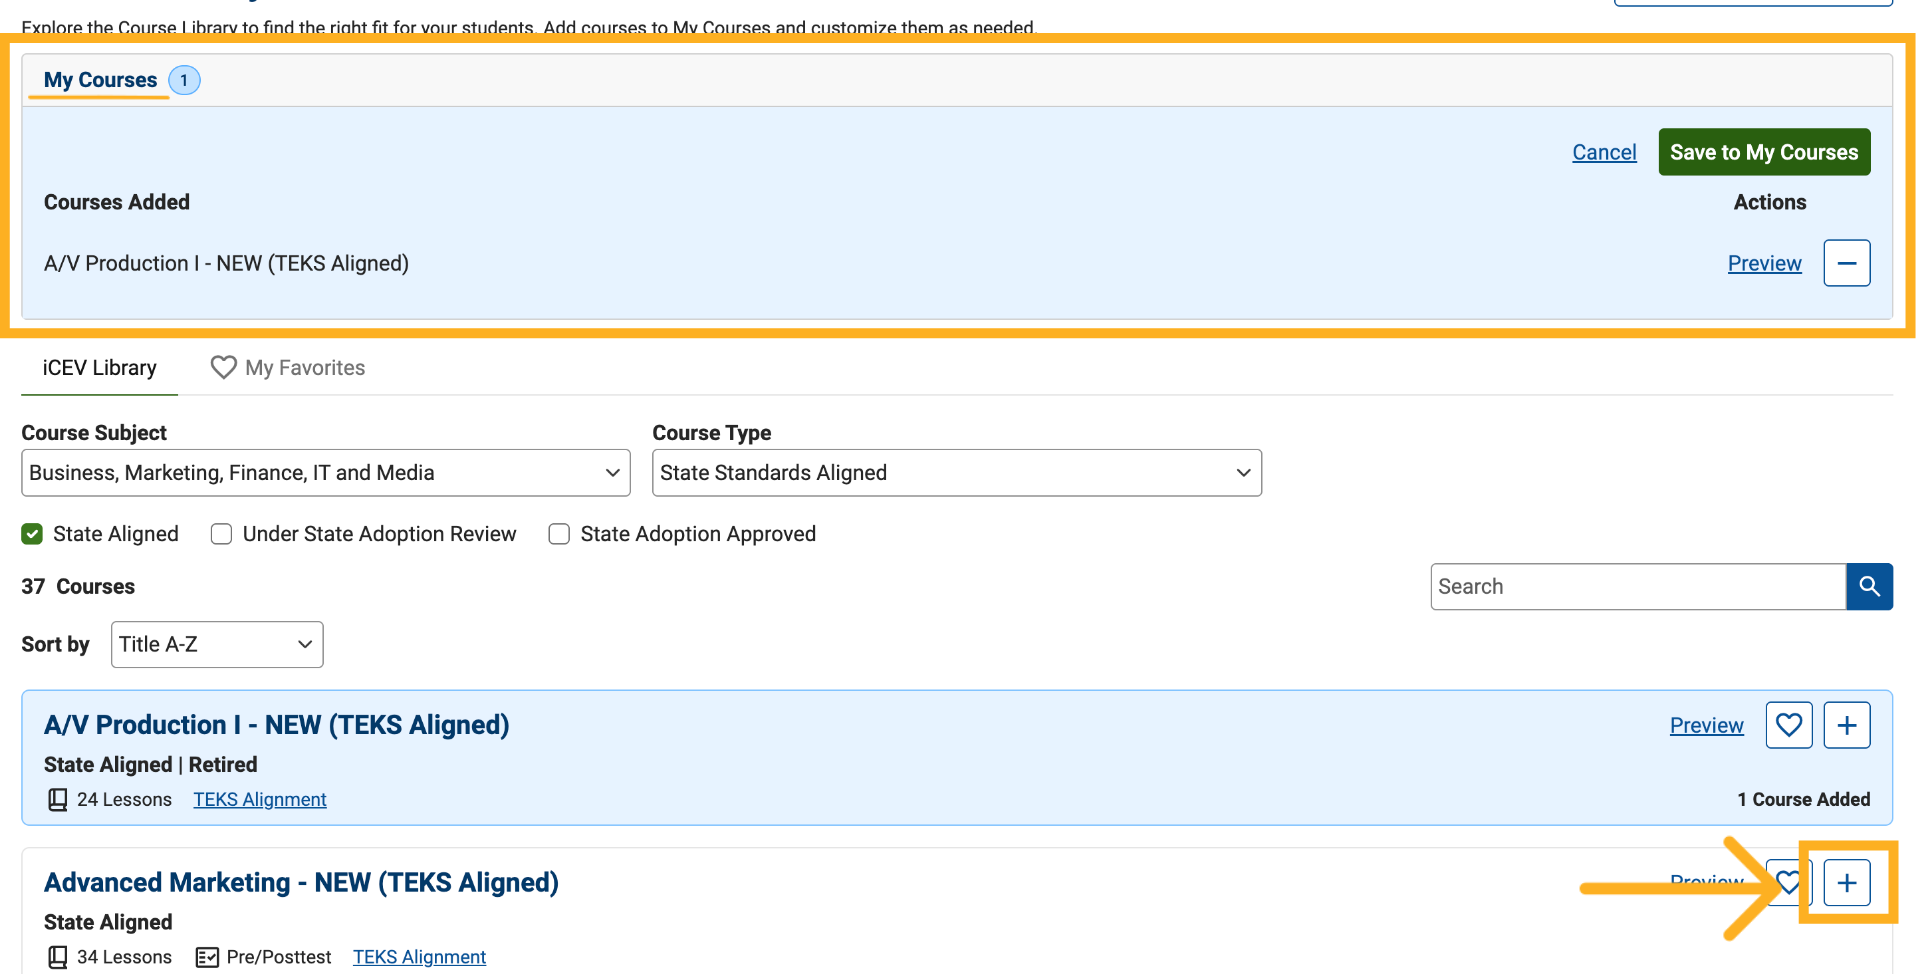
14. Add a Course
To add a course, click the Add (+) button on the course card.
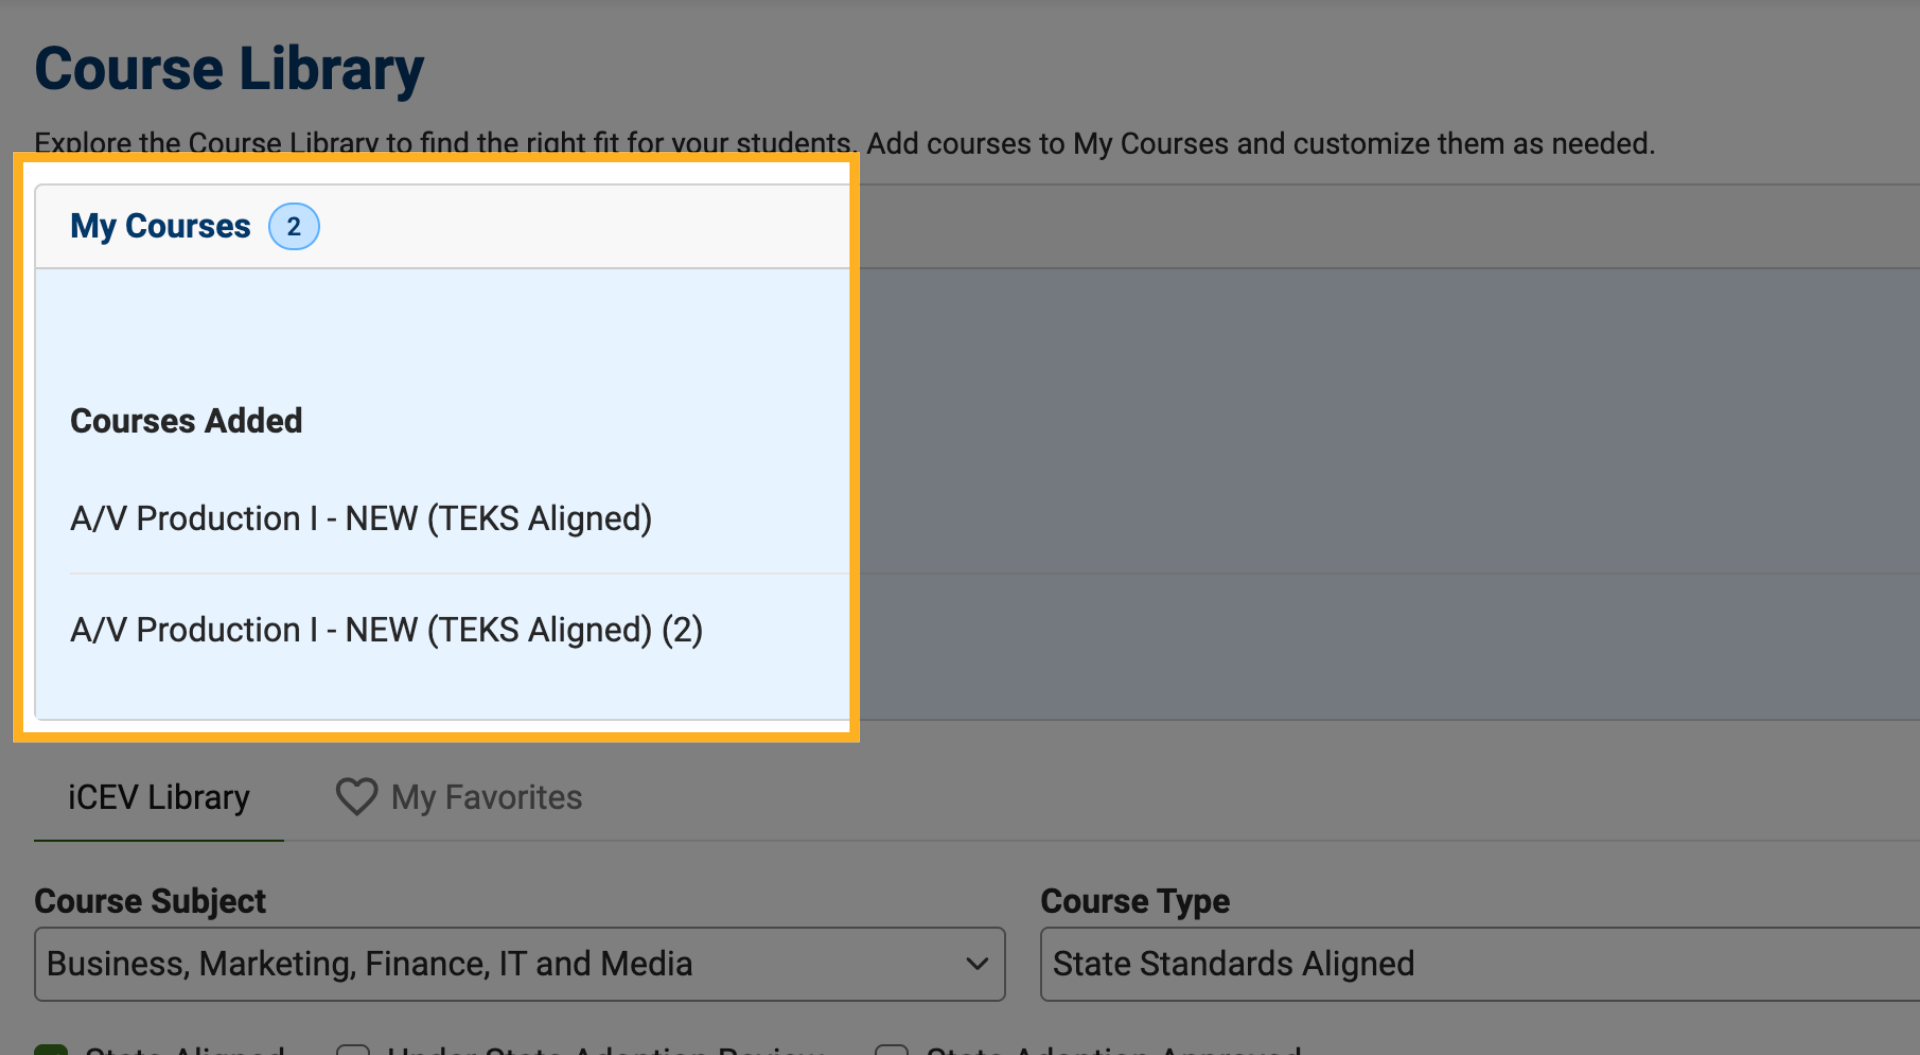
The course is added to your My Courses queue, and the queue badge updates to show the number of selected courses.
15. Add Multiple Copies of a Course
You can add the same course more than once if you teach multiple class periods.
Each course copy is managed independently, making it easy to track student progress by section.
16. Remove or Preview Courses
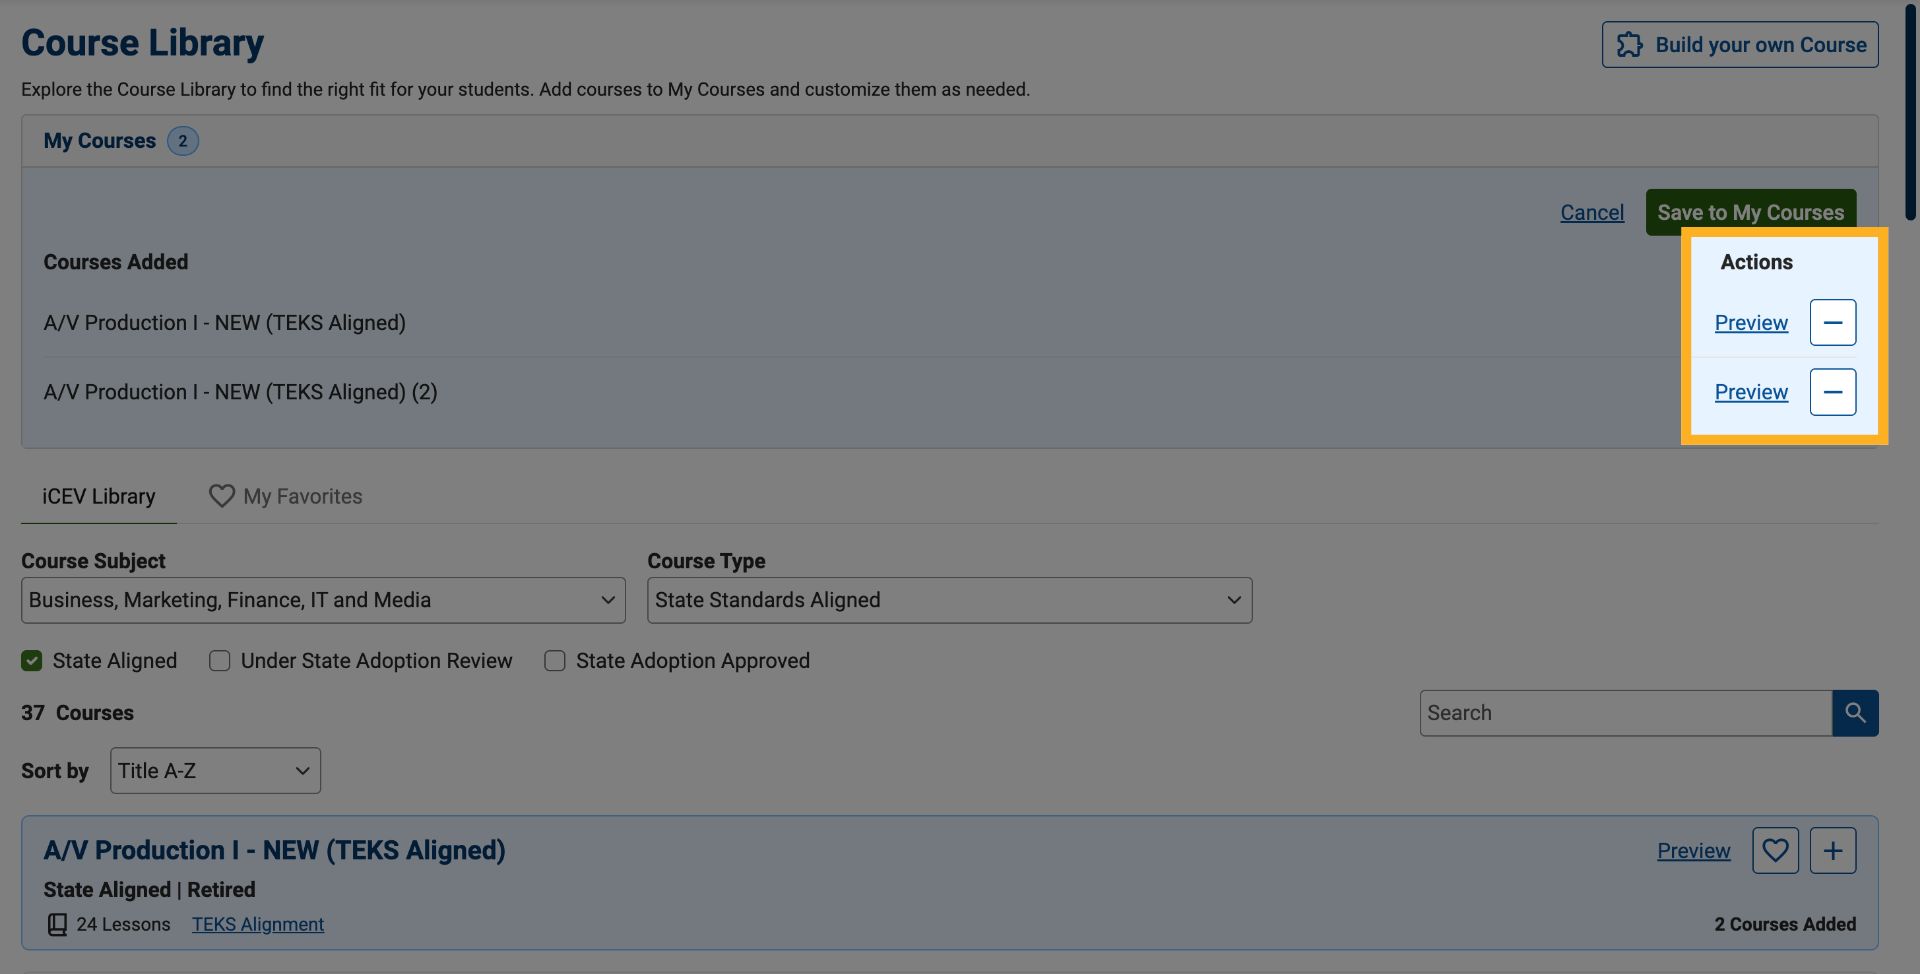
Before saving, you can:
-
Click Remove (-) to take a course out of your queue
-
Click Preview to review course content before adding it
17. Preview a Course
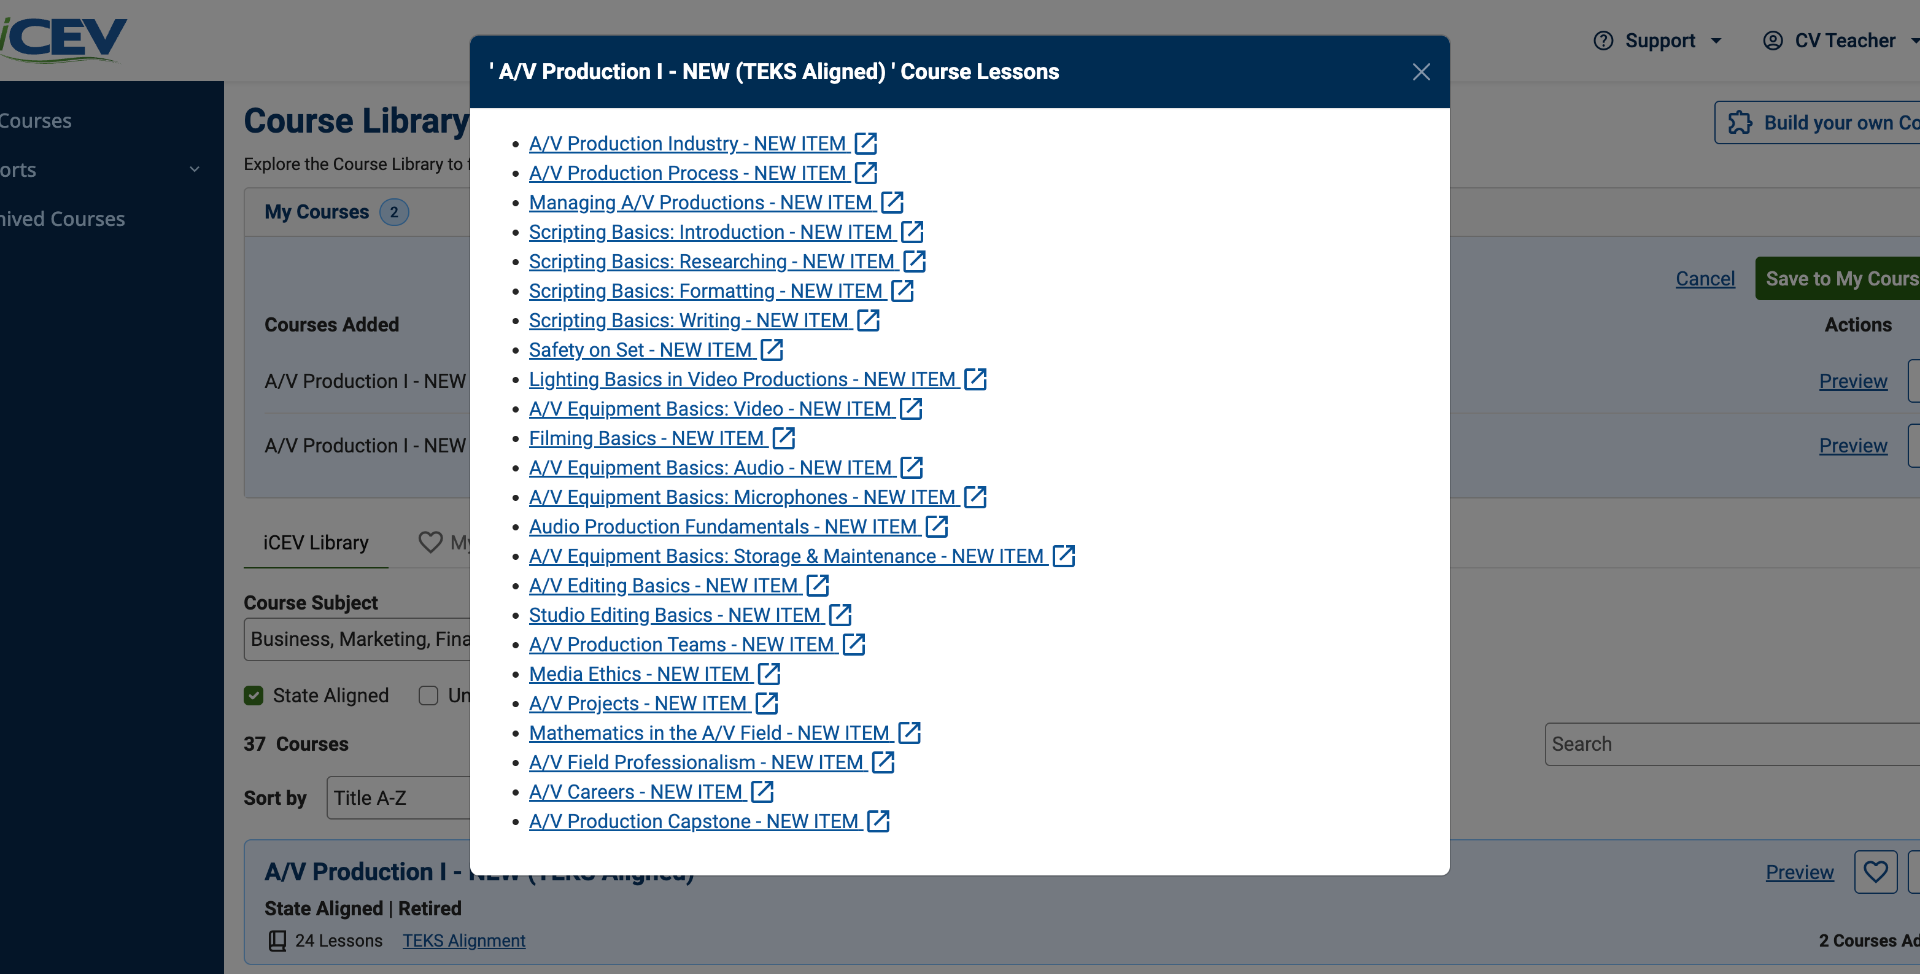
Selecting Preview opens a window displaying all lessons included in the course.
You can browse the lesson list and select individual lessons for additional details.
18. Preview Individual Lessons
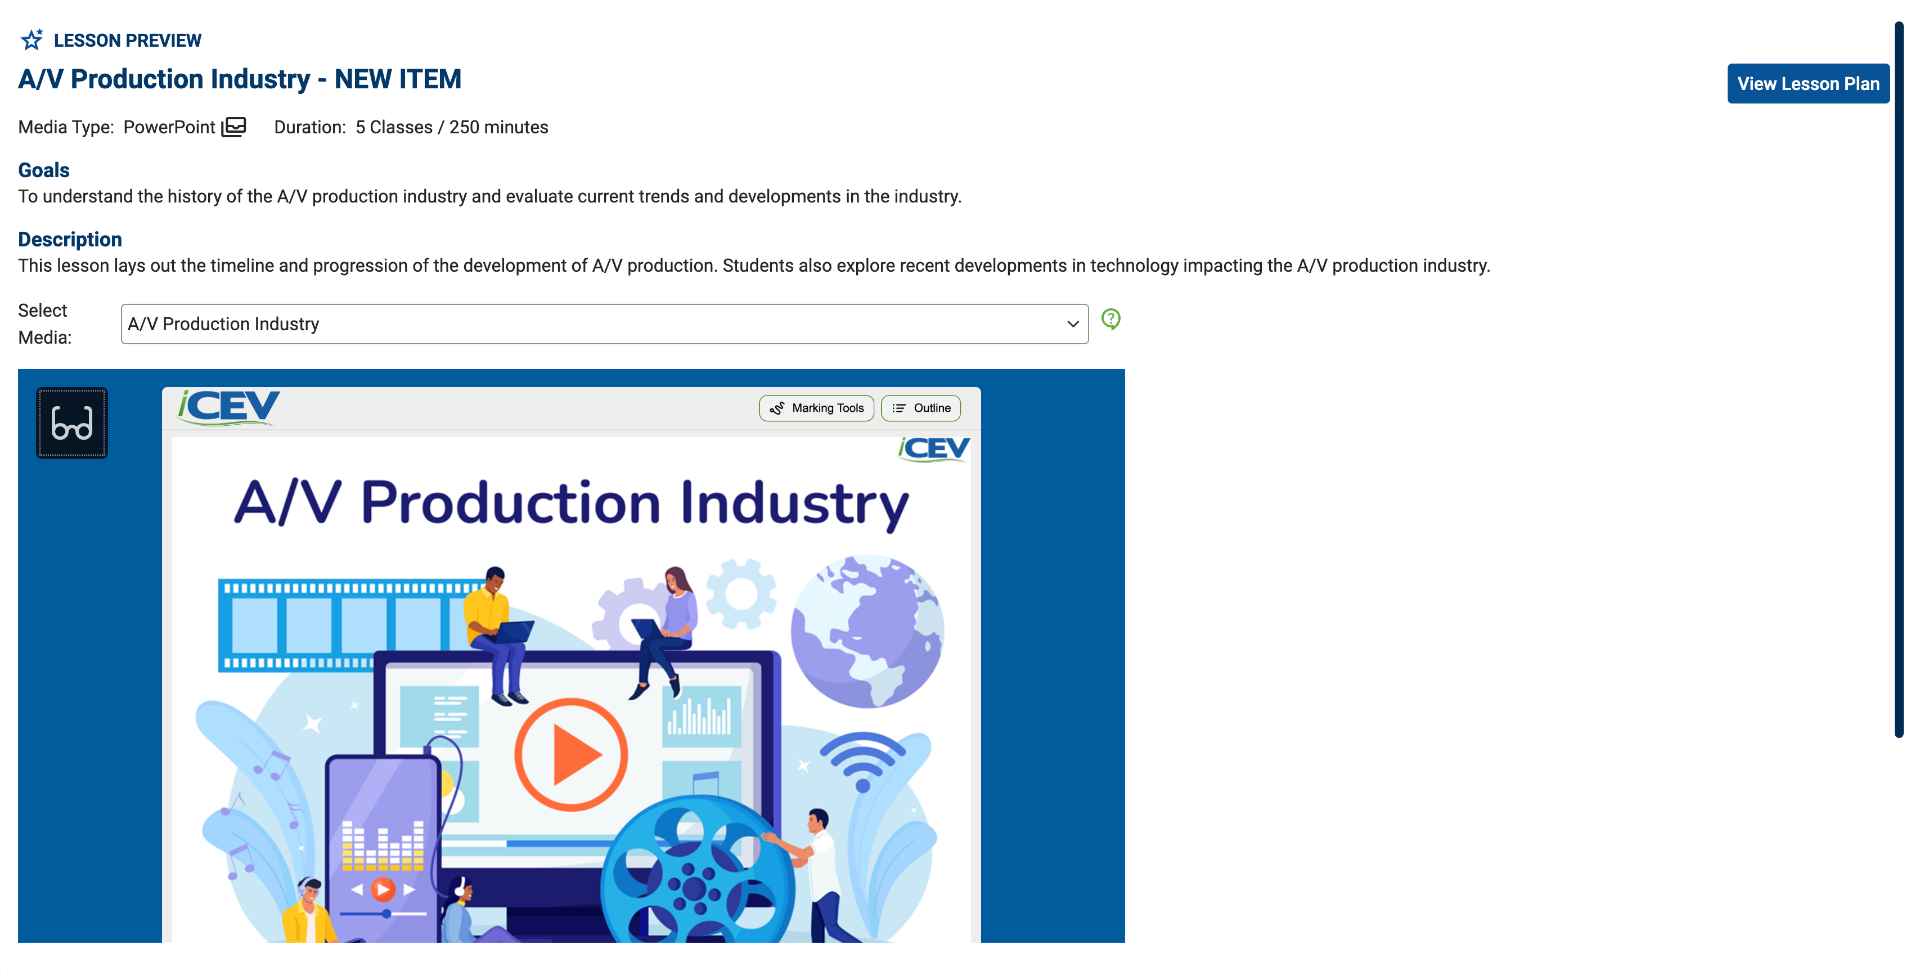
Within the lesson preview, you can:
-
Read lesson descriptions
-
View lesson media types
-
Check lesson duration
-
Review course goals and content
-
Access lesson plans
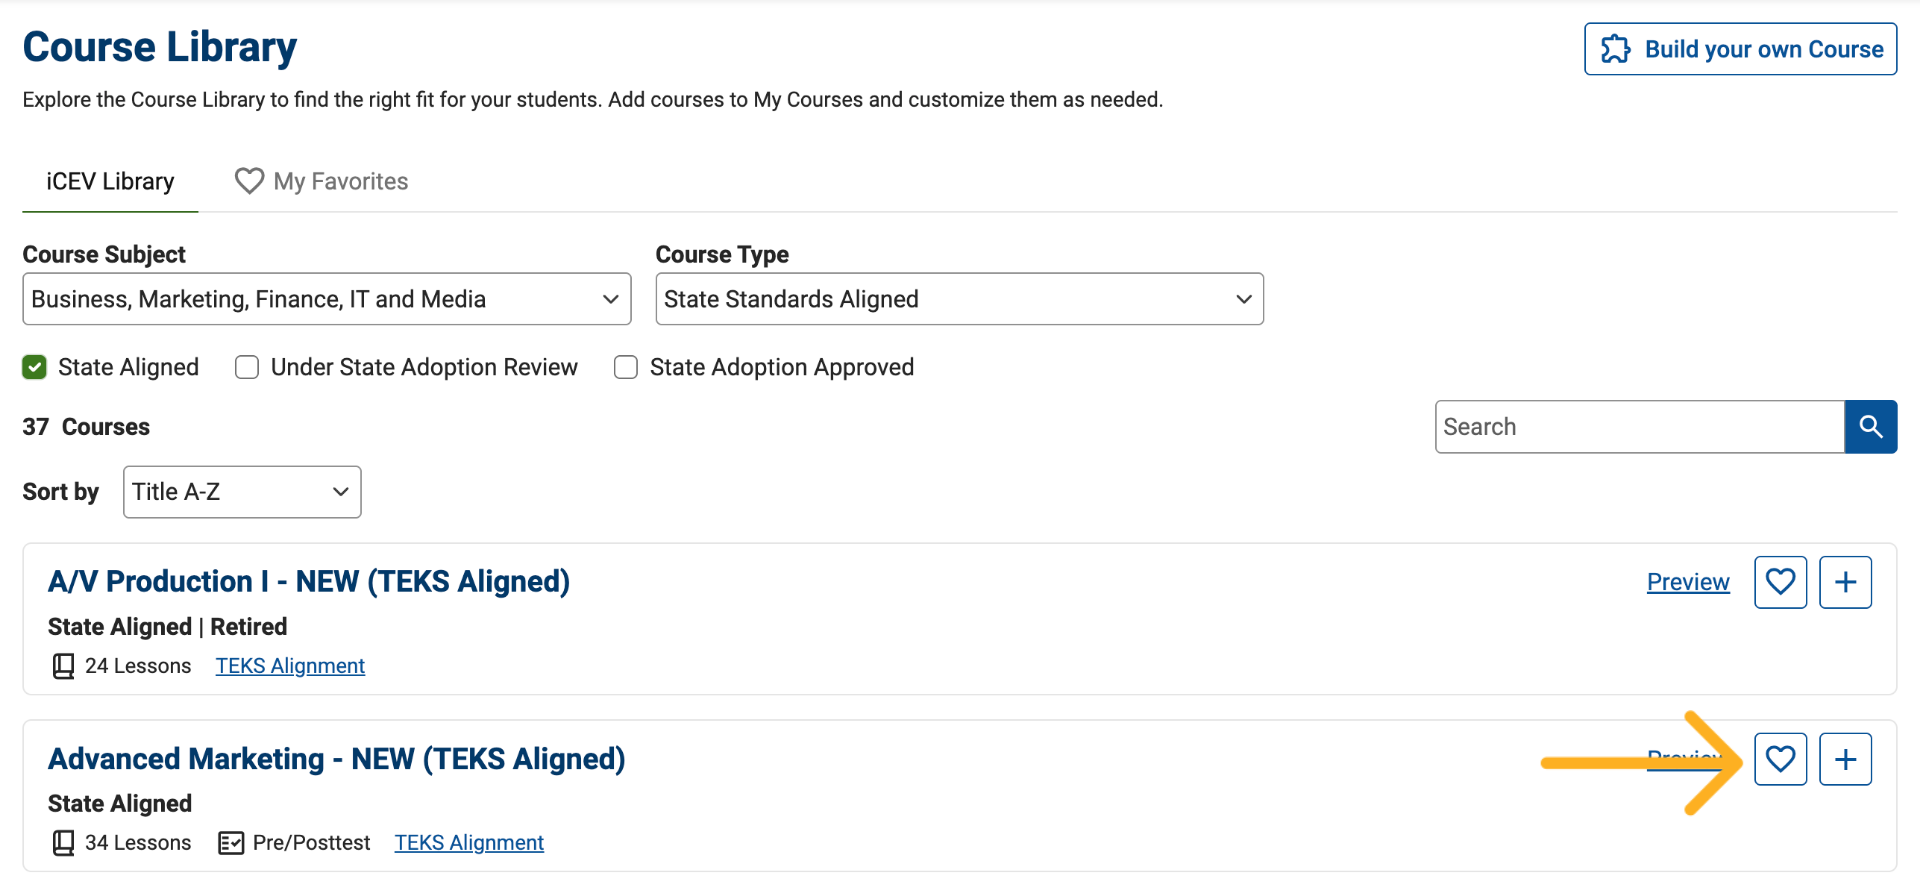
19. Favorite Courses
To save a course for future consideration, click the Favorite or Heart icon.
This adds the course to your favorites list.
20. View Favorite Courses
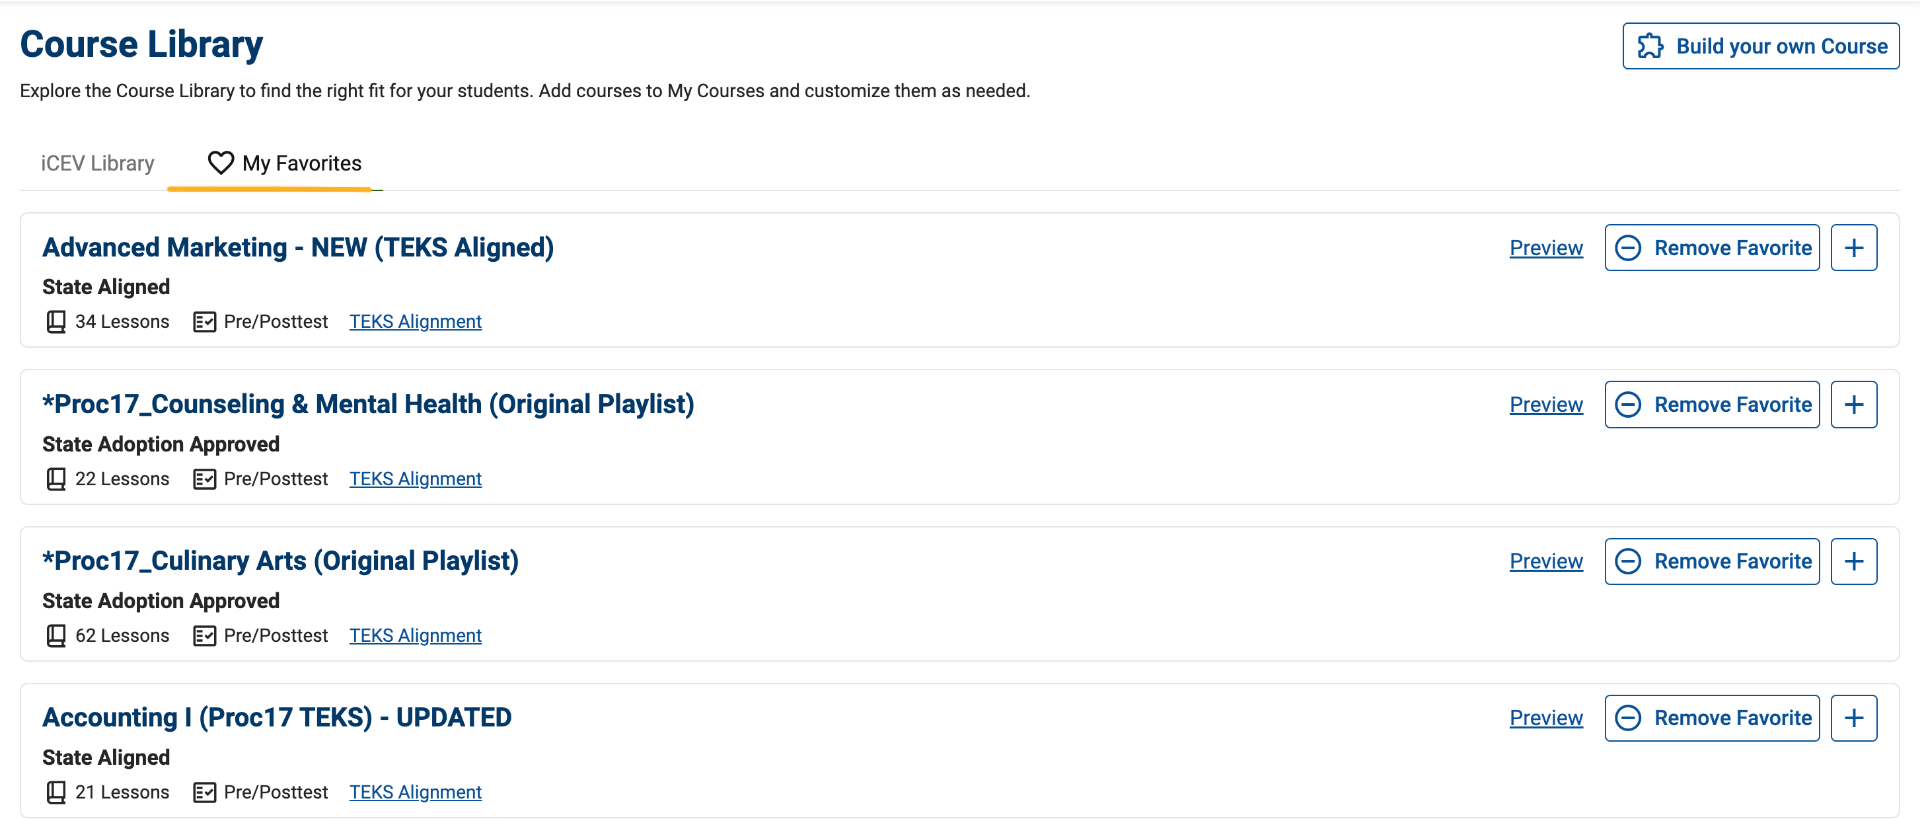
Select the My Favorites tab to review your saved courses.
From this view, you can:
-
Compare courses
-
Remove favorites
-
Preview courses
-
Add courses to your My Courses queue
21. Save Selected Courses
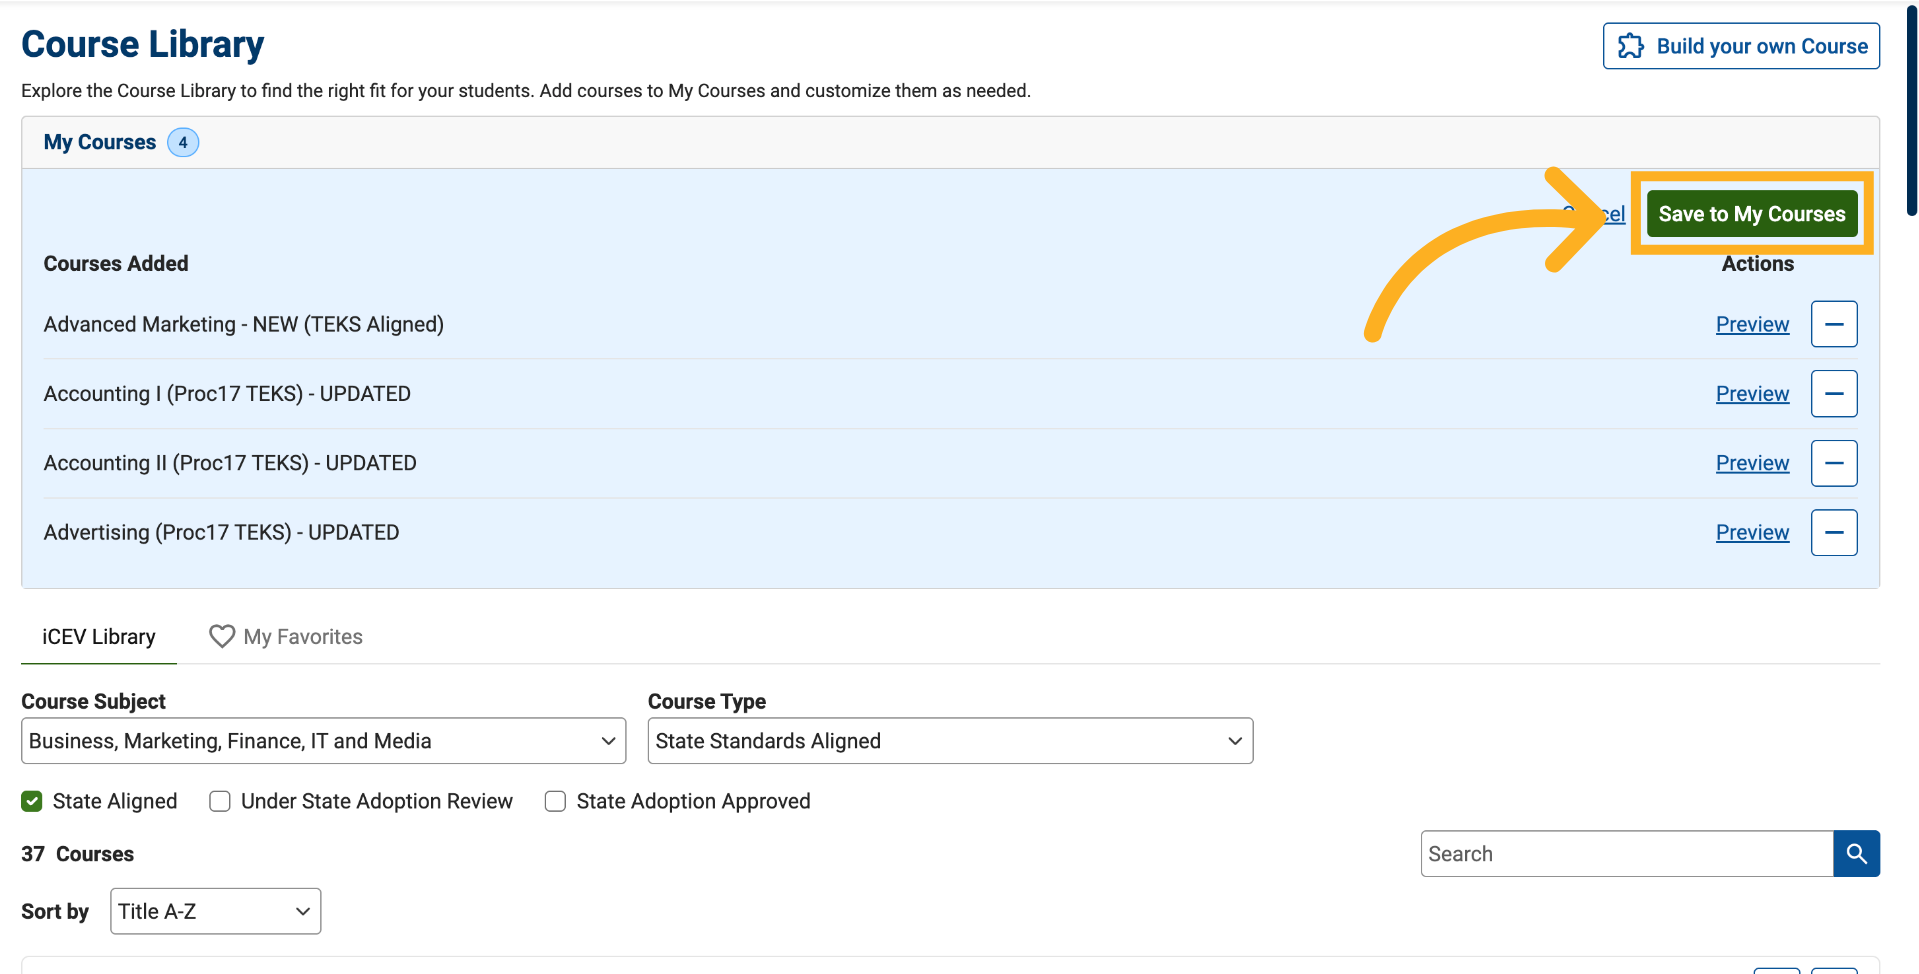
After selecting your courses, click Save to My Courses.
This begins the roster assignment process.
22. Assign Course Rosters (Optional)
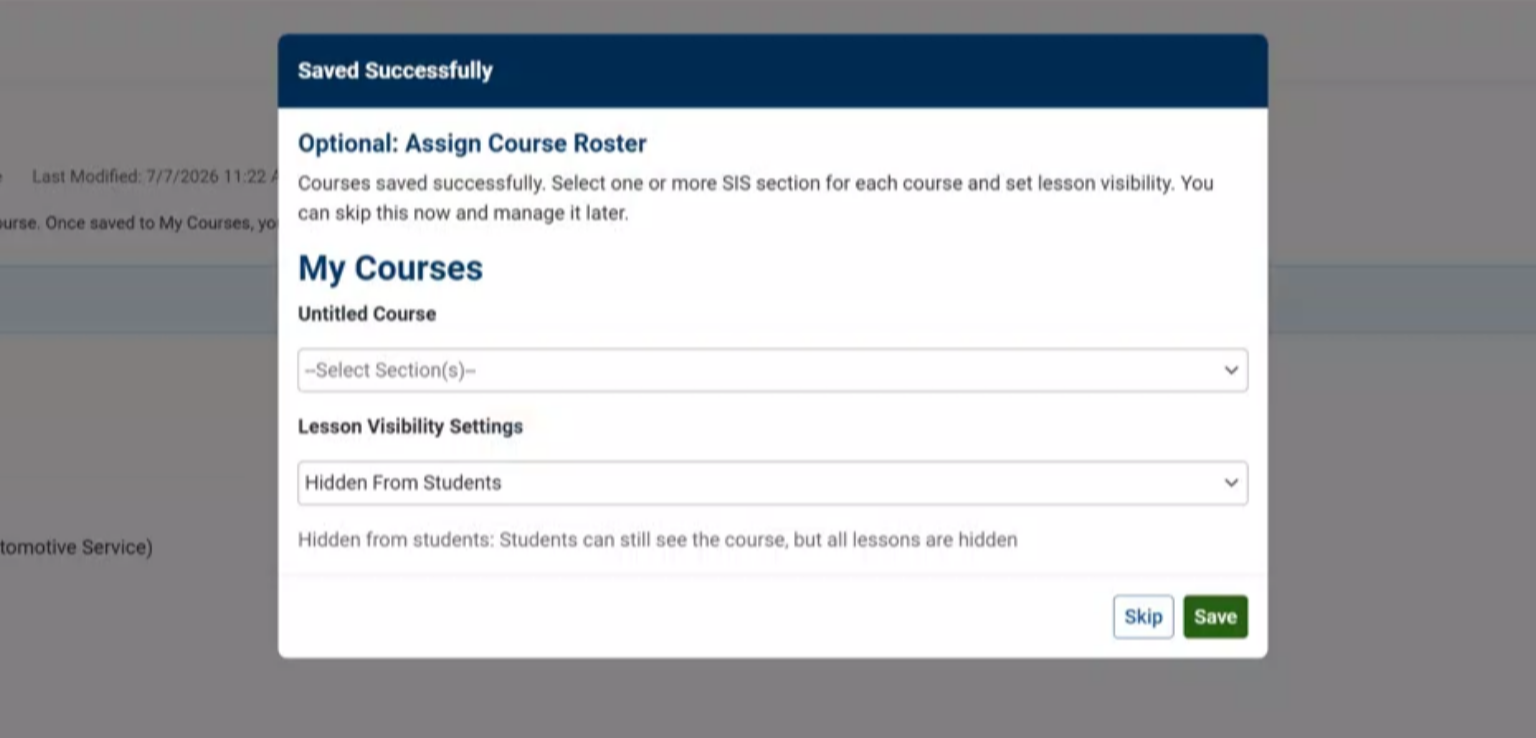
A roster assignment window appears.
You can:
-
Assign one or more SIS sections to each course
-
Configure lesson visibility settings
If you prefer, you can skip this step and assign rosters later.
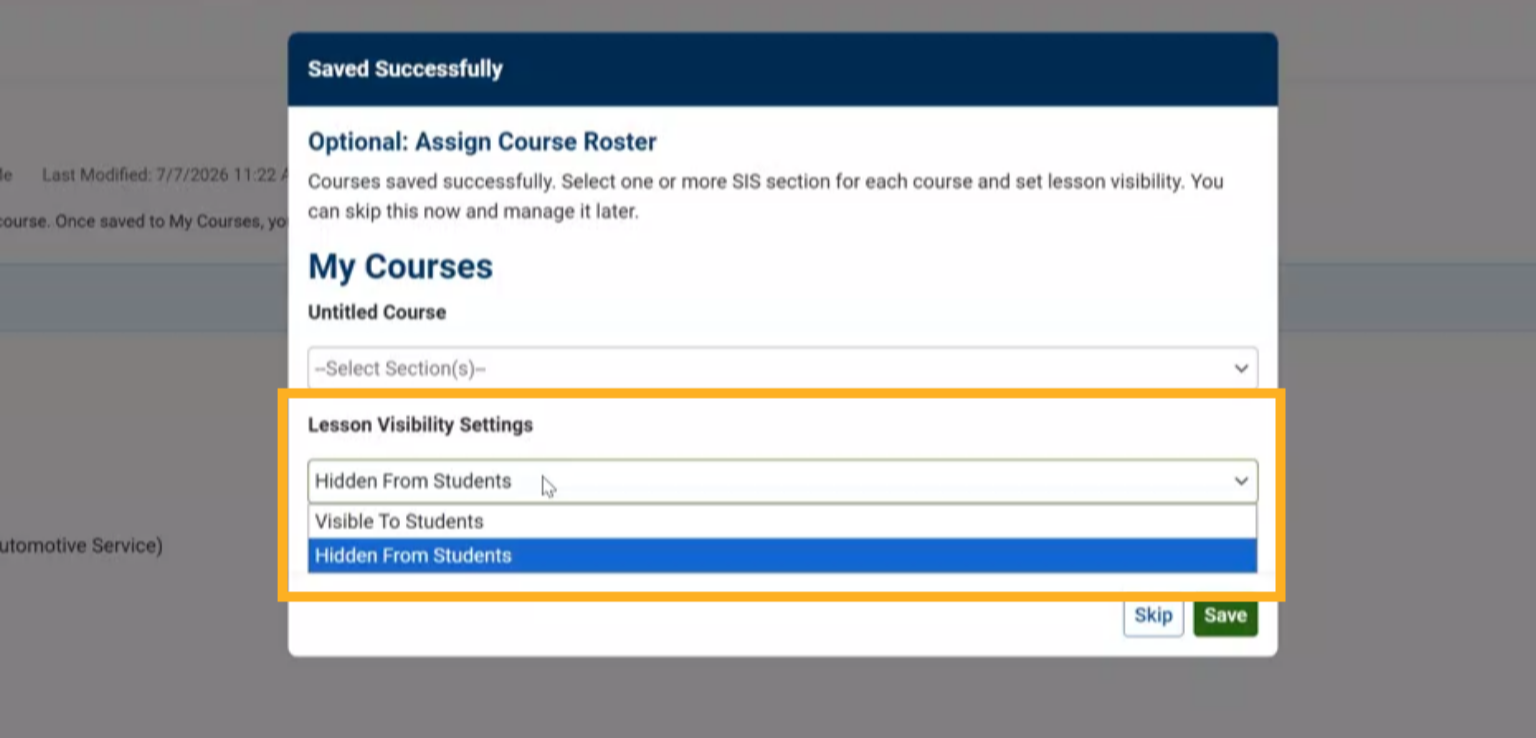
23. Configure Lesson Visibility
Choose how students will access course content:
Visible to Students
Lessons become available to students immediately after the course is saved.
Hidden from Students
Lessons remain unavailable until you manually make them visible later.
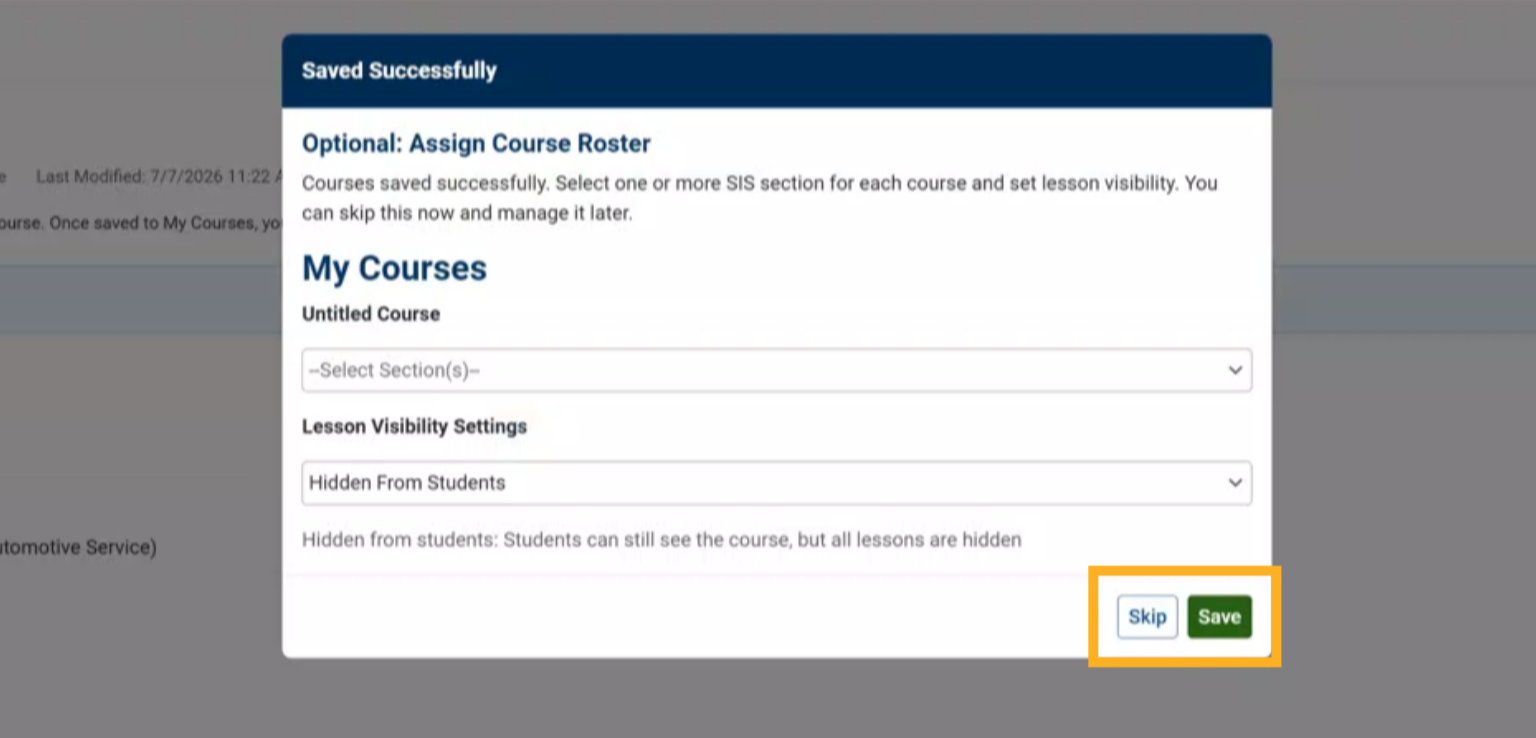
24. Save Roster Assignments
Click Save to apply your course roster assignments and visibility settings.
If you do not want to configure these settings now, select Skip and return to them later.
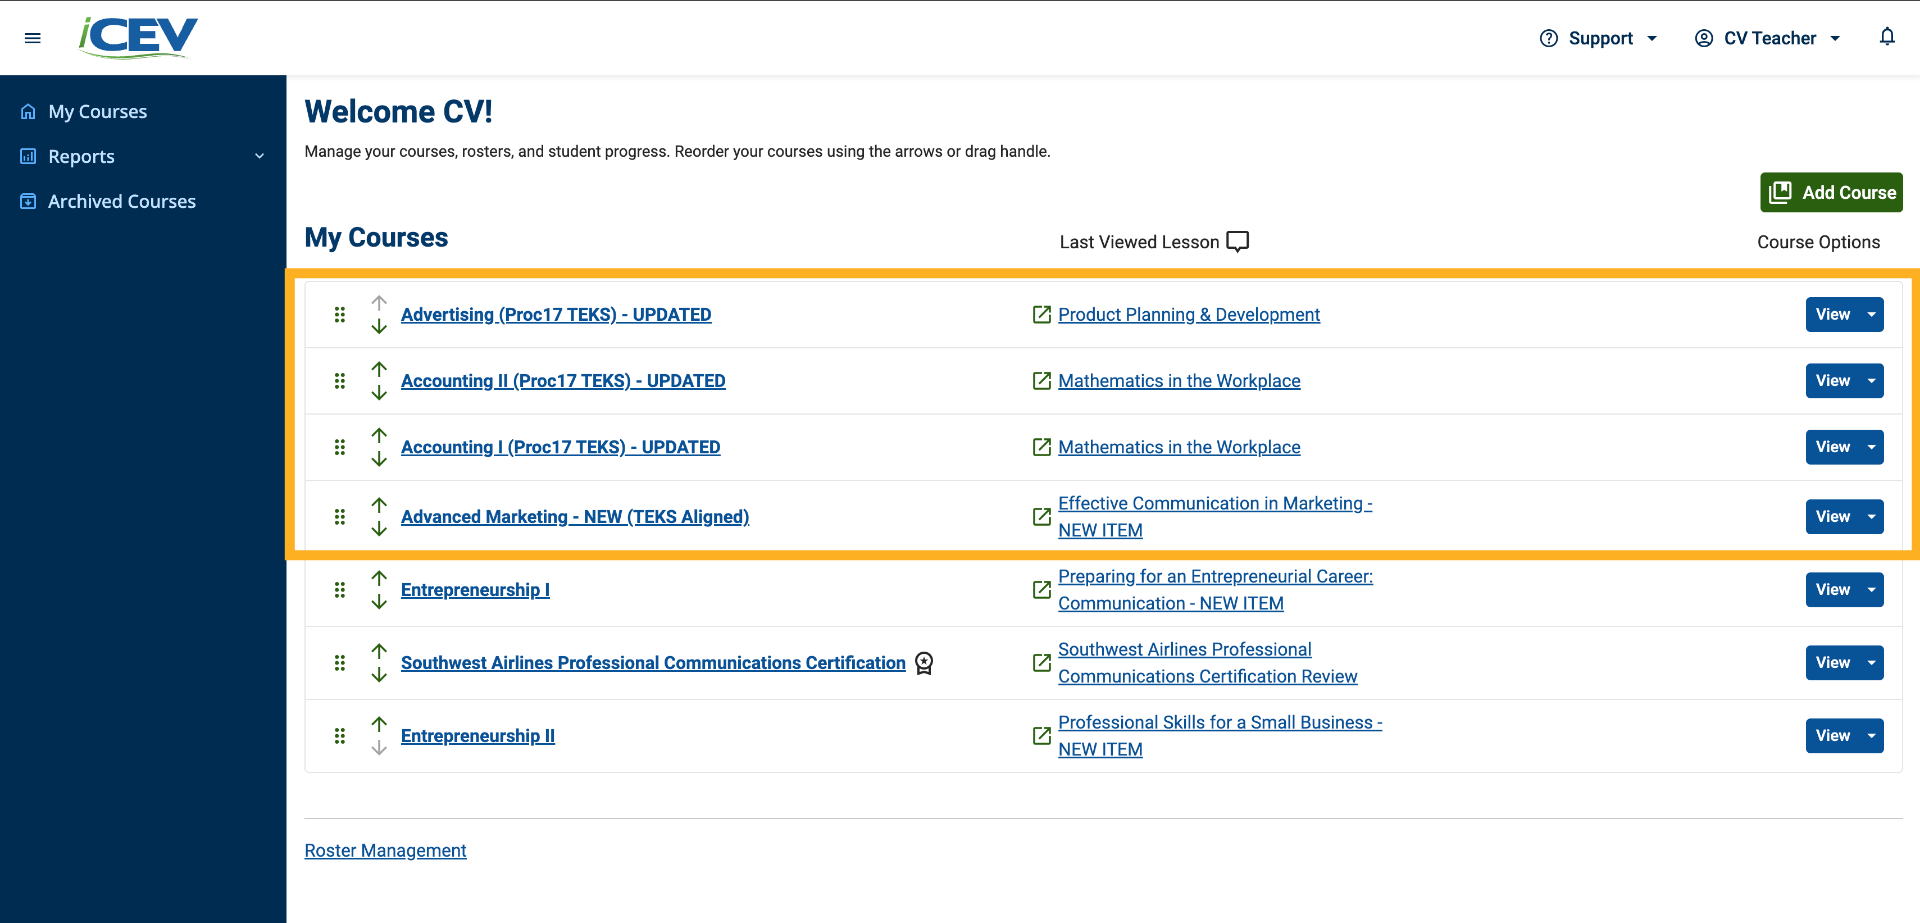
25. Verify Your Courses
After saving, you will be returned to the My Courses page.
Your newly added course(s) will appear at the top of the course list and are ready for use.
Building and Rostering a Customized Course
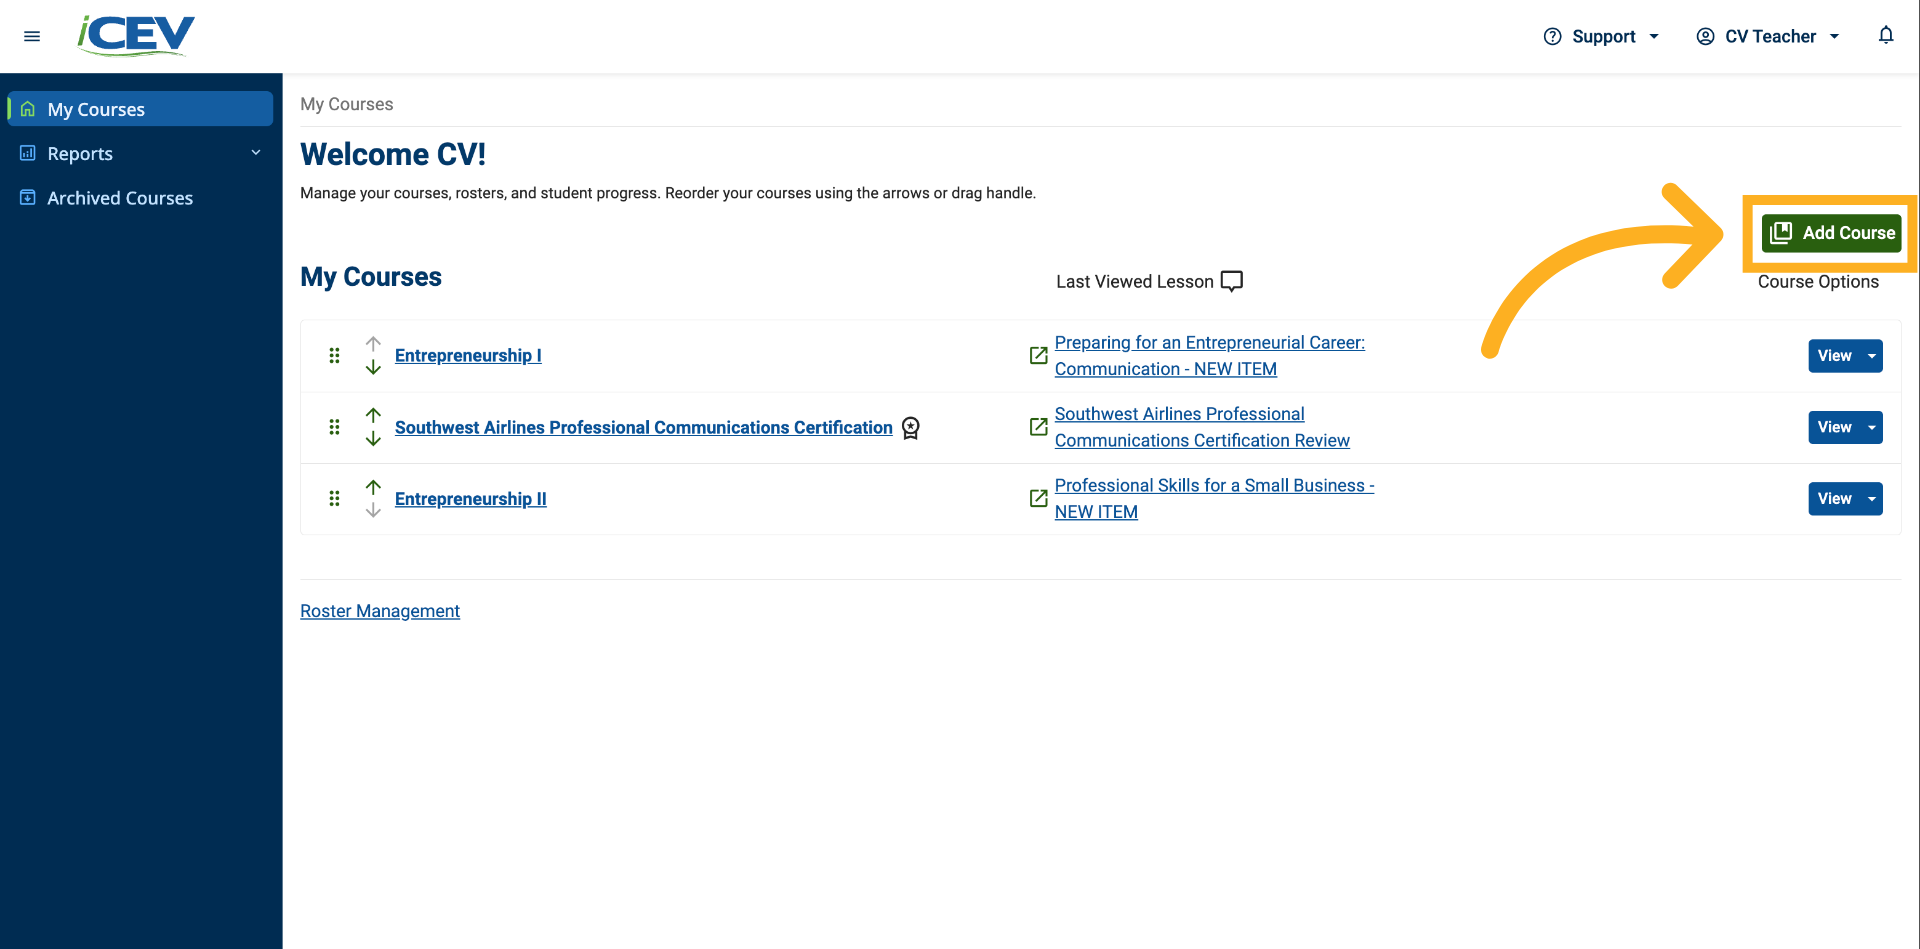
1. Start Building a Custom Course
From the My Courses page, click Add Course to begin creating a new course.
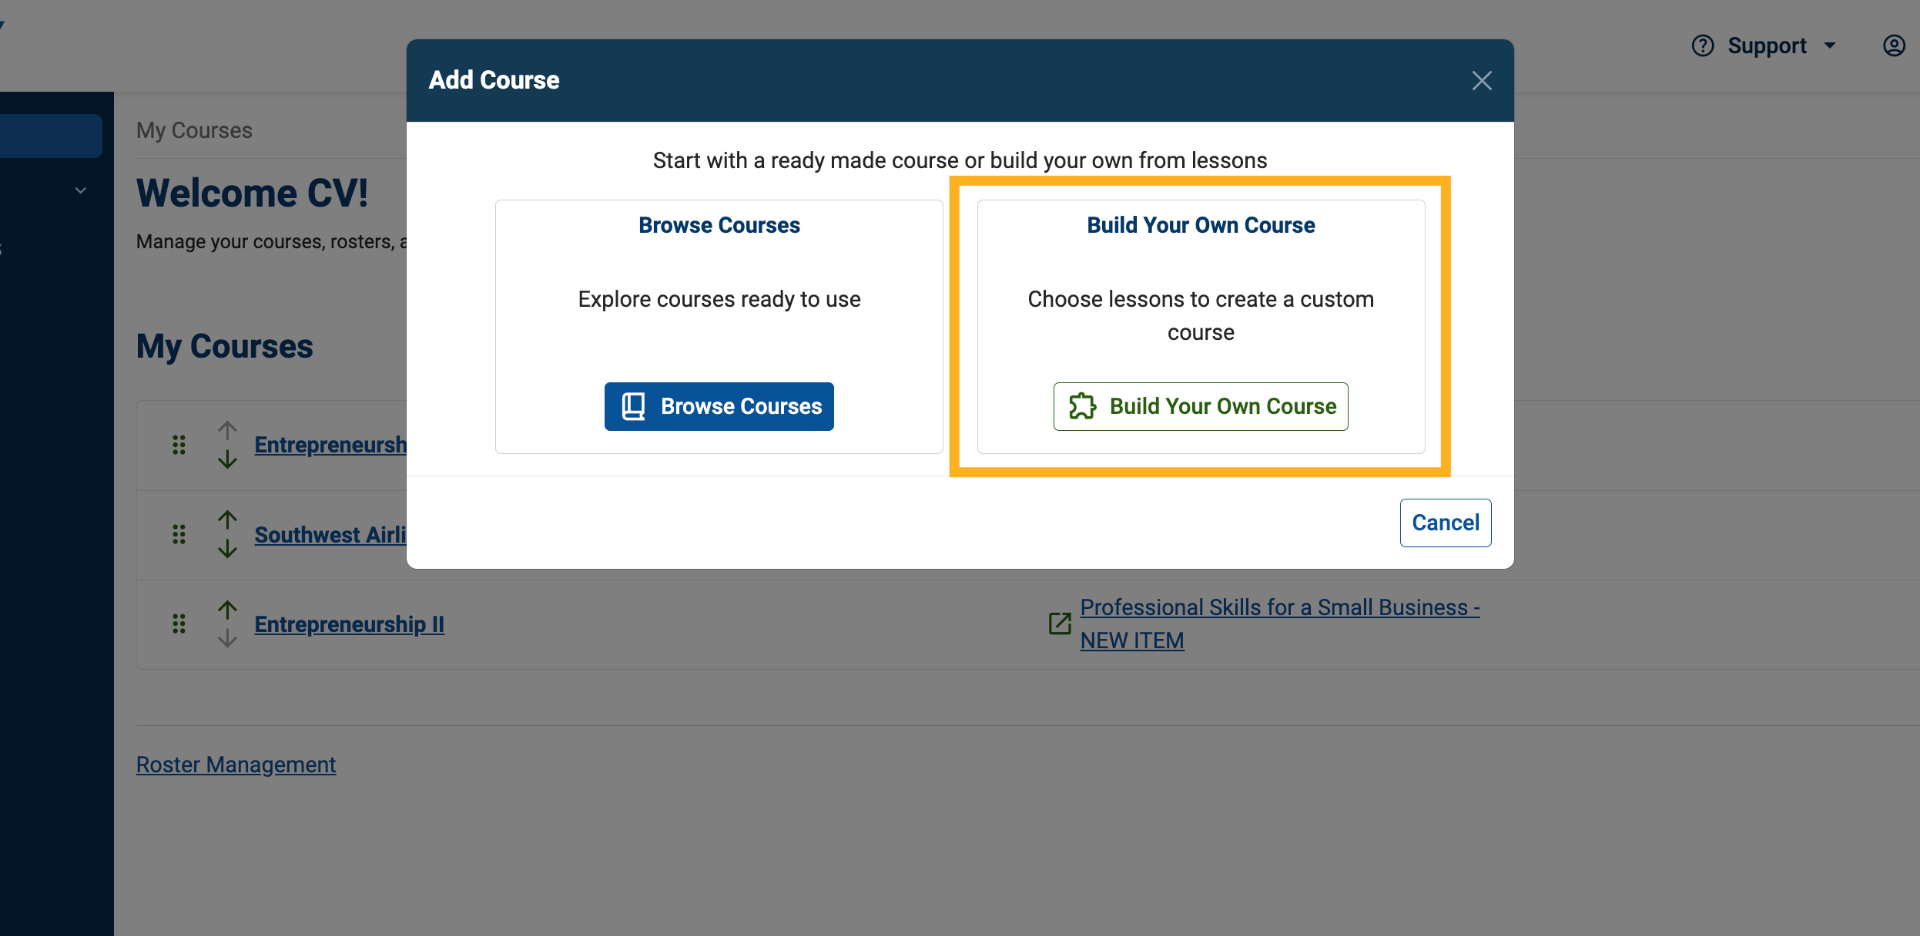
2. Select "Build Your Own Course"
When the course setup window opens, select Build Your Own Course.
This option allows you to create a custom course using lessons from across the iCEV lesson library.
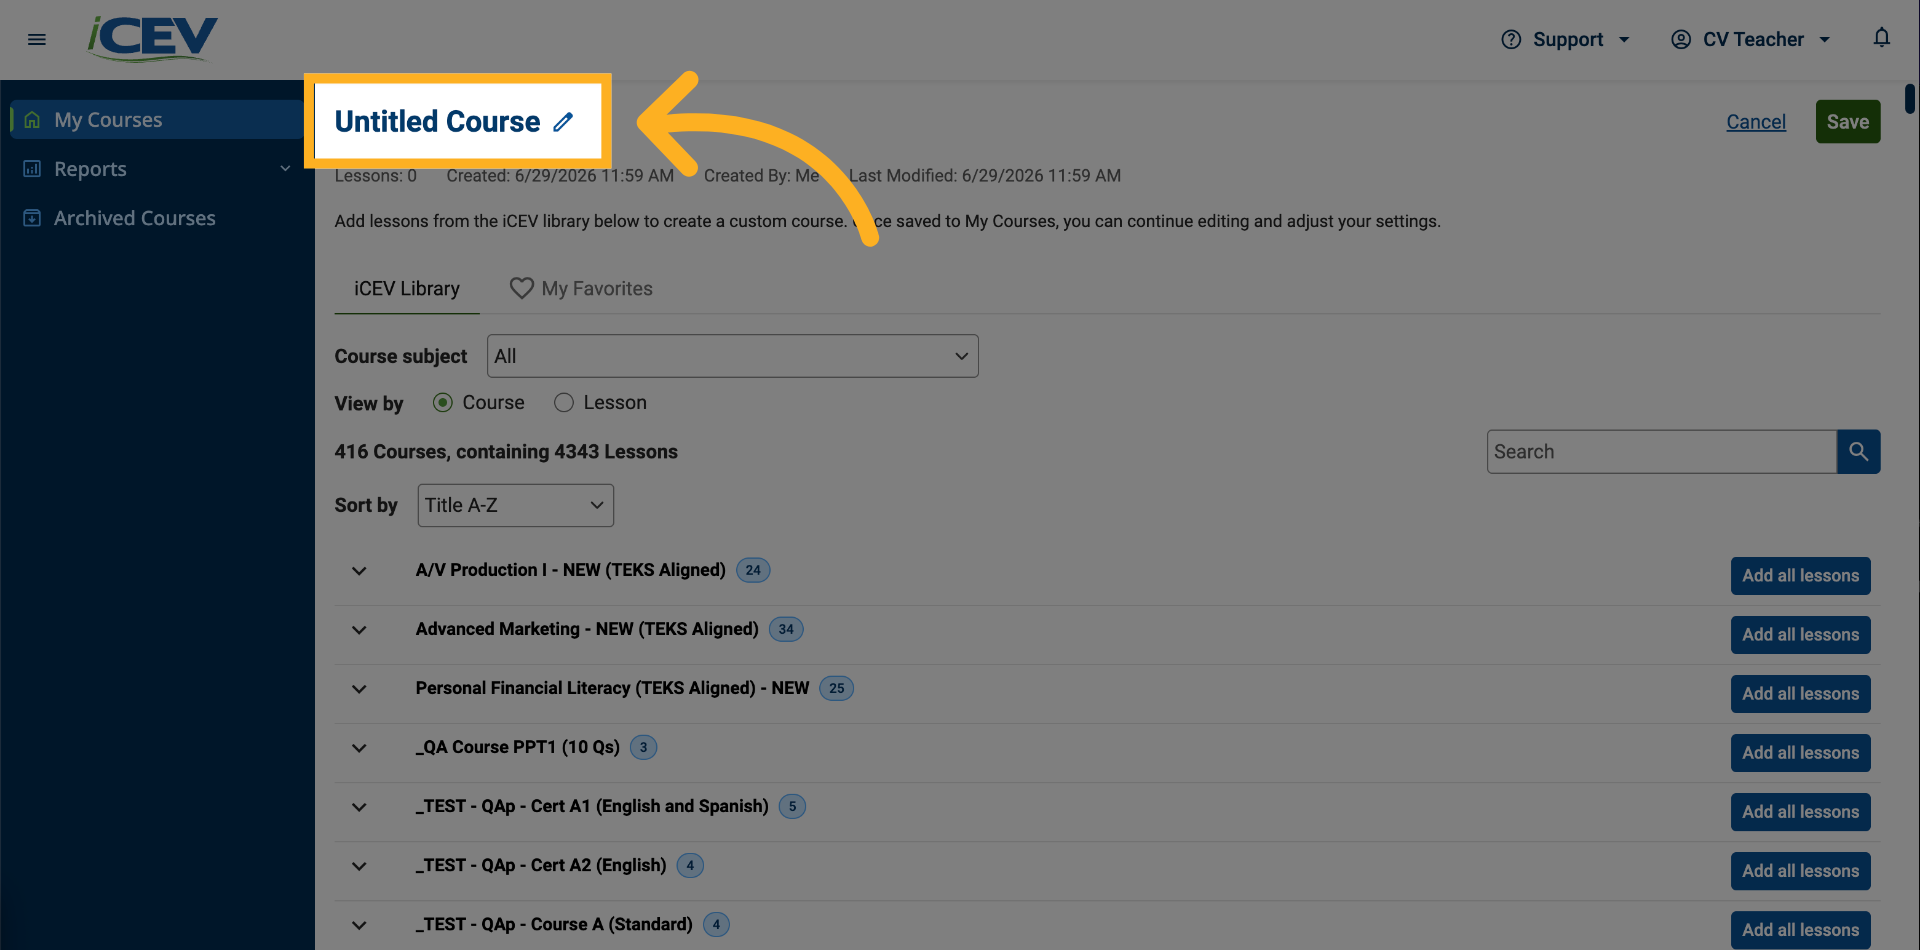
3. Name Your Course
Enter a course title that clearly identifies your course and its intended purpose.
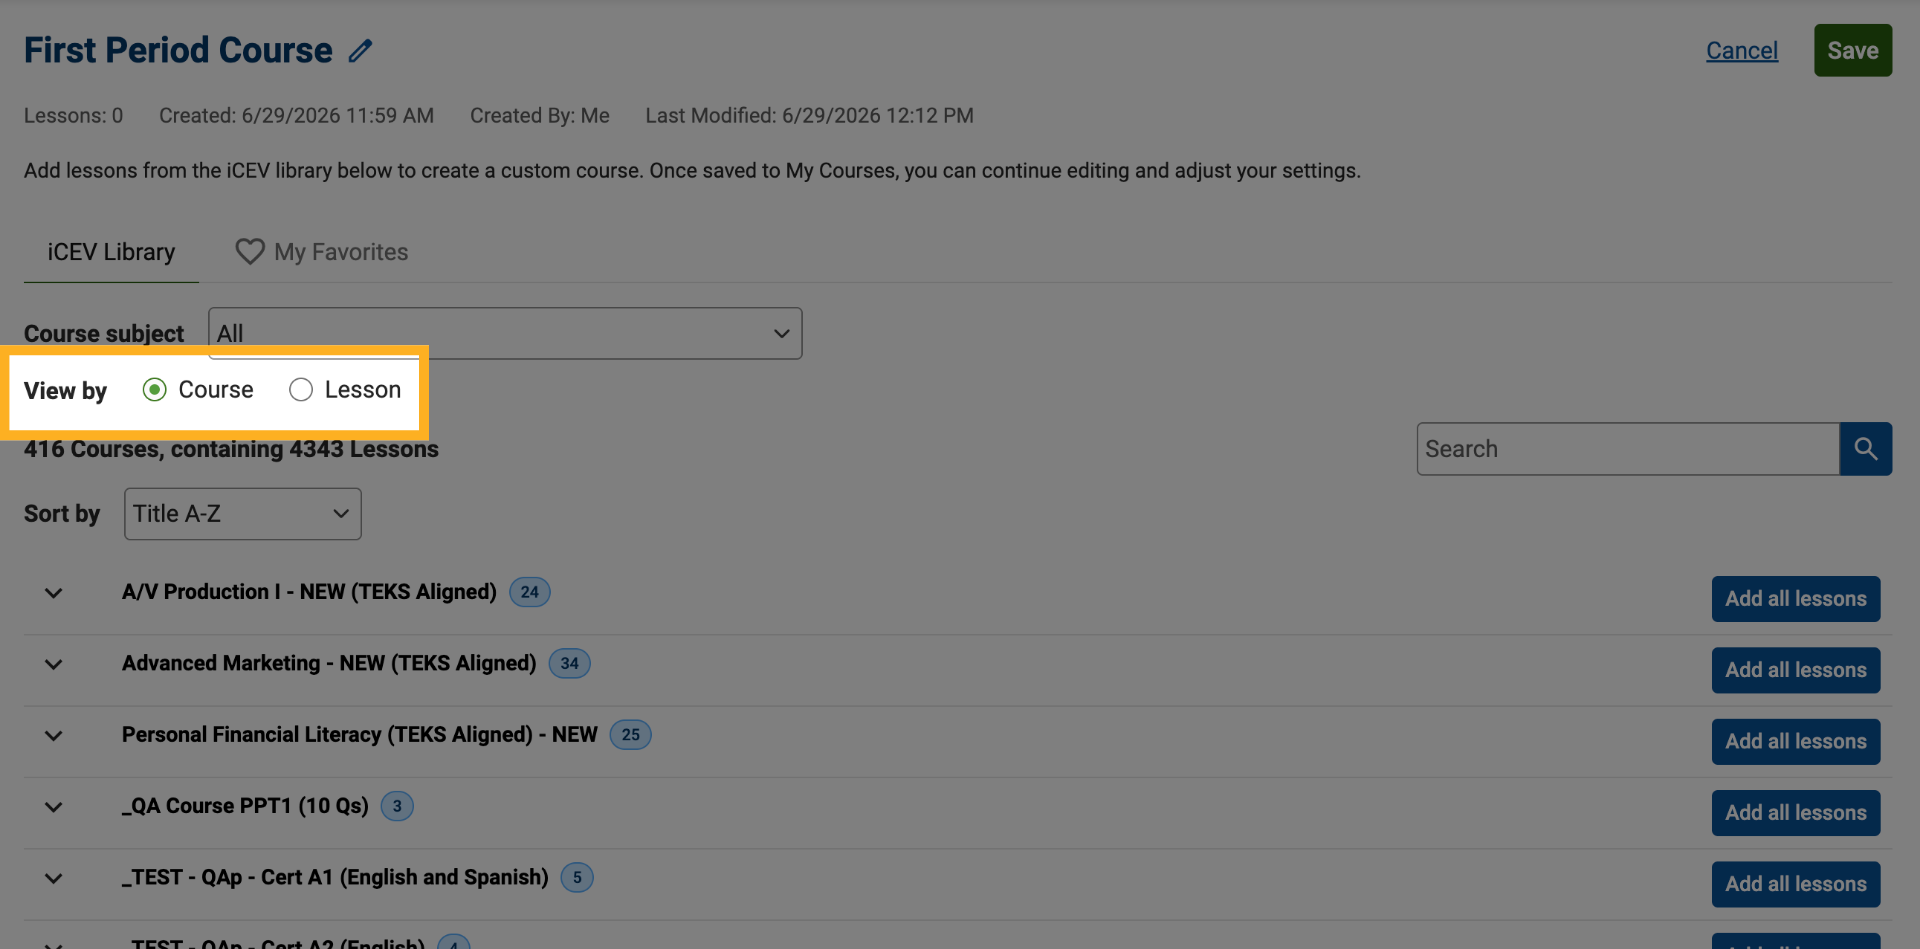
4. Choose How to Browse Content
You can explore content using two different views:
-
Course View: Displays courses that contain groups of lessons.
-
Lesson View: Displays individual lessons available within your licensed subject areas.
Use the radio buttons at the top of the page to switch between views at any time.
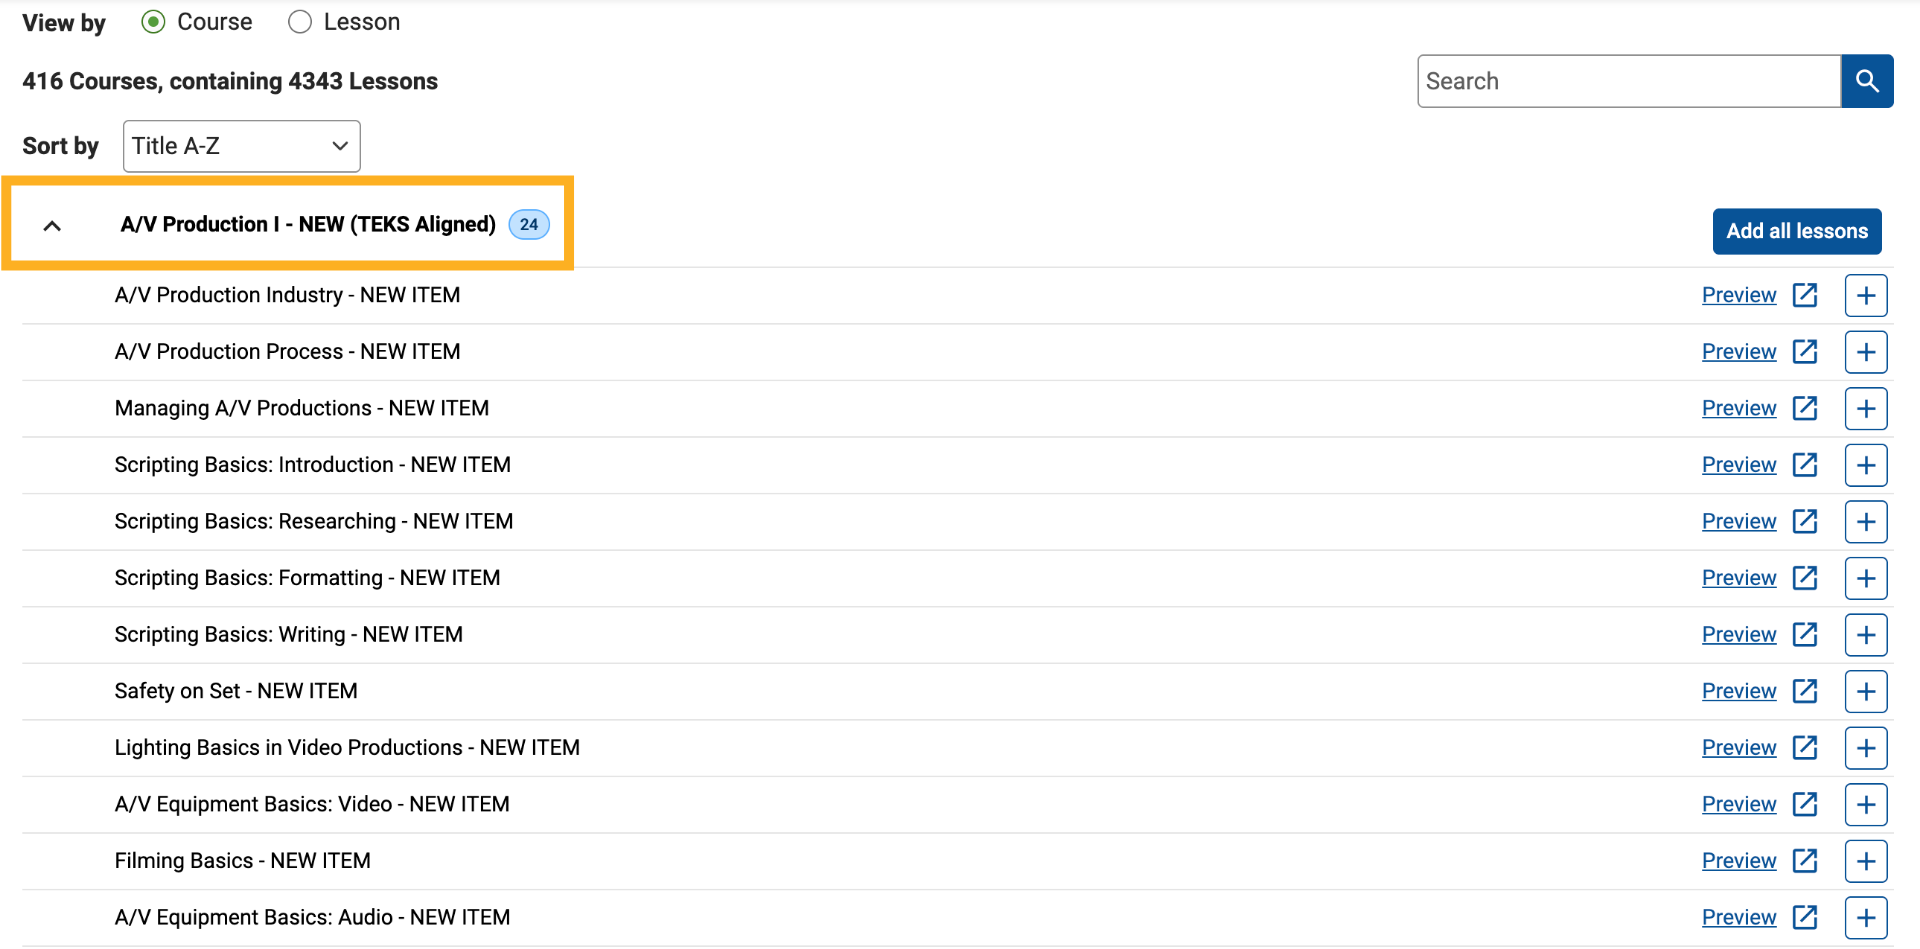
5. Browse Lessons Within a Course
In Course View, expand a course to view all lessons it contains.
This allows you to review course content and select only the lessons you want to include in your customized course.
6. Open Lesson Previews
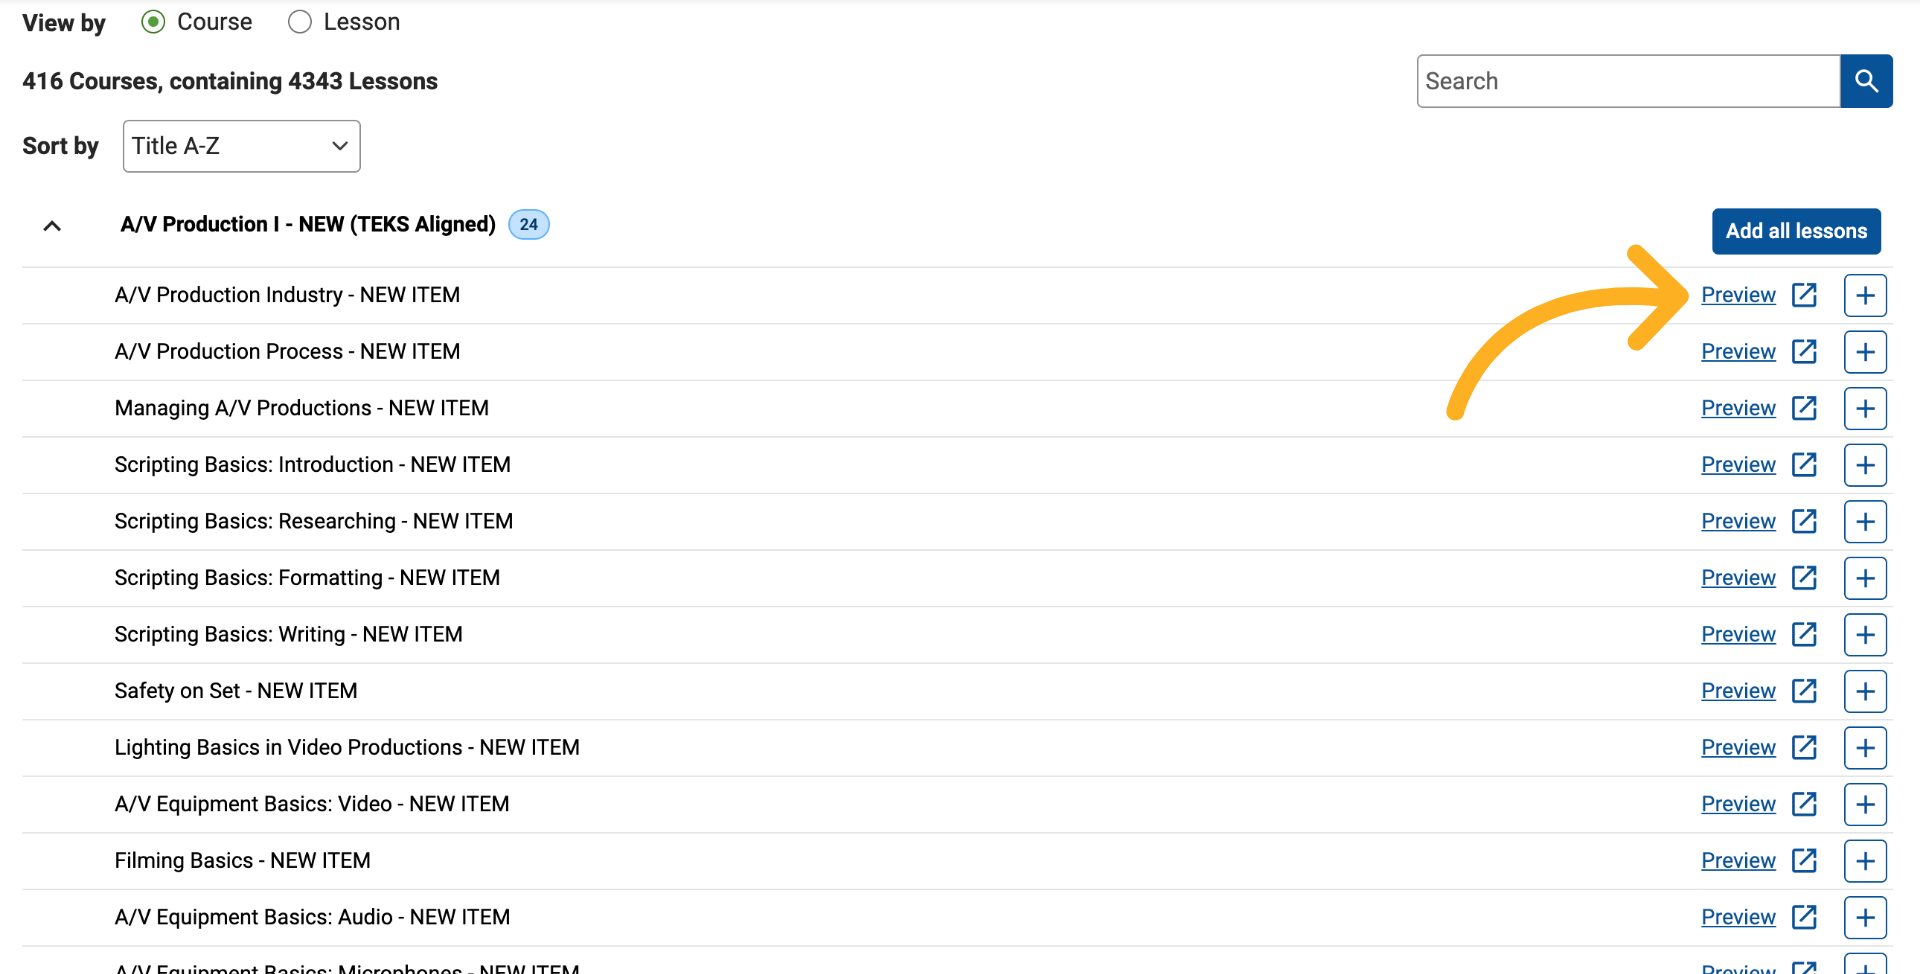
To learn more about a lesson before adding it, click the Preview link next to the lesson.
7. Preview Lessons
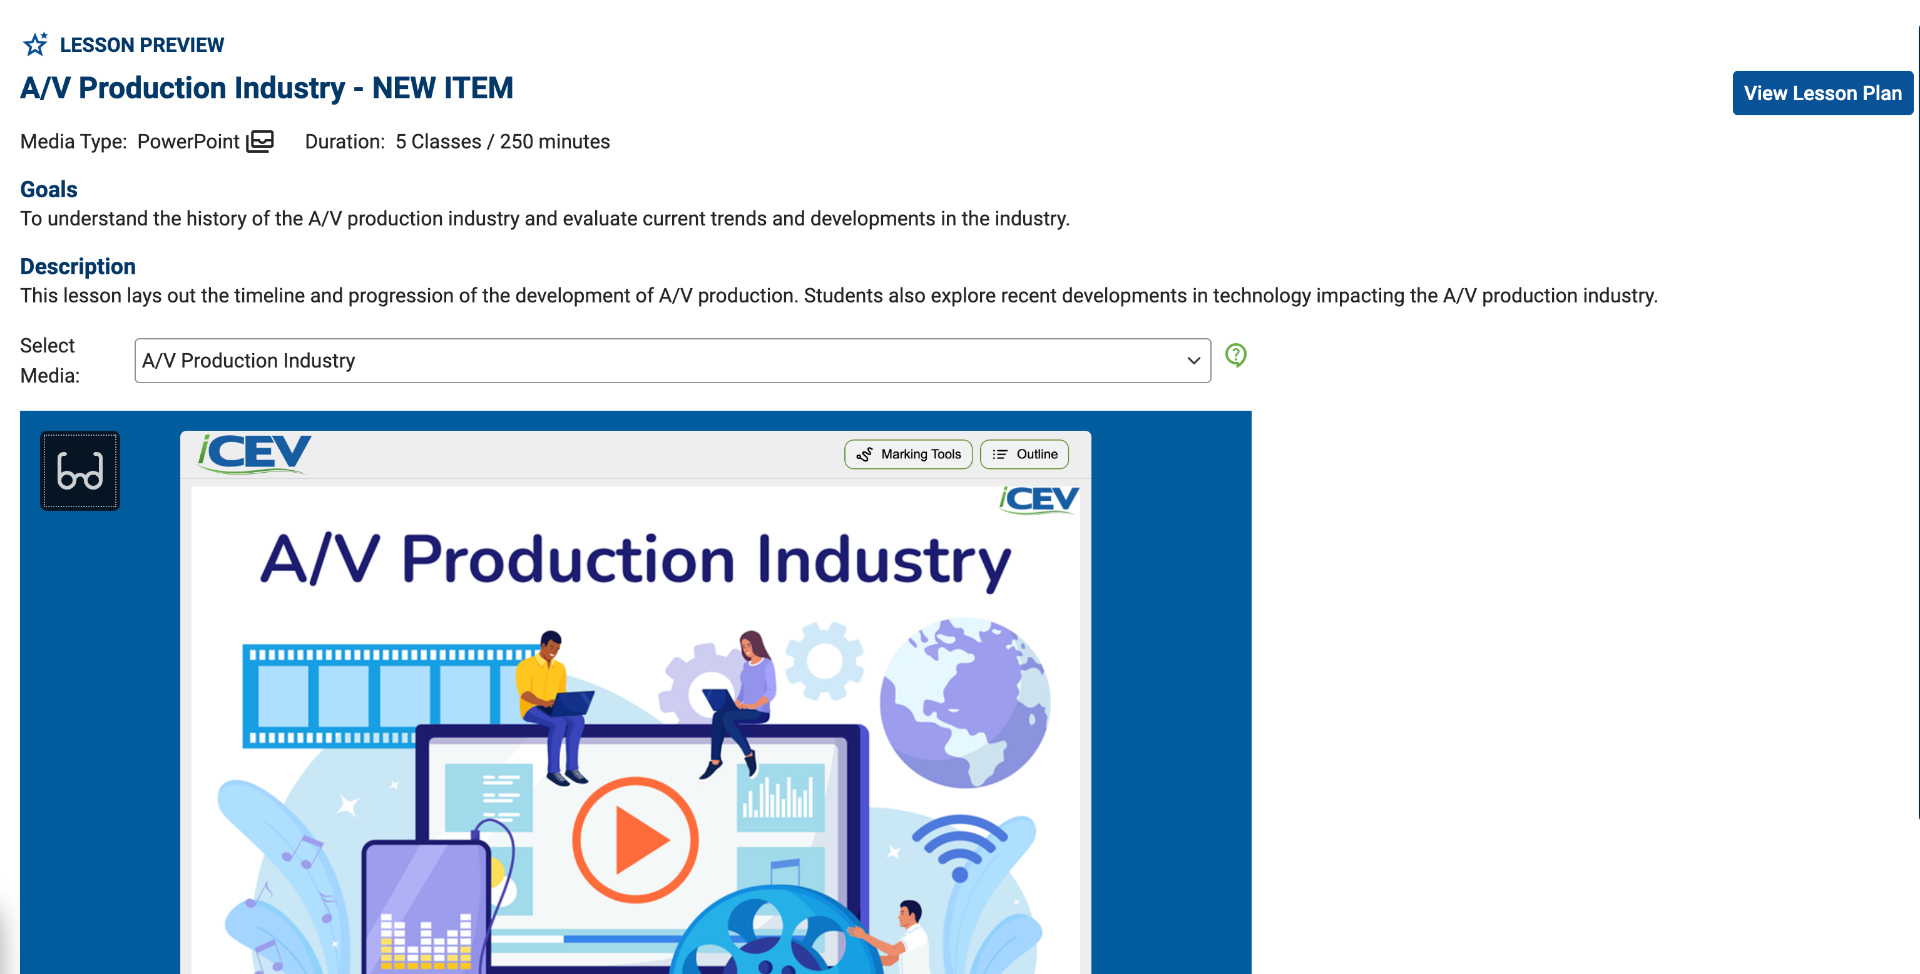
The lesson preview provides additional information, including:
-
Lesson descriptions
-
Media types and lesson duration
-
Course goals and content
-
Lesson plans
8. Add Individual Lessons
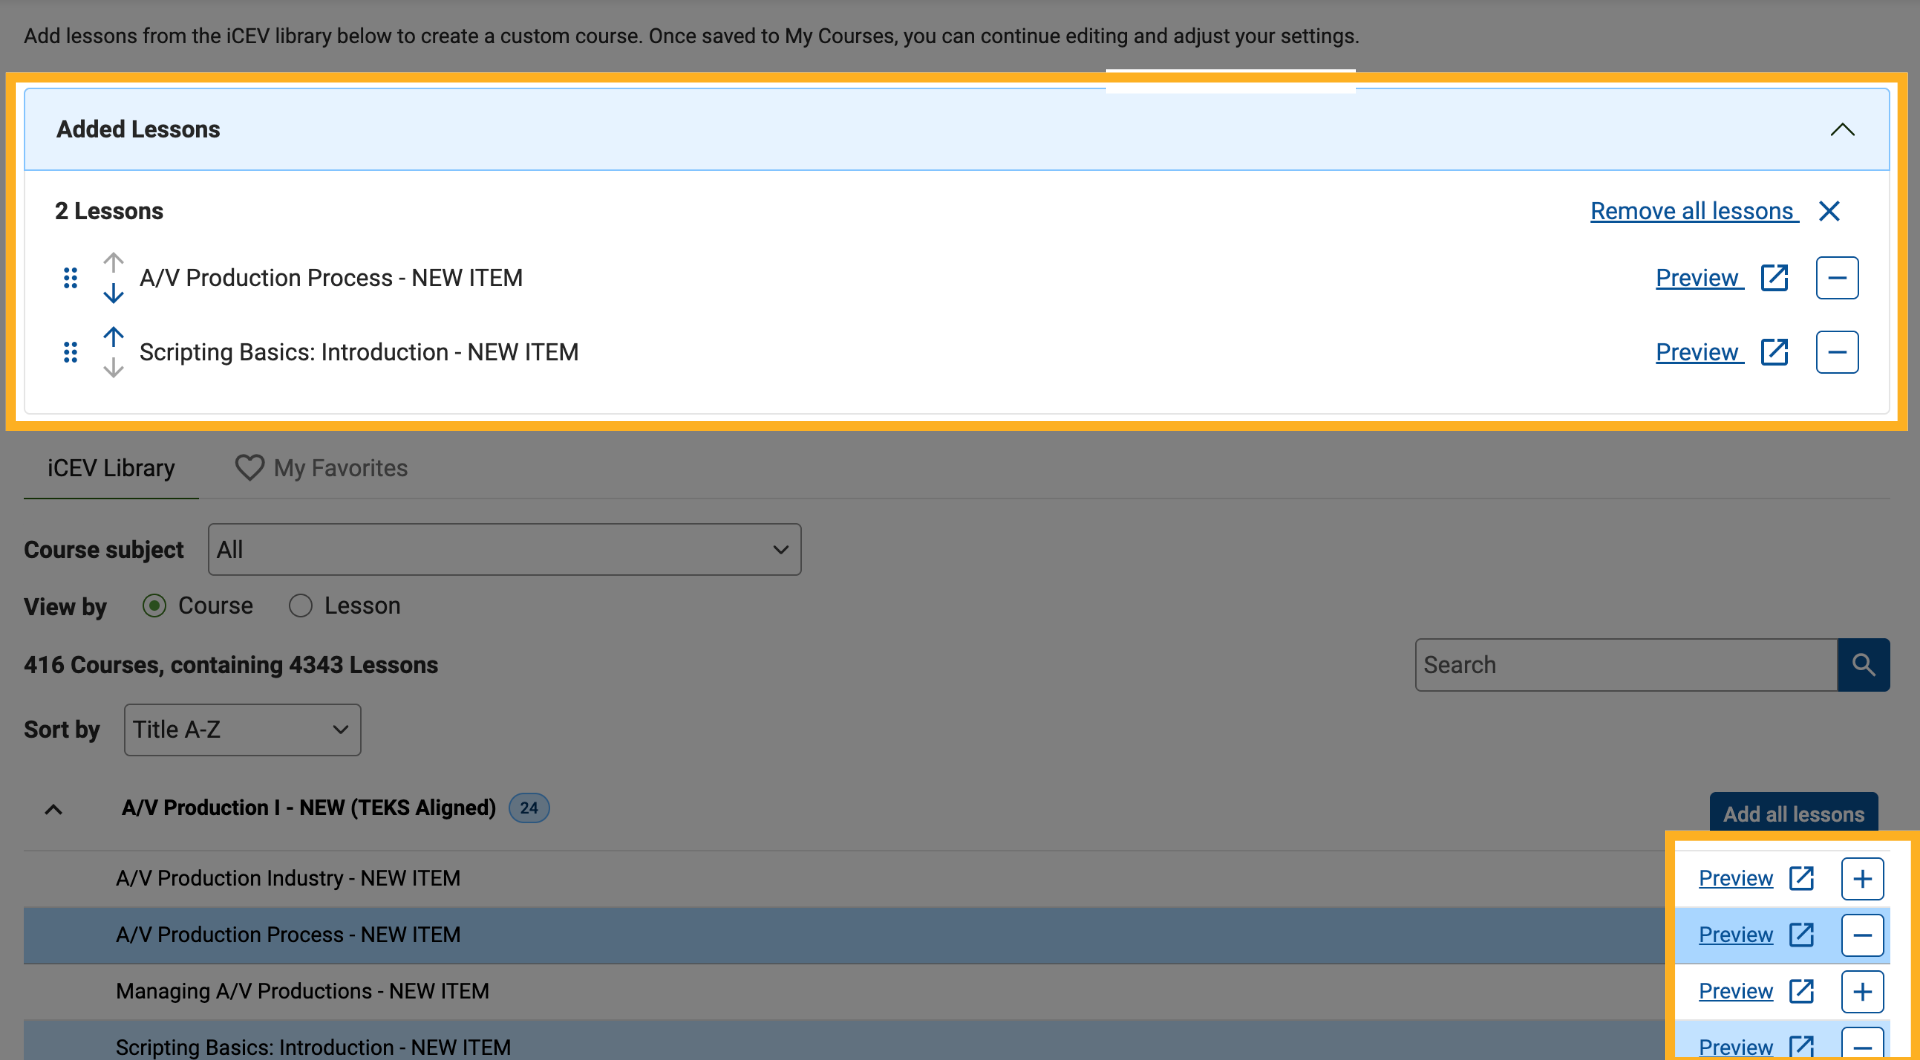
To add a lesson to your custom course, click the Add (+) button next to the lesson.
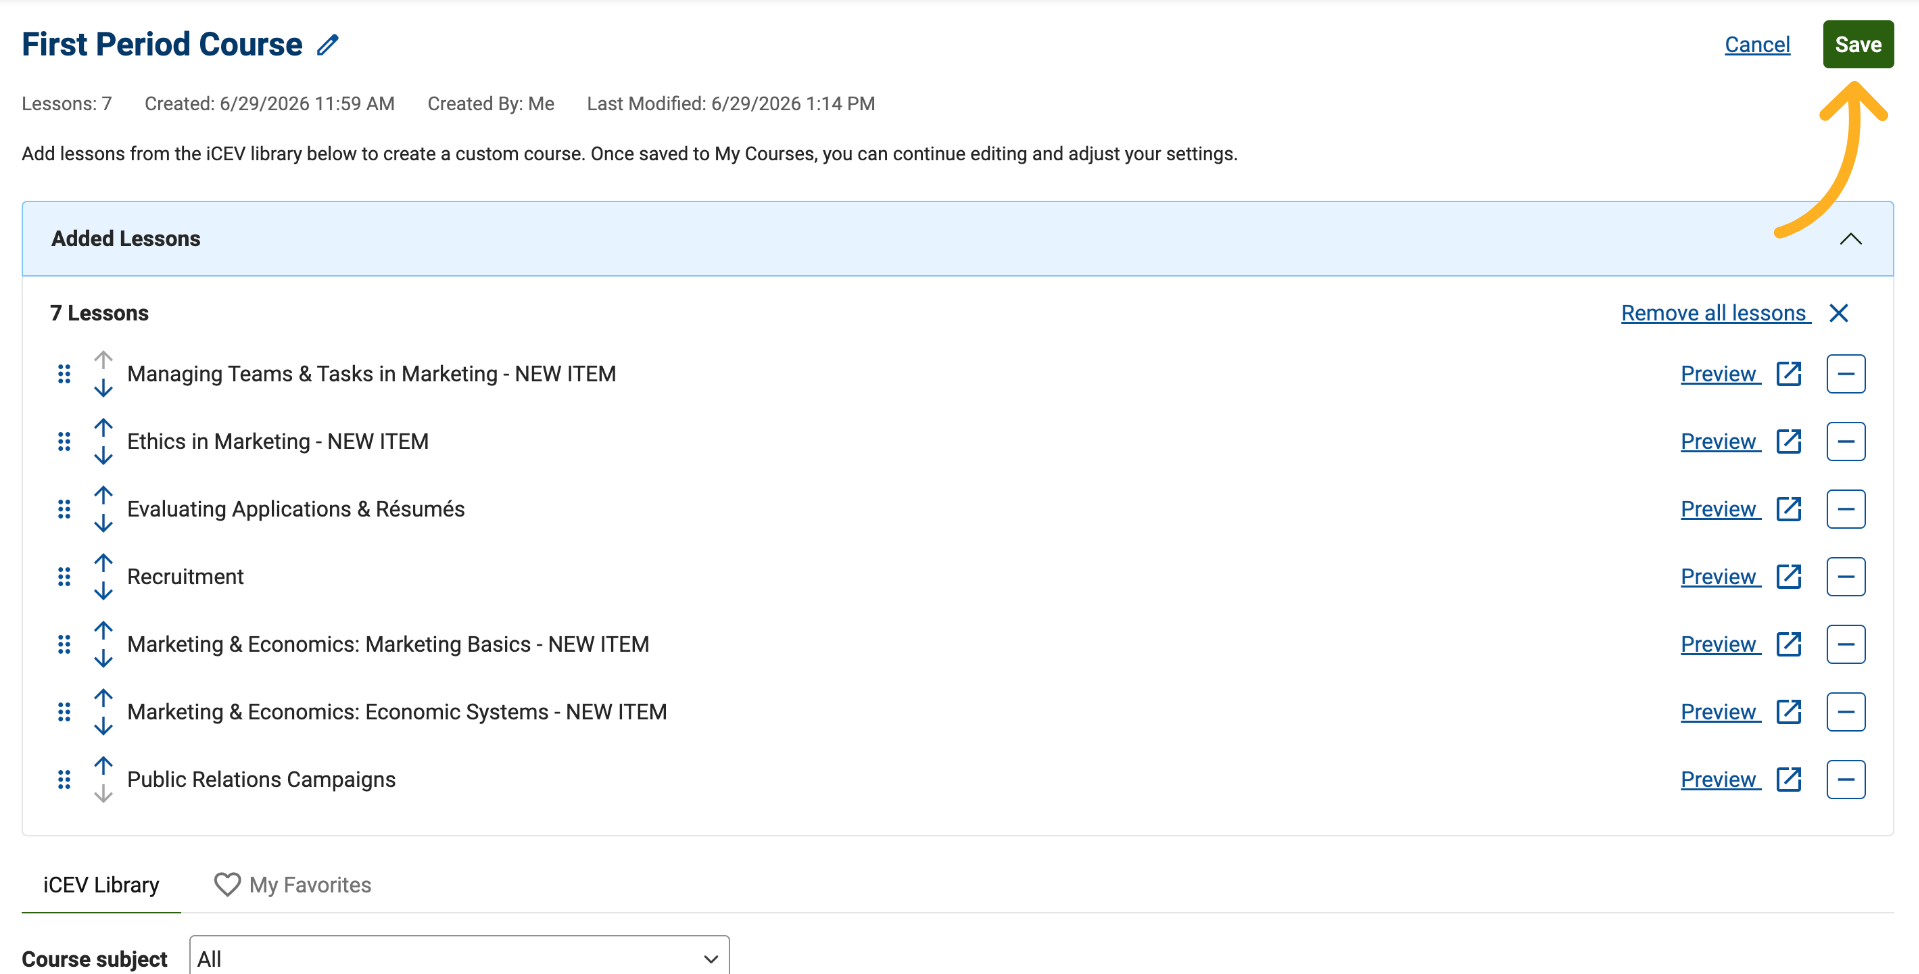
Added lessons appear in the course queue at the top of the page, allowing you to track your selections as you build your course.
9. Identify Added Lessons
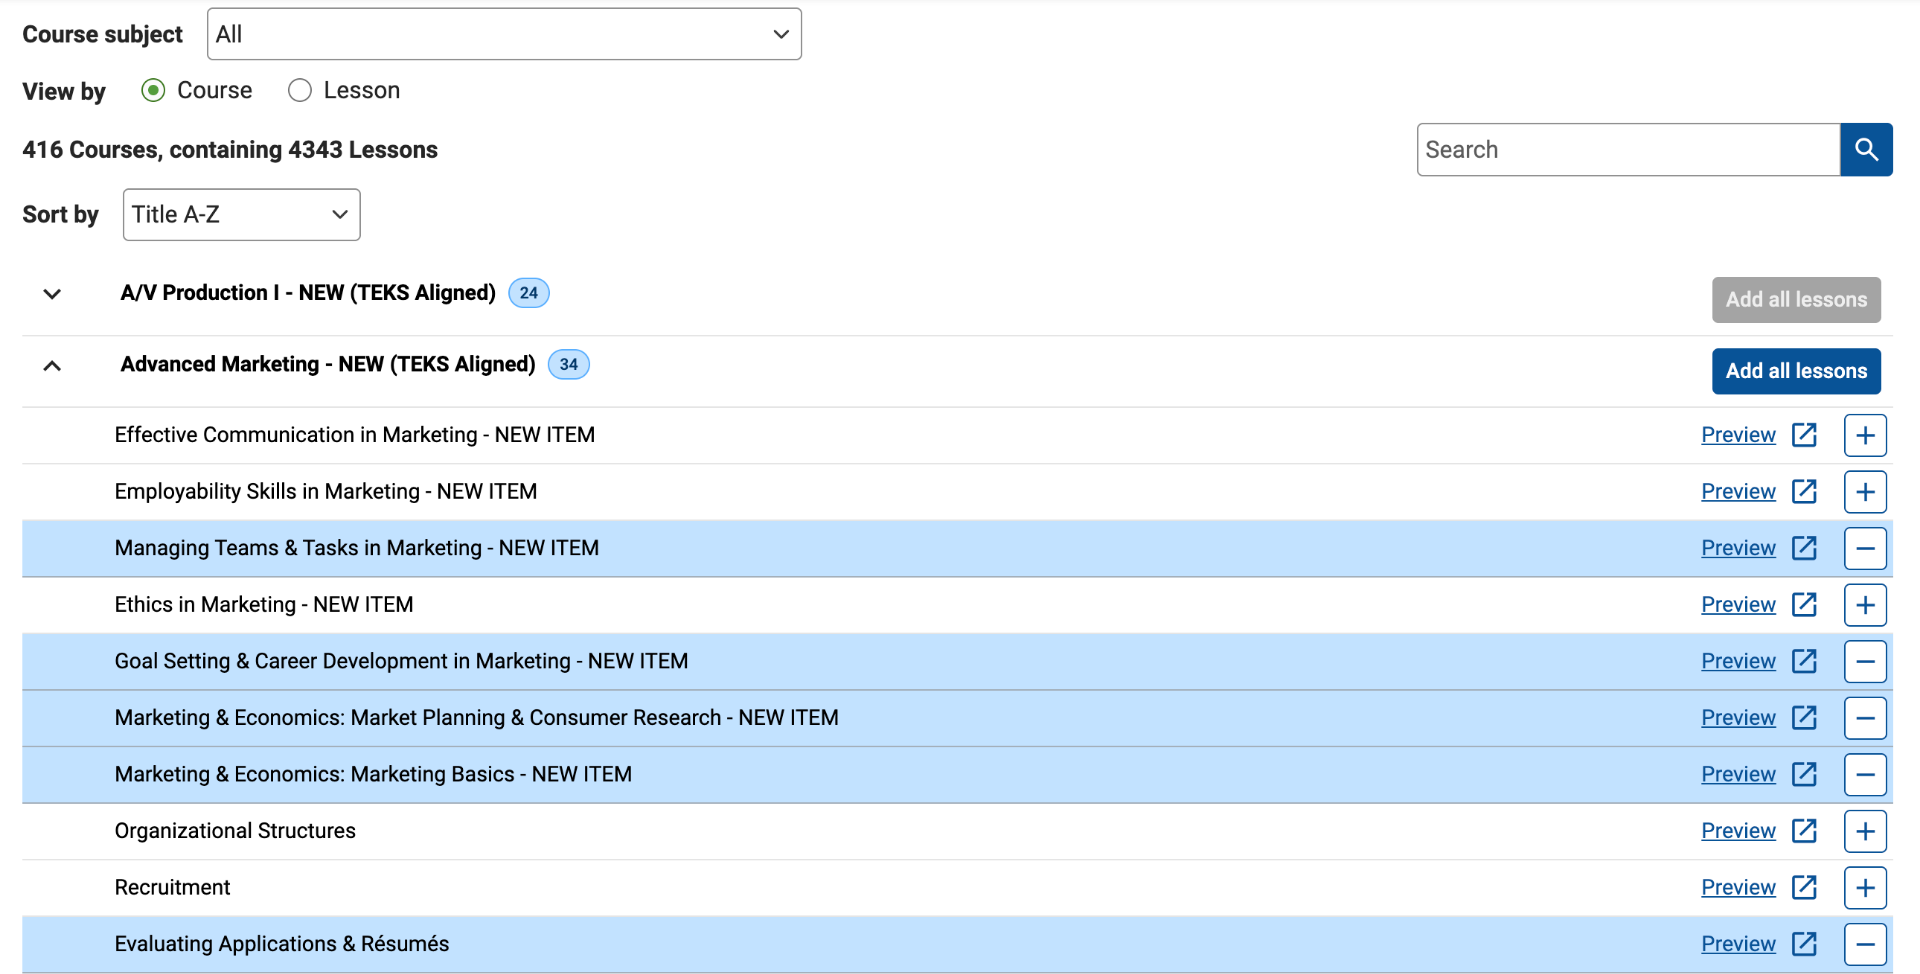
Lessons that have already been added to your course are highlighted.
This visual indicator helps prevent duplicate selections, as the same lesson cannot be added to a course more than once.
10. Add All Lessons from a Course
If you want to include every lesson from a course, click Add All Lessons.
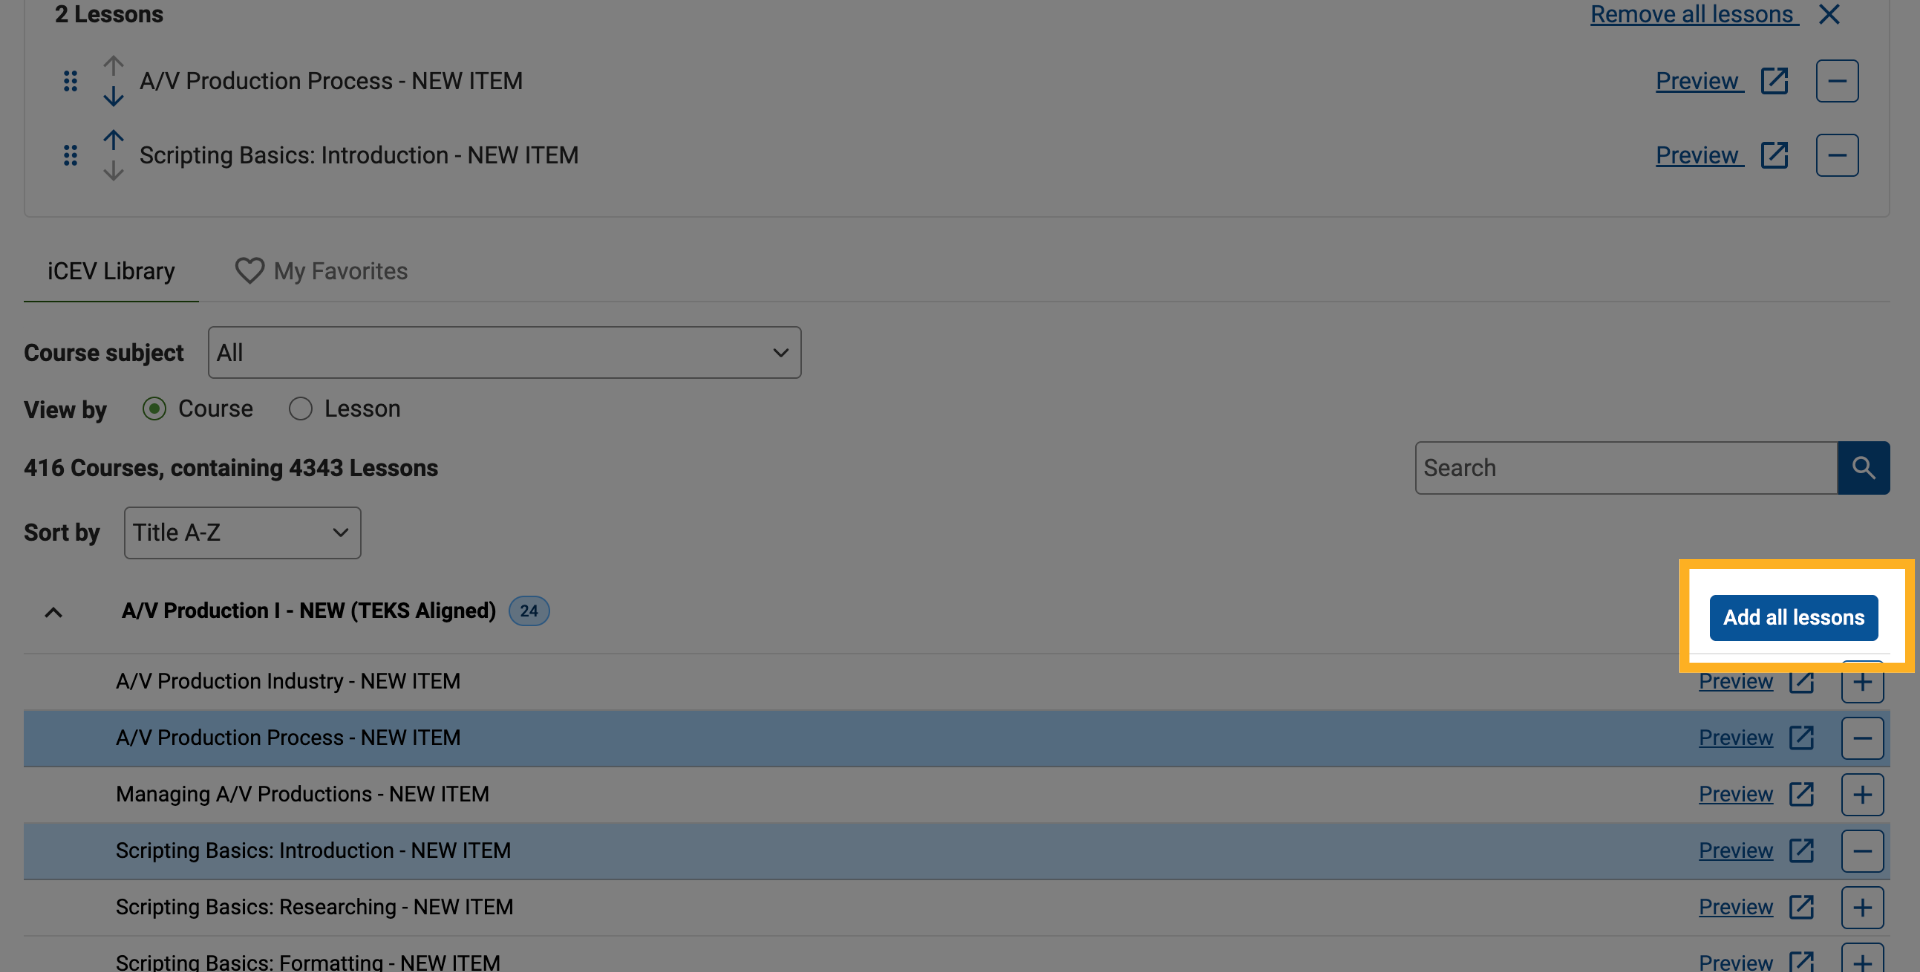
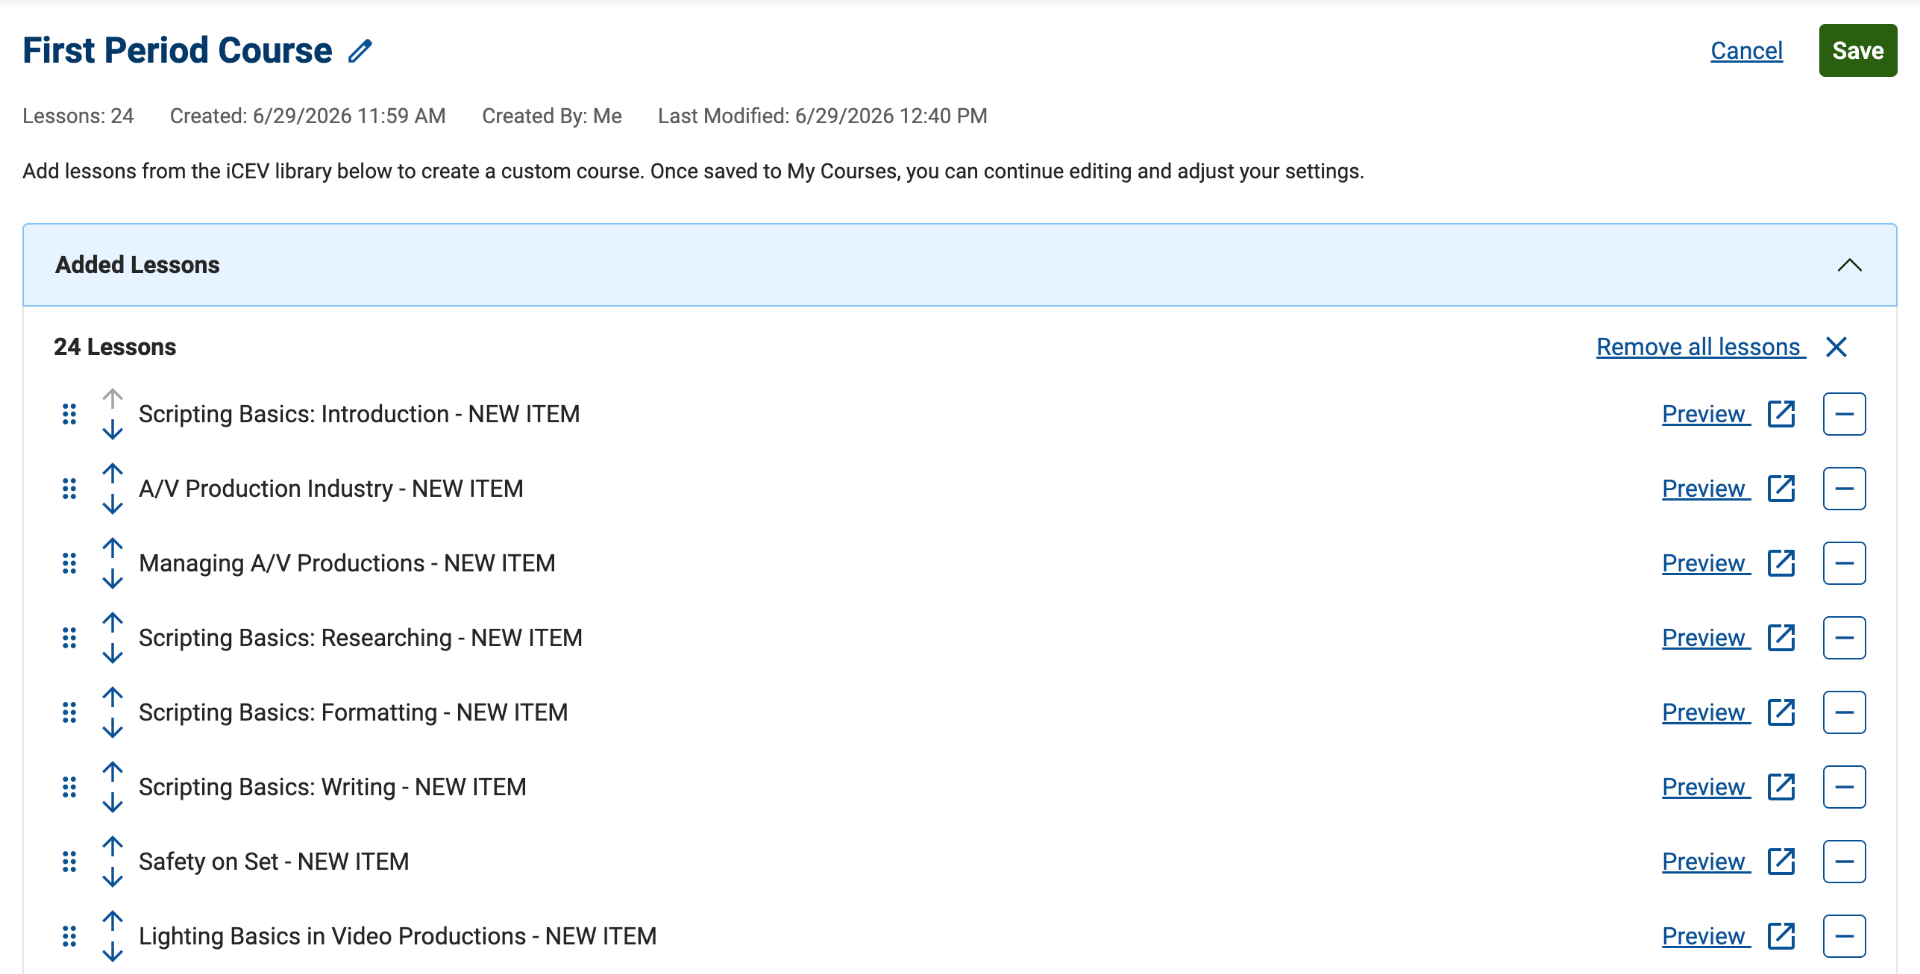
11. Review Automatically Added Lessons
When you select Add All Lessons, every lesson from that course is added to your custom course queue automatically.
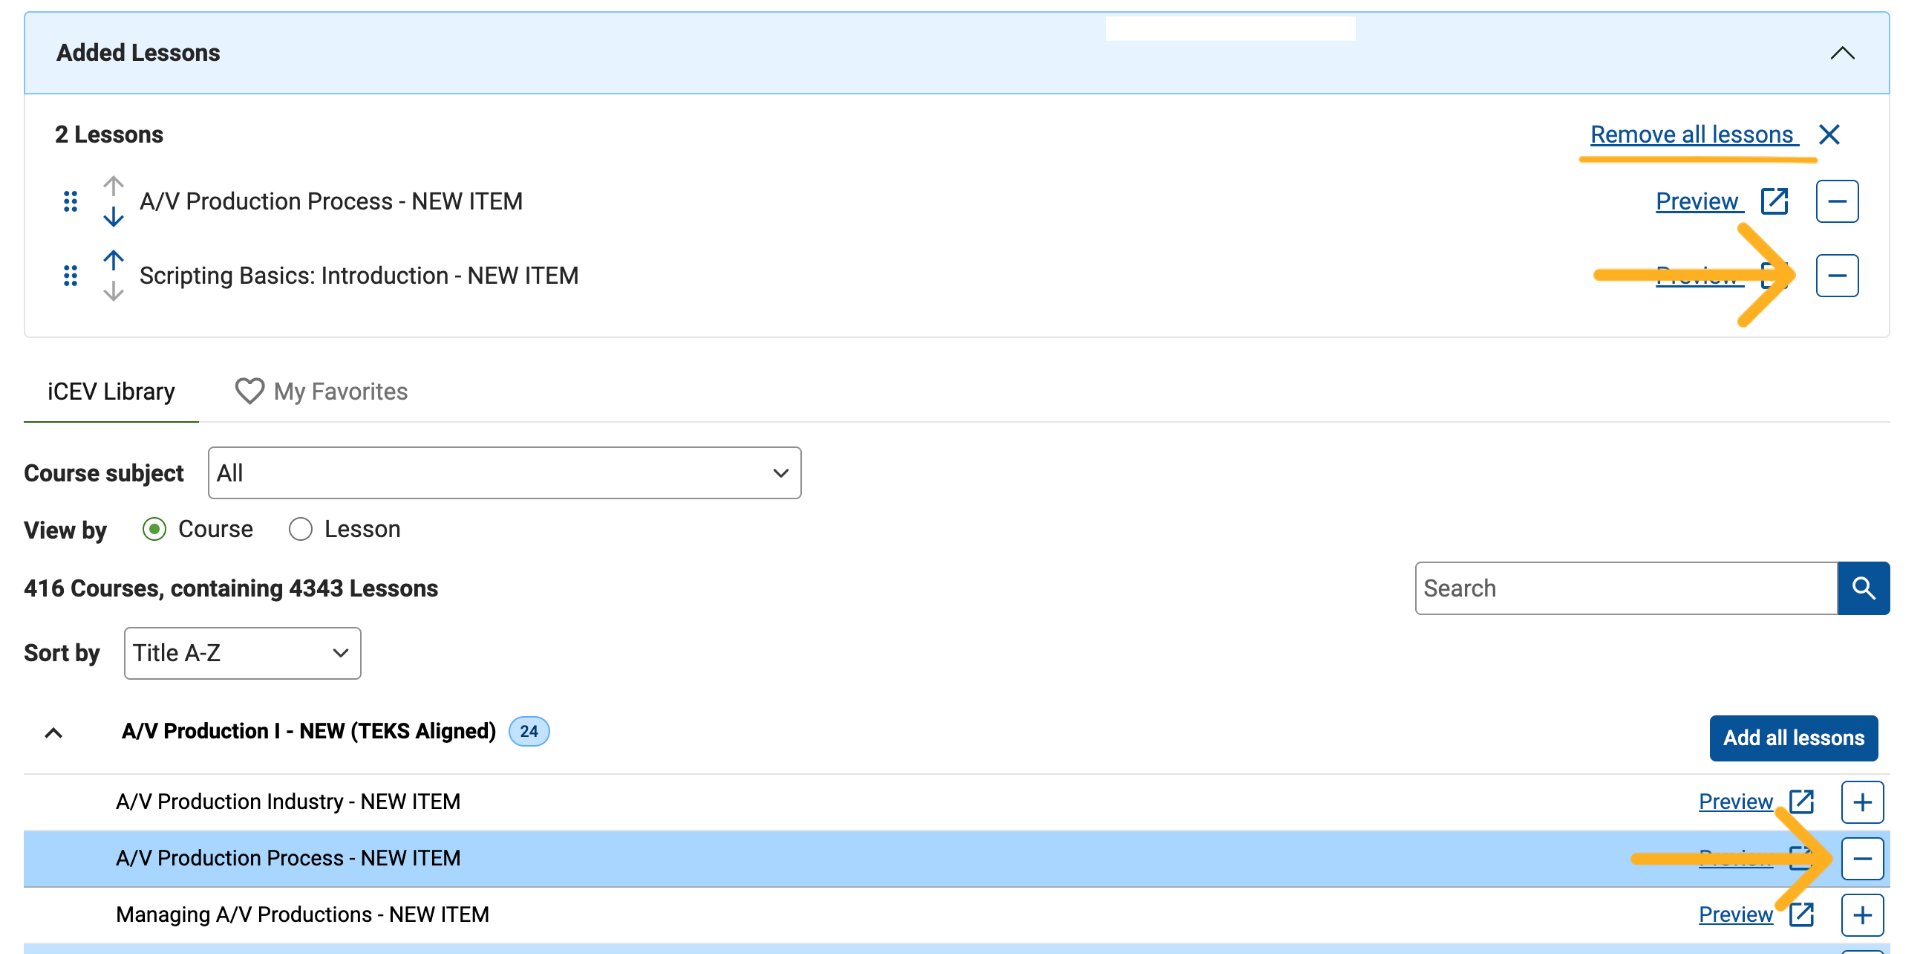
12. Remove Lessons
You can remove lessons from your course in several ways:
-
Click the Remove (-) button from the lesson list.
-
Click the Remove (-) button directly from the course queue.
-
Click Remove All Lessons above the course queue to clear all selected lessons.
Removing a lesson from either location removes it from your customized course.
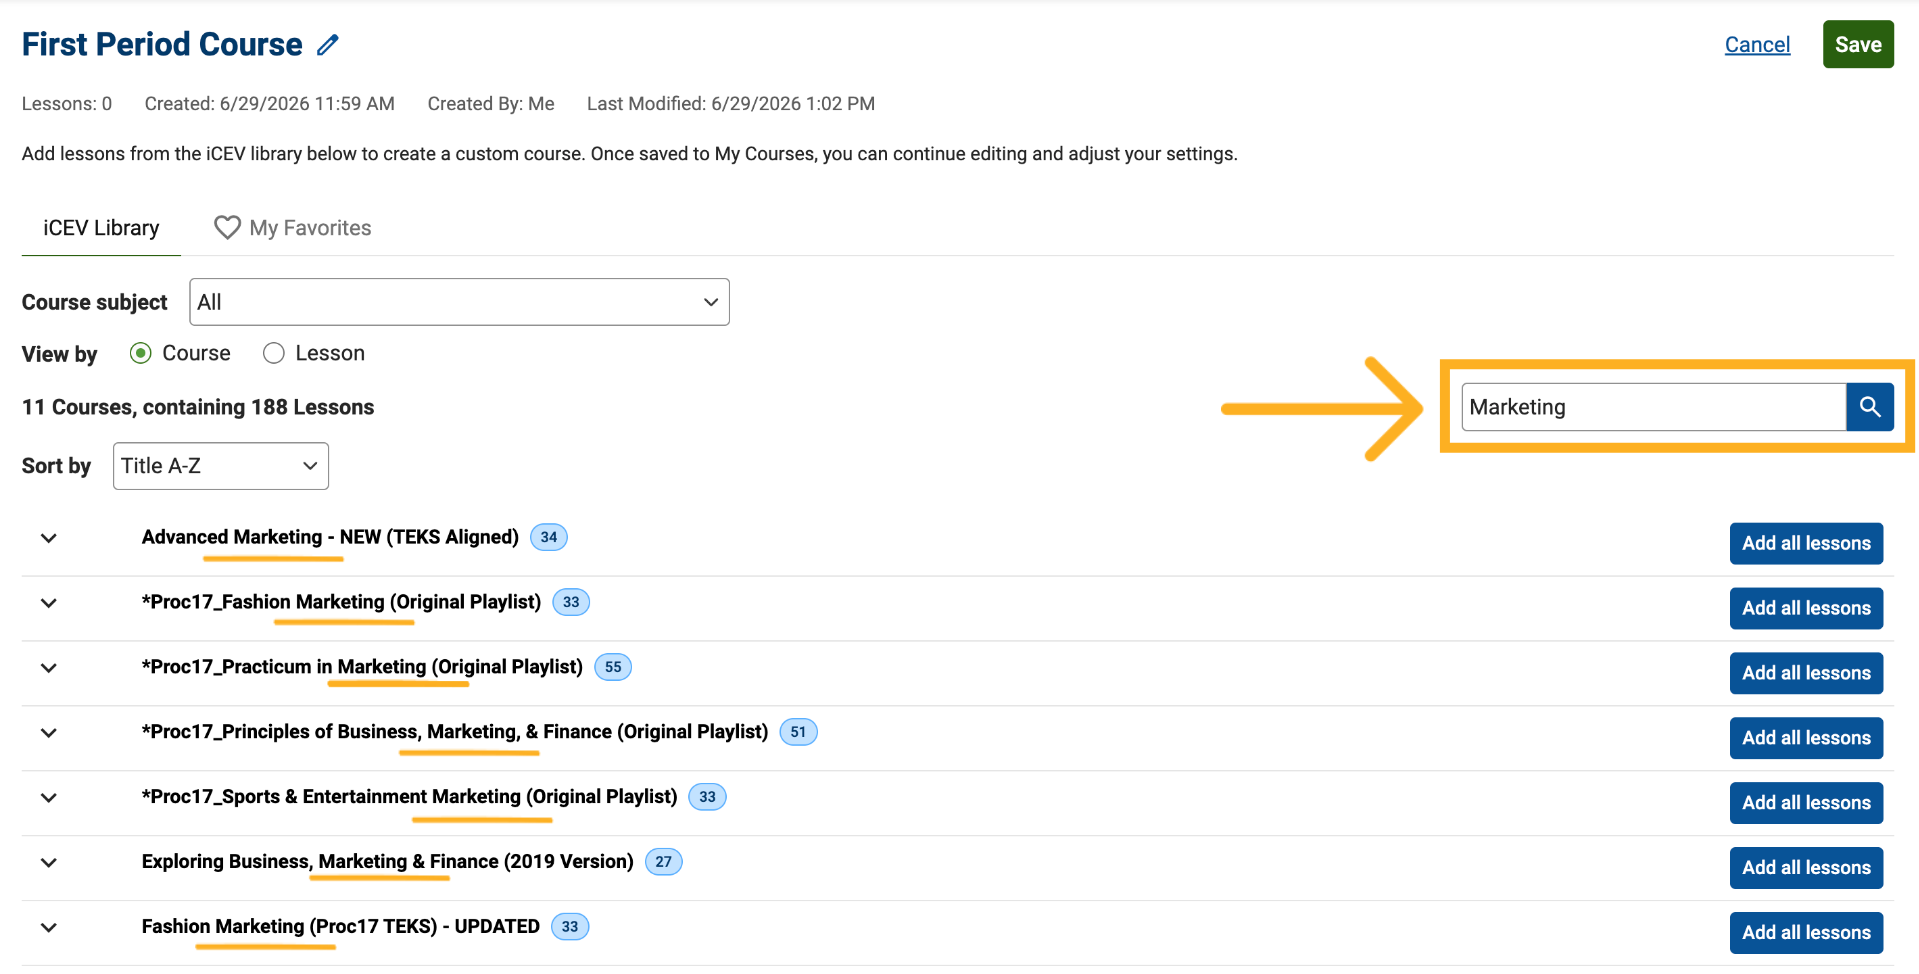
13. Search for Content
Use the search bar to find specific content quickly.
Search results are matched based on:
-
Course titles when using Course View
-
Lesson titles when using Lesson View
14. Search by Individual Lesson
Switch to Lesson View when searching for specific lessons rather than entire courses.
You can also narrow your results by subject area to find relevant lessons more efficiently.
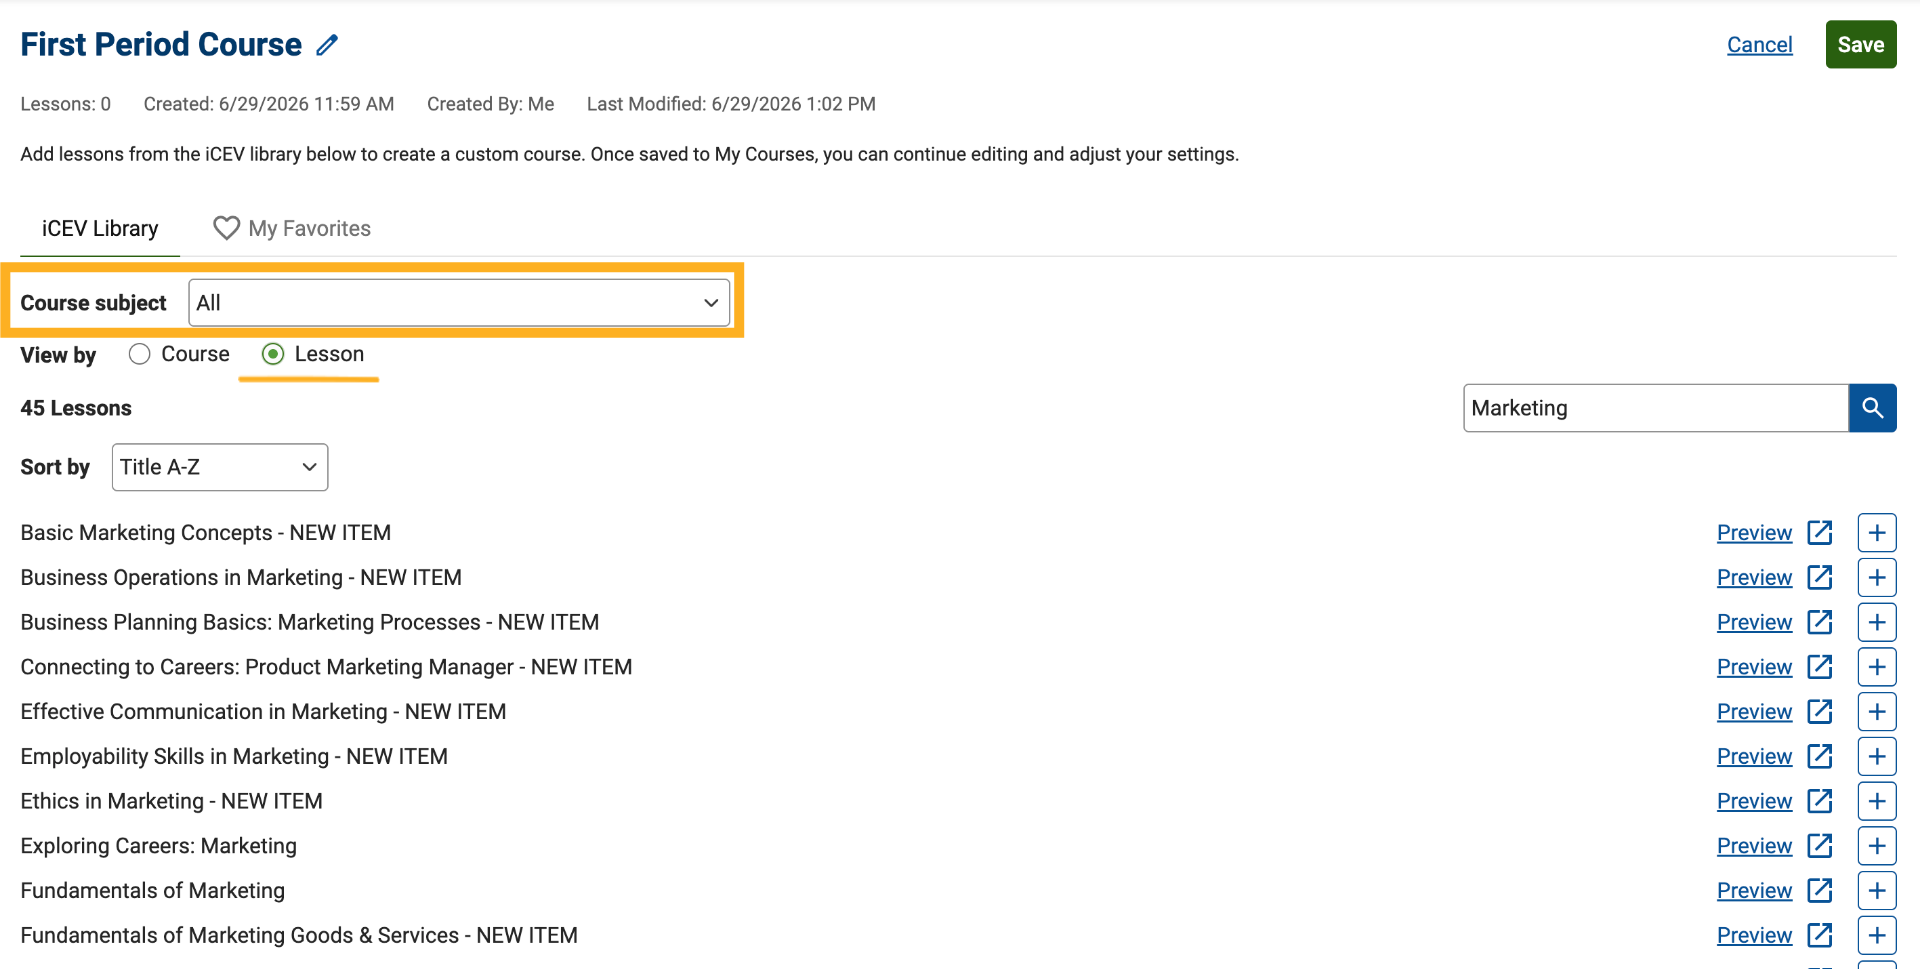
15. Add Lessons from Favorites
If you have previously favorited courses, access them through the My Favorites tab.
While individual lessons cannot be favorited within the Build Your Own Course workflow, favorite courses can help you quickly locate and add lessons to your custom course.
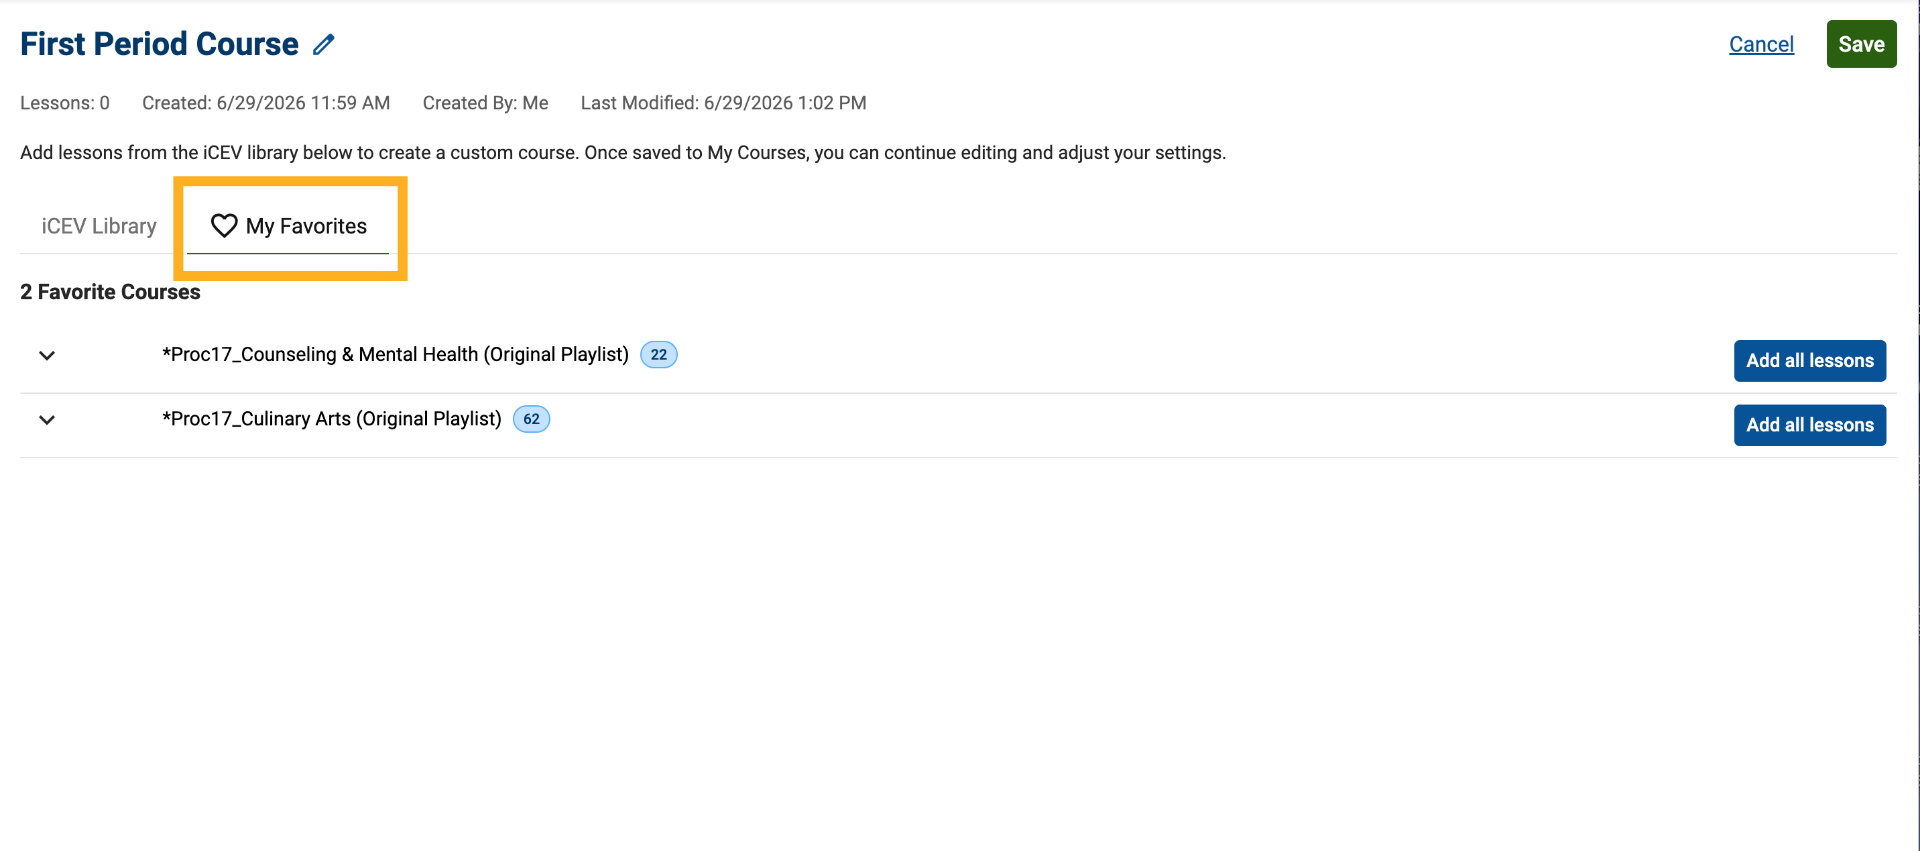
16. Review Your Selected Lessons
As you build your course, review the lesson queue at the top of the page.
From here, you can:
-
Preview lessons
-
Remove lessons individually
-
Verify lesson selections
-
Make adjustments before saving
When you are satisfied with your lesson selections, save the course.
17. Assign Course Rosters (Optional)
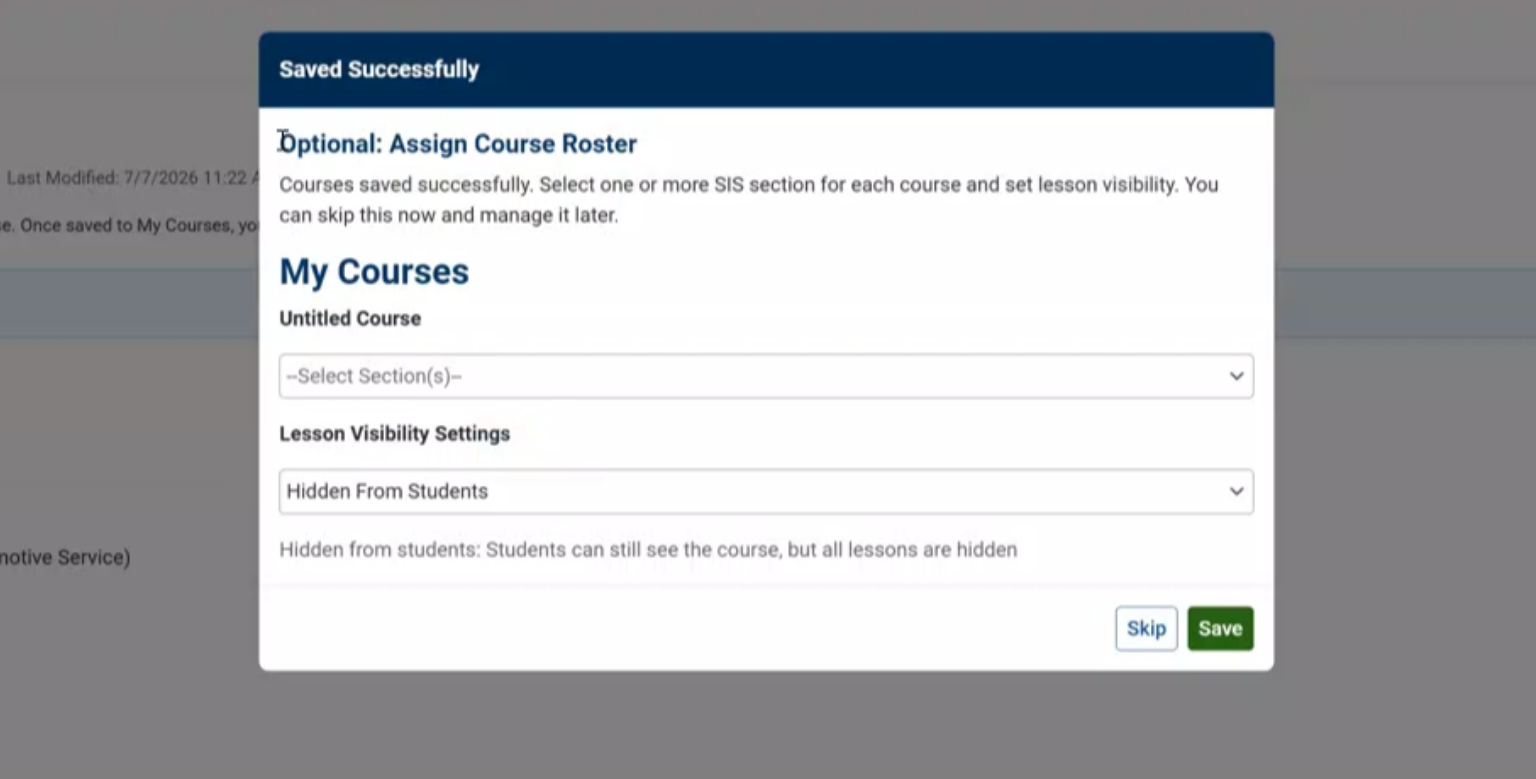
A roster assignment window appears.
You can:
-
Assign one or more SIS sections to each course
-
Configure lesson visibility settings
If you prefer, you can skip this step and assign rosters later.
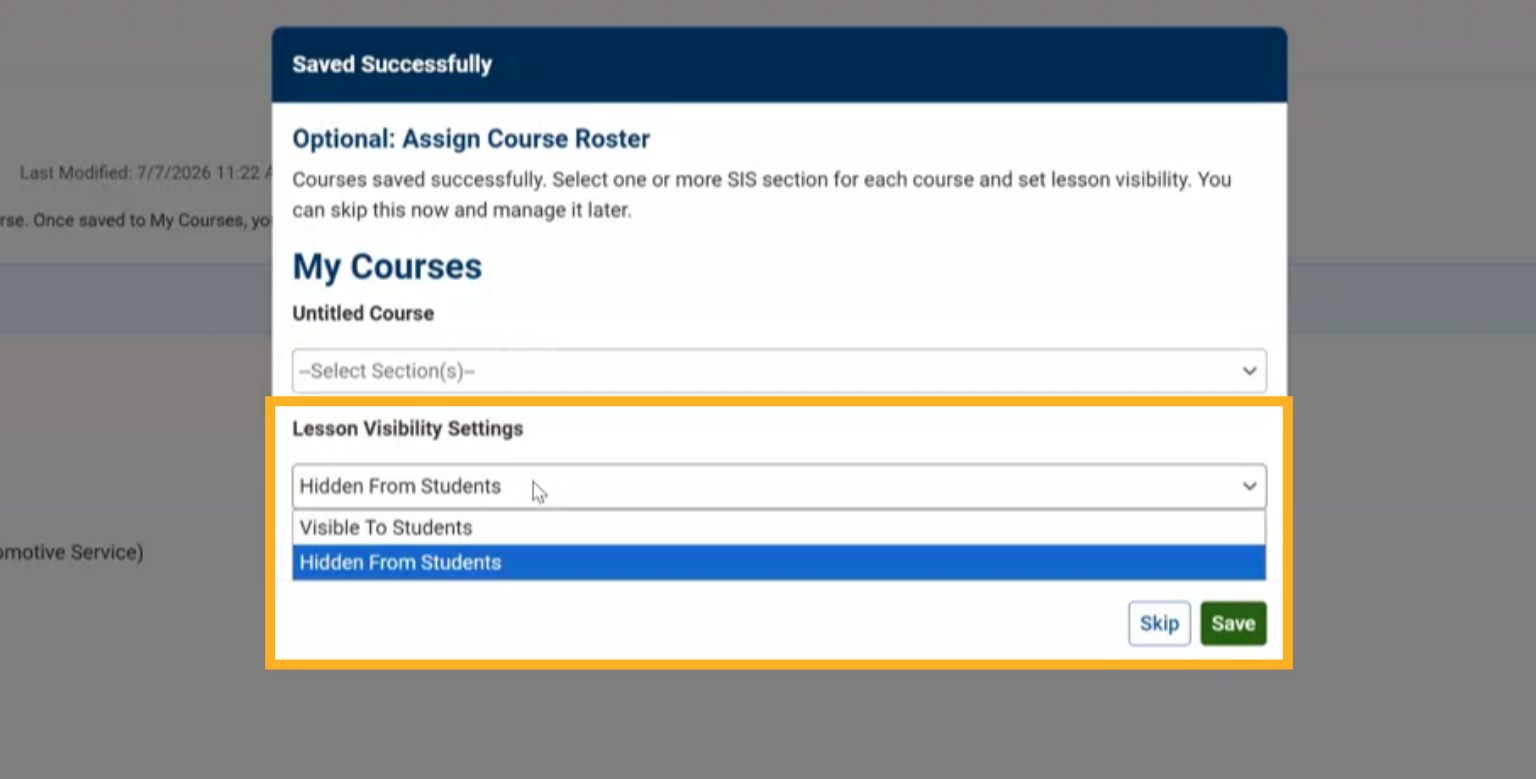
18. Configure Lesson Visibility
Choose how students will access course content:
Visible to Students
Lessons become available to students immediately after the course is saved.
Hidden from Students
Lessons remain unavailable until you manually make them visible later.
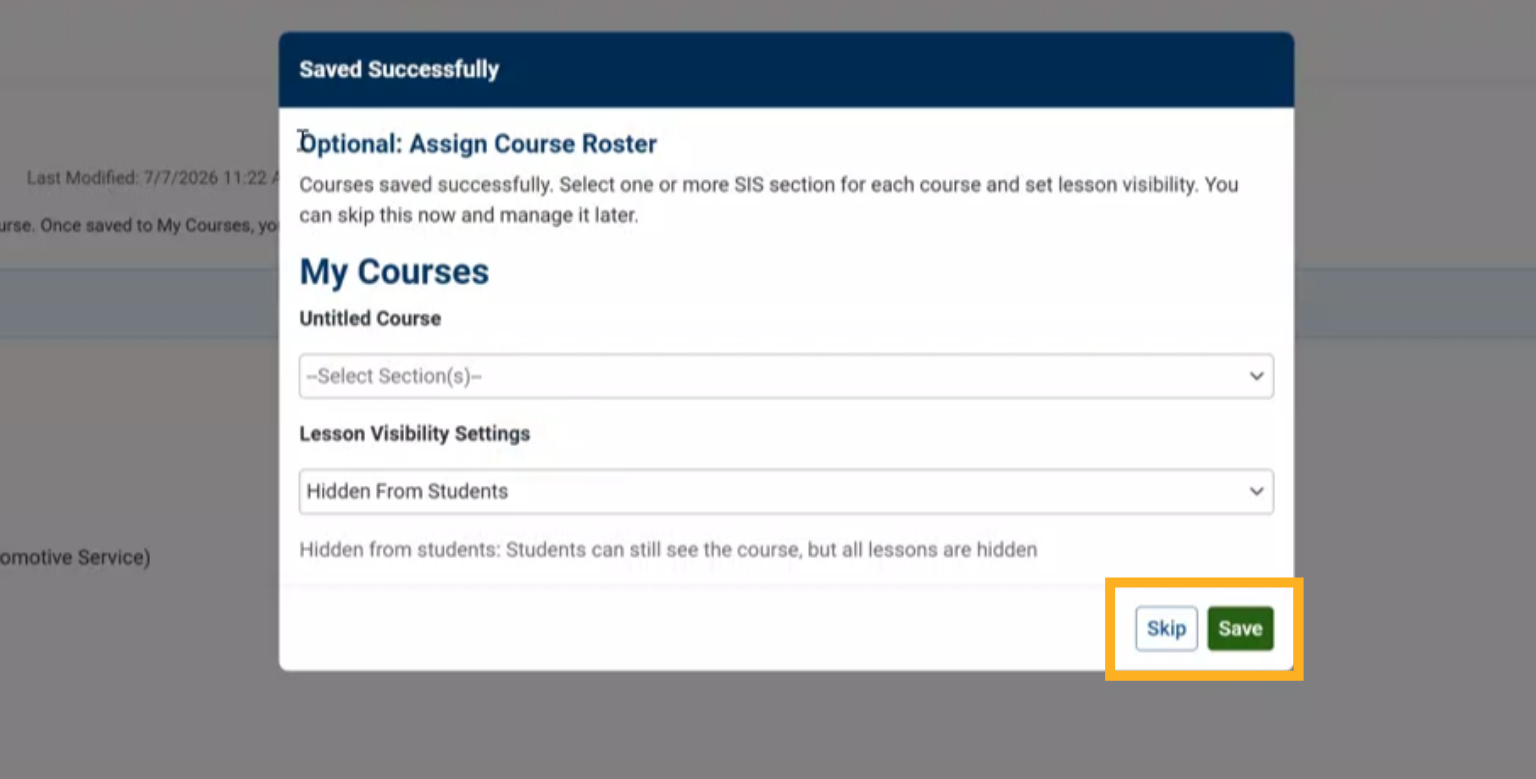
19. Save Roster Assignments
Click Save to apply your course roster assignments and visibility settings.
If you do not want to configure these settings now, select Skip and return to them later.
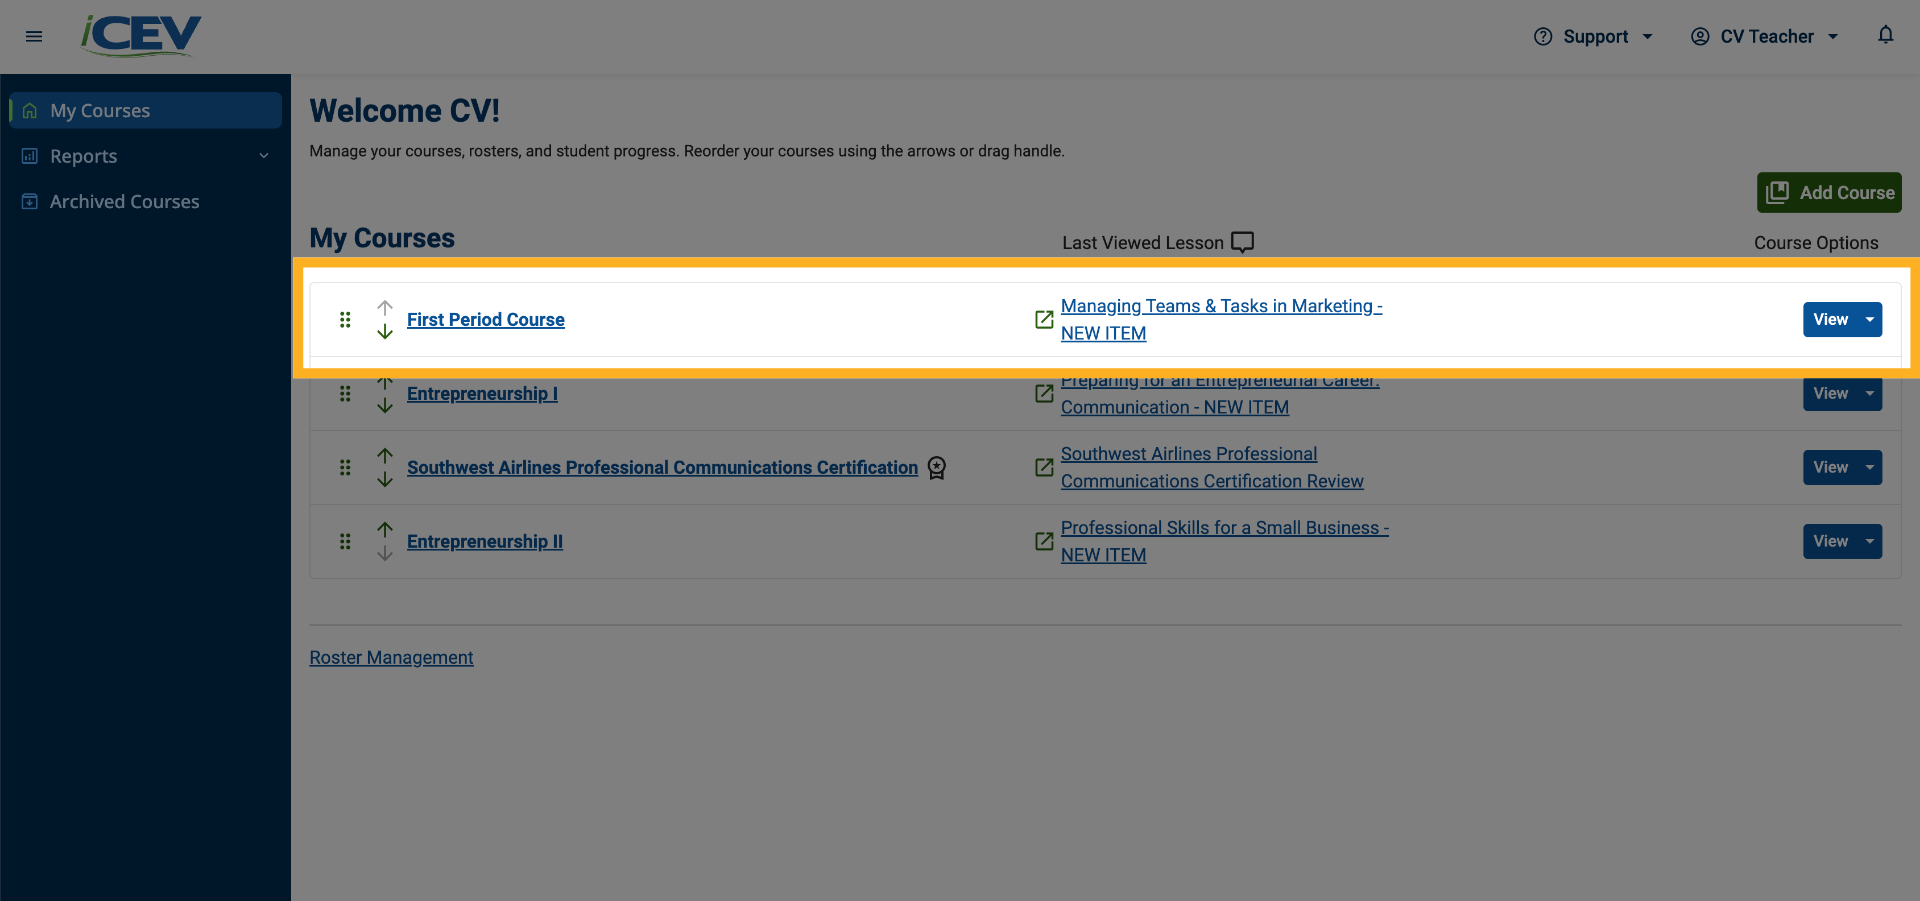
20. Save Your Custom Course
Your customized course will be added to your My Courses page and will appear at the top of your course list.
21. Edit Your Course Later
You can continue customizing your course at any time.
Open the course from your My Courses page and select the Customize This Course button to use the available customization tools to:
-
Add lessons
-
Remove lessons
-
Rearrange lesson order
This flexibility allows you to update your course as your classroom needs change.