

CTE Curriculum
Prepare learners with CTE curriculum aligned to industry standards.


1. Select the Certification Exam
From the My Courses page:
- Both the proctor and the student should click the View button next to the certification exam.

2. Manage Proctors
Teacher View – Proctor the Exam
- Scroll to the bottom of the Lessons page.
- Under the Proctors menu:
- Click Manage Proctors to assign someone else.
- Or click Proctor Exam to begin proctoring yourself.

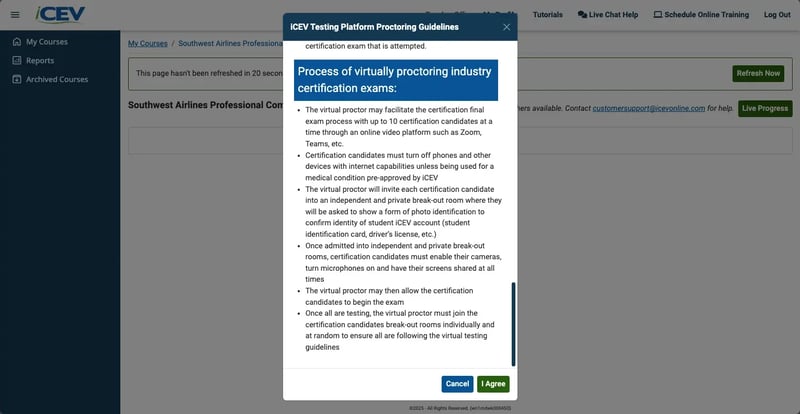
- Read through the iCEV Testing Platform Proctoring Guidelines and click the I Agree button to proceed.
Student View – Confirm Identity
- Students must complete the Final Assessment(s) on the required Lessons pages.
- Once completed, a green checkmark will appear next to the lesson, showing their highest score.

- The student must check the identity confirmation box and click the green Check In button.

- The message “Waiting on Proctor to start the exam” will appear.
3. Checking In
Status: Not Checked-In
- If a student is ready but hasn’t checked in, their status will show “Not Checked-In.”
- Ask the student to click the Check In button.
- Once checked in, their status will change to “Ready.”
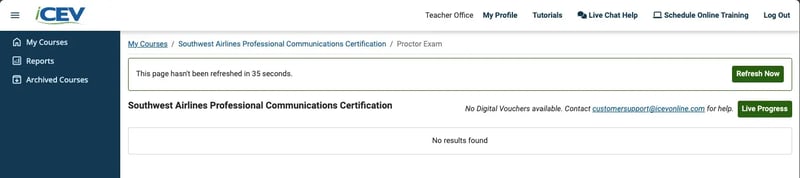
💡 Use the floating timer to see when the proctor page was last refreshed. If a student says they’ve checked in but doesn’t appear, click “Refresh Now.”

Student needs to check-in
The student needs to click the Check In button
Status: Ready
- Indicates the student has completed all required lessons and successfully checked in.

New Feature Column - Exam Language
With the addition of a Spanish language option for select certification exams, a new Exam Language column has been added.

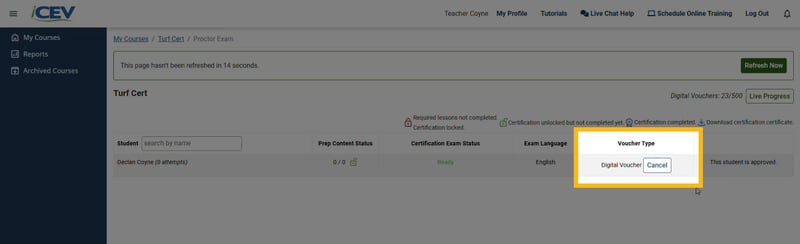
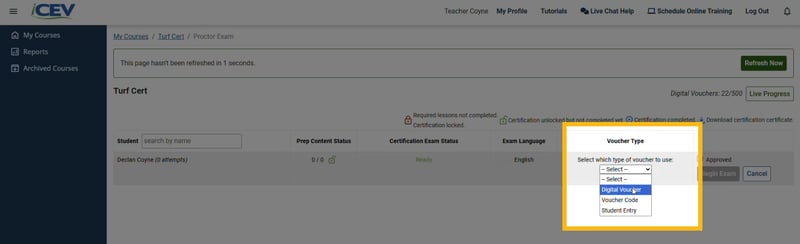
Voucher Selection
Once the student is marked as Ready, select the type of voucher to use:

Option 1: Digital Vouchers (Most Common)
- Select Digital Voucher from the dropdown.
- Check the Approved checkbox.
- Click Begin Exam.

Using Digital Vouchers
Student Experience:
- After approval, the student will see the Next button.
- Then, they’ll click Launch Exam to begin.

What students will see after they click the Next button
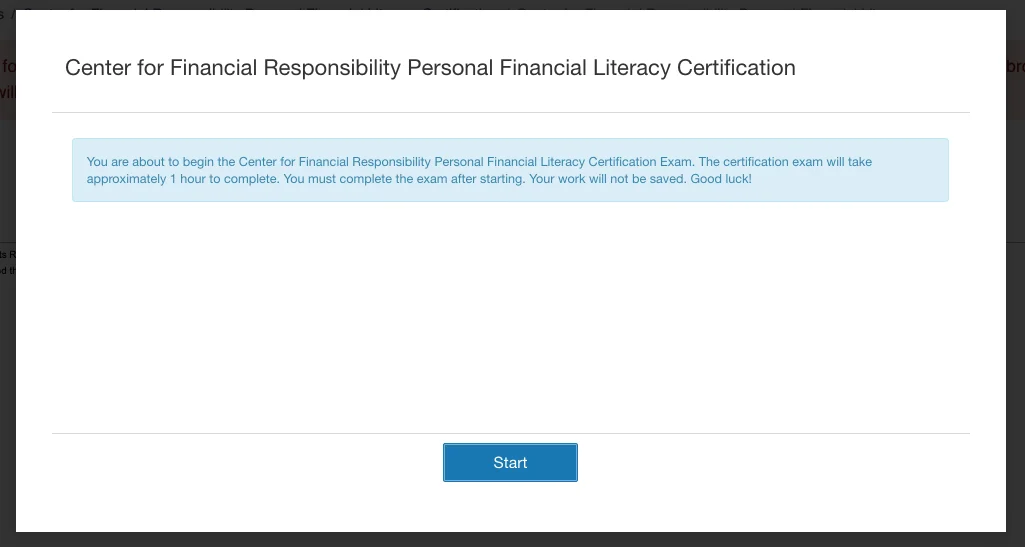
What students will see after they click the Launch Exam button
Option 2: Voucher Code
- Select Voucher Code from the dropdown.
- Enter the voucher code in the textbox.
- Check the Approved checkbox.
- Click Begin Exam.

Using Voucher Code

Important Notes:
- If the voucher code is invalid or already used, the student will be redirected to the Purchase Certification screen.

- The student must re-enter the code or use a new one on their own device.
What students will see after they click the Next button and a valid voucher code is used
What students will see after they click the Launch Exam button
Option 3: Student Entry
Use this if the student:
- Purchased a voucher from a campus bookstore.
- Is paying via credit card.
Steps:
- Select Student Entry from the dropdown.
- Check the Approved checkbox.
- Click Begin Exam.

Using Student Entry
What students will see after opening the certification course
What students will see after they click the Next button and a valid voucher code is used
What students will see after they click the Launch Exam button
New Feature - Canceling Wrong Voucher Type Exam
If the wrong voucher type is selected and approved for a student, you can now cancel the exam as long as you do so before the student starts testing.
This will restart the certification exam process so the student must check in again, allowing you to choose the correct voucher type.
4. Monitoring Student Progress
⏱️ Students must begin the exam within 20 minutes of proctor approval. If not, their session will be terminated and they’ll receive a reset notification.

In this scenario, the certification candidate has been placed in a "reset" state and will not need an additional digital voucher or be prompted for credit card information to start the exam. Each certification candidate is granted three resets.
A proctor can monitor a student's progress as they take a certification exam.
Understanding the Live Progress Screen Icons
The Live Progress screen includes visual indicators to help proctors monitor student activity in real time.
Active Column
✓ Green Check Mark – Student (Jesse) is actively working within the iCEV exam window.

✕ Red X – Student (Jesse) has clicked outside of the iCEV exam window and may be accessing something else.
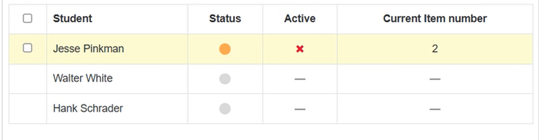
— Dash – Exam has been submitted.
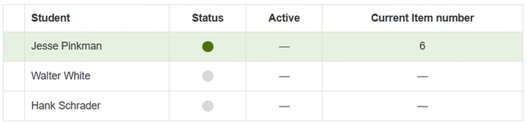
Status Column
⏸ Pause Icon – The question review pop-up box is open.
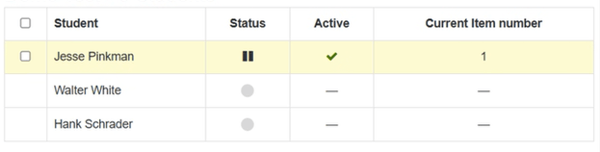
Orange Dot – Exam is currently active.
Green Dot – Exam has been submitted.
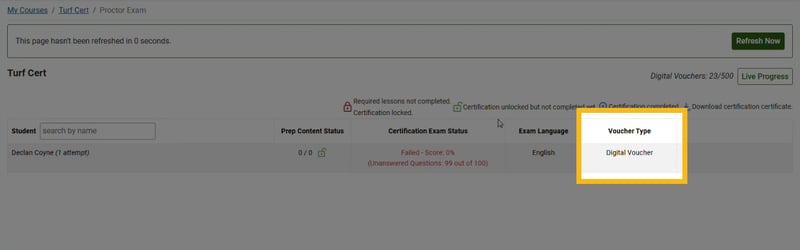
New Feature - Voucher Type Column
The Voucher Type column shows which type of voucher the student used when taking the certification exam.
5. Resetting the Exam
🔄 The Reset button only appears if a student checks back in after a technical issue.
Reset Guidelines
- Each student is allowed three resets per certification.
- Resets are used to avoid consuming a voucher when:
- The device loses power or internet.
- The student closes the browser or navigates away.
- The student fails to start the exam within 20 minutes of approval.
Reset Scenario:
- If the student doesn’t begin the exam within the required time, they’ll be placed in a reset state.
- No new voucher is needed, and the student can restart the exam.