CTE Curriculum
Prepare learners with CTE curriculum aligned to industry standards.


1. Open the Course Setup Tool
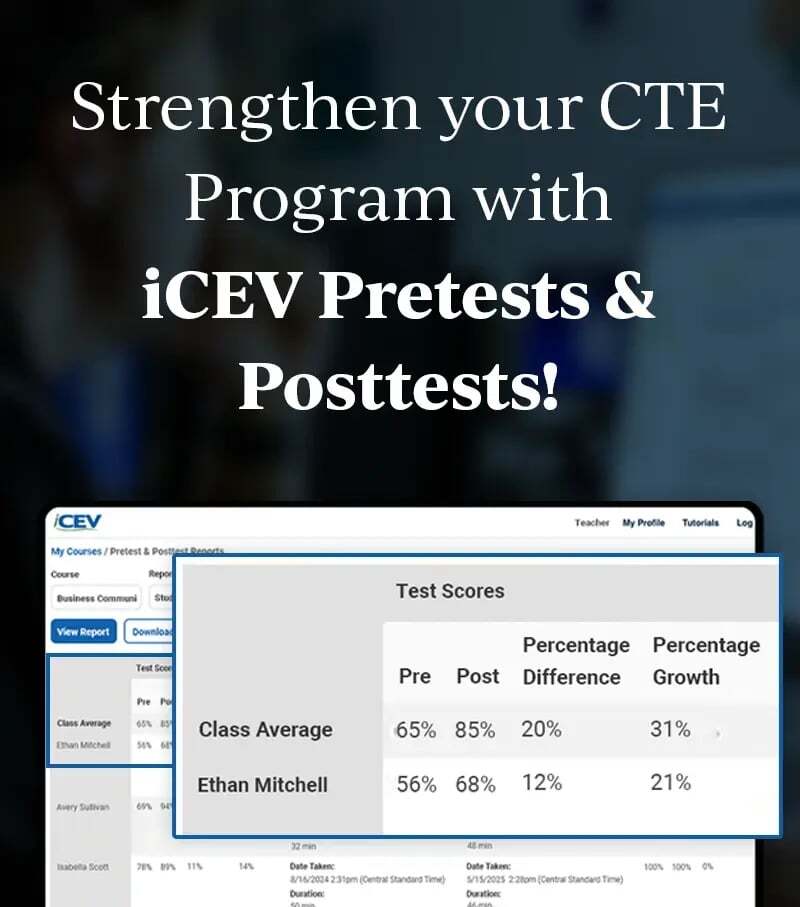
From your My Courses page, click Add Course to start creating a new course.
2. Access the Course Library
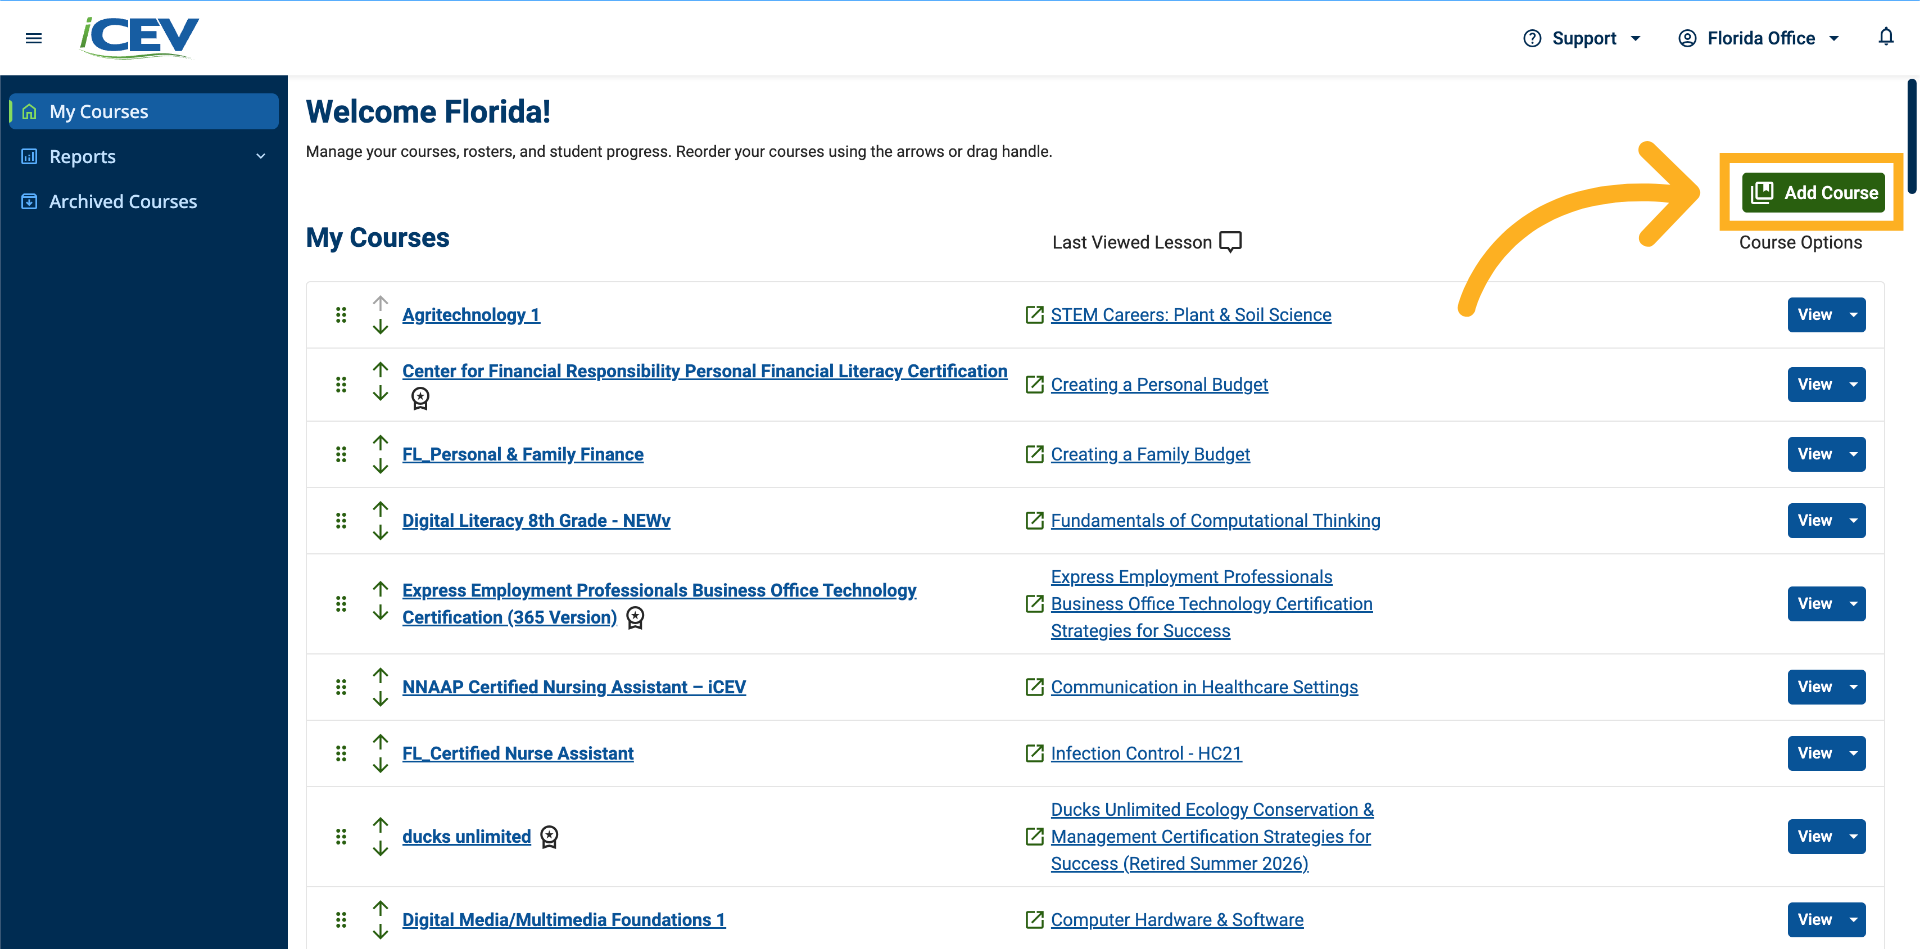
A window will appear with options to either browse ready-made courses or build your own course from iCEV lessons.
Select Browse Courses to open the Course Library and view all available courses.
3. Review Available Courses
The Course Library displays all courses available based on your organization's access and the subject licenses assigned to your account.
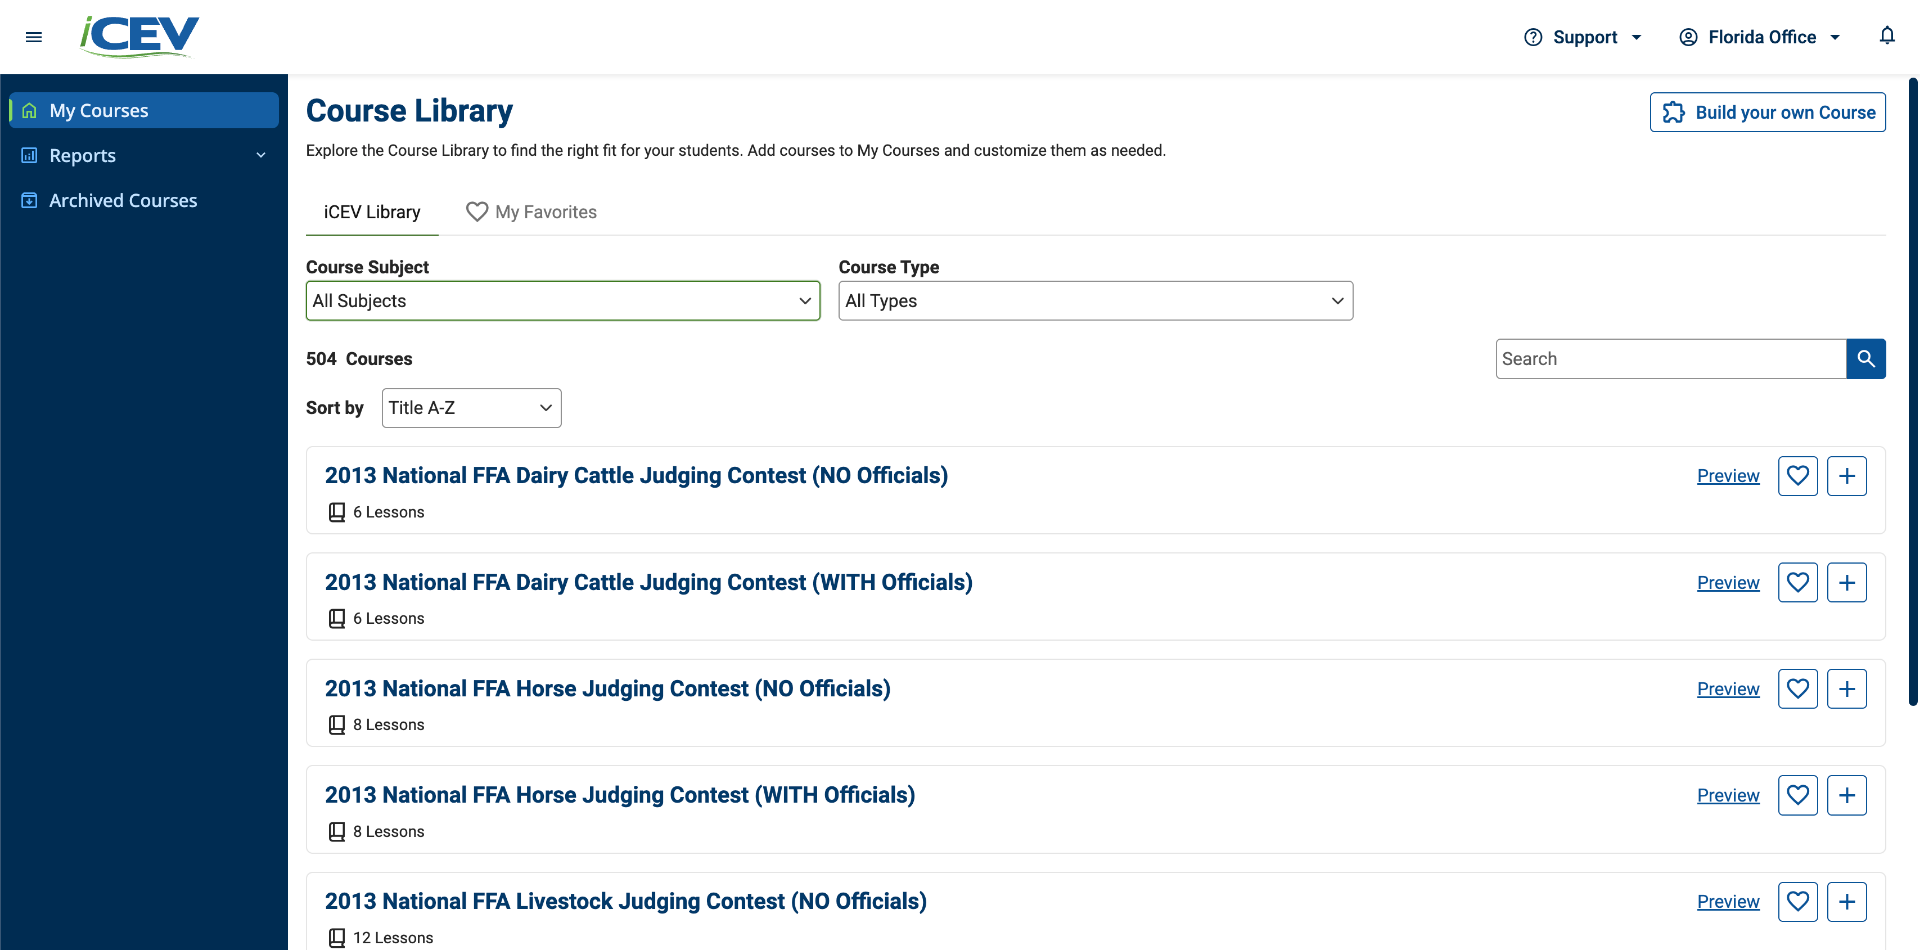
4. Explore Course Information
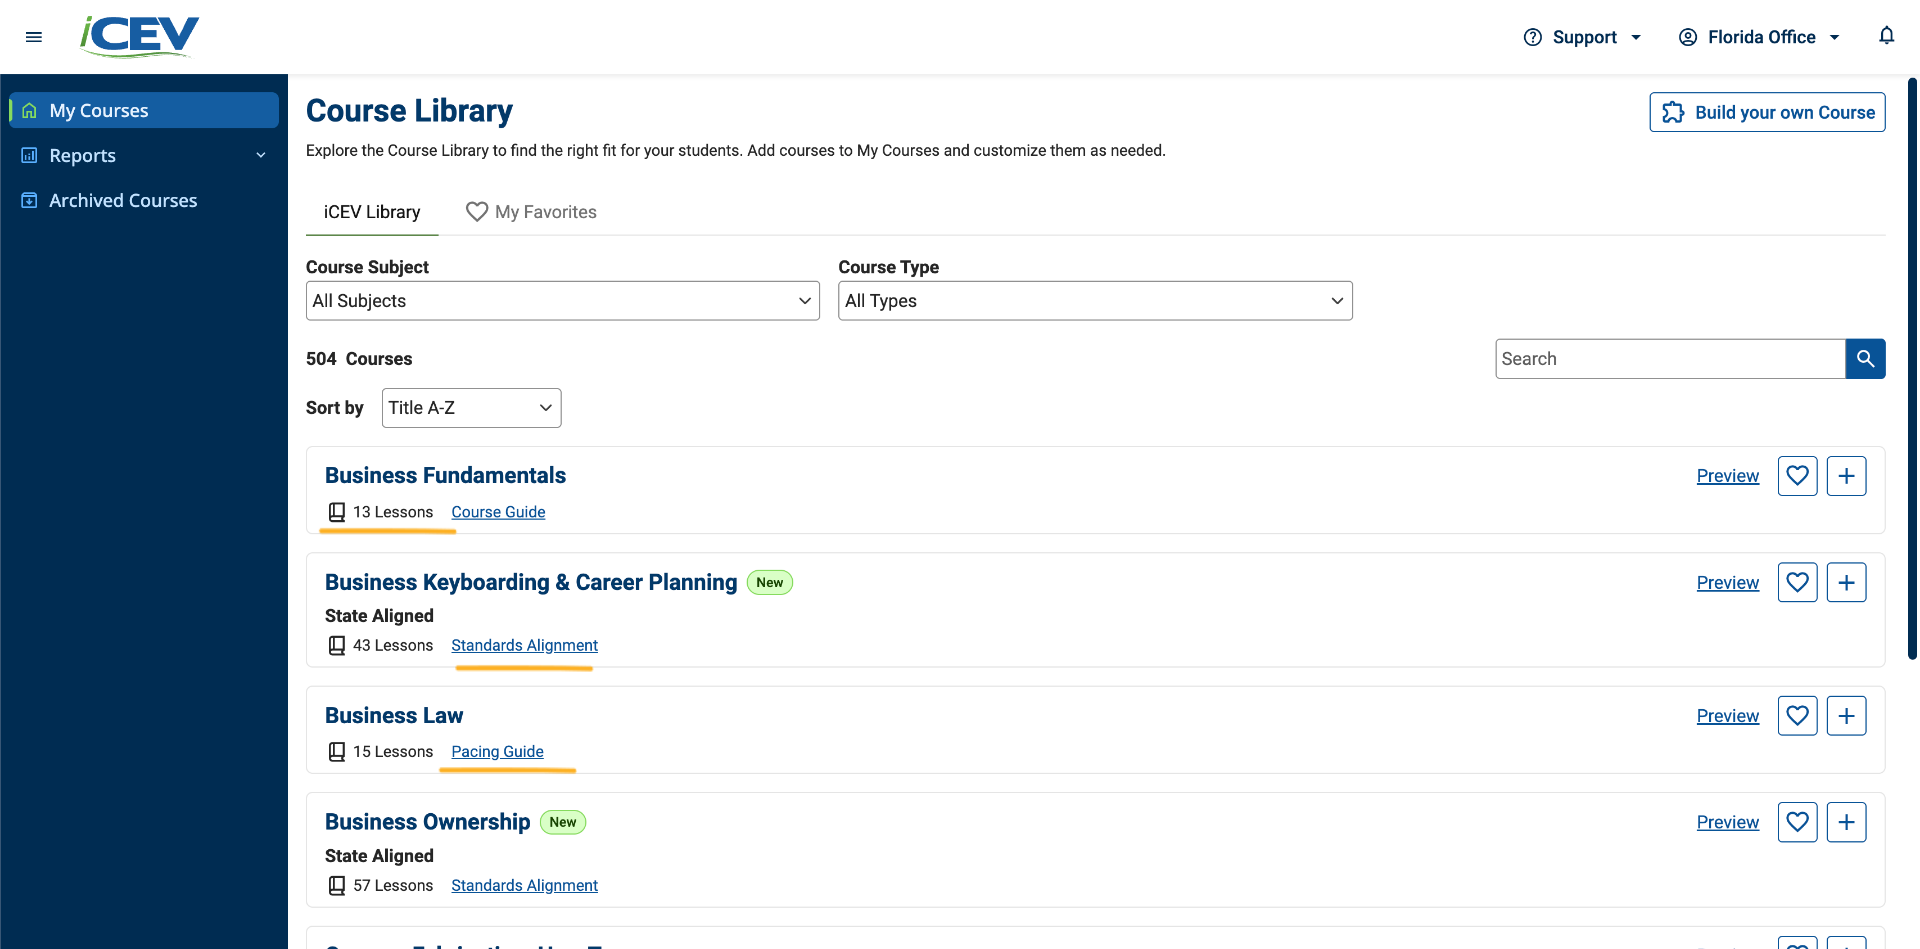
Before adding a course, review the details available on each course card, including:
-
Number of lessons
-
Standards alignments (when available)
-
Course guides and pacing guides (for select courses)
-
Certification-aligned designation
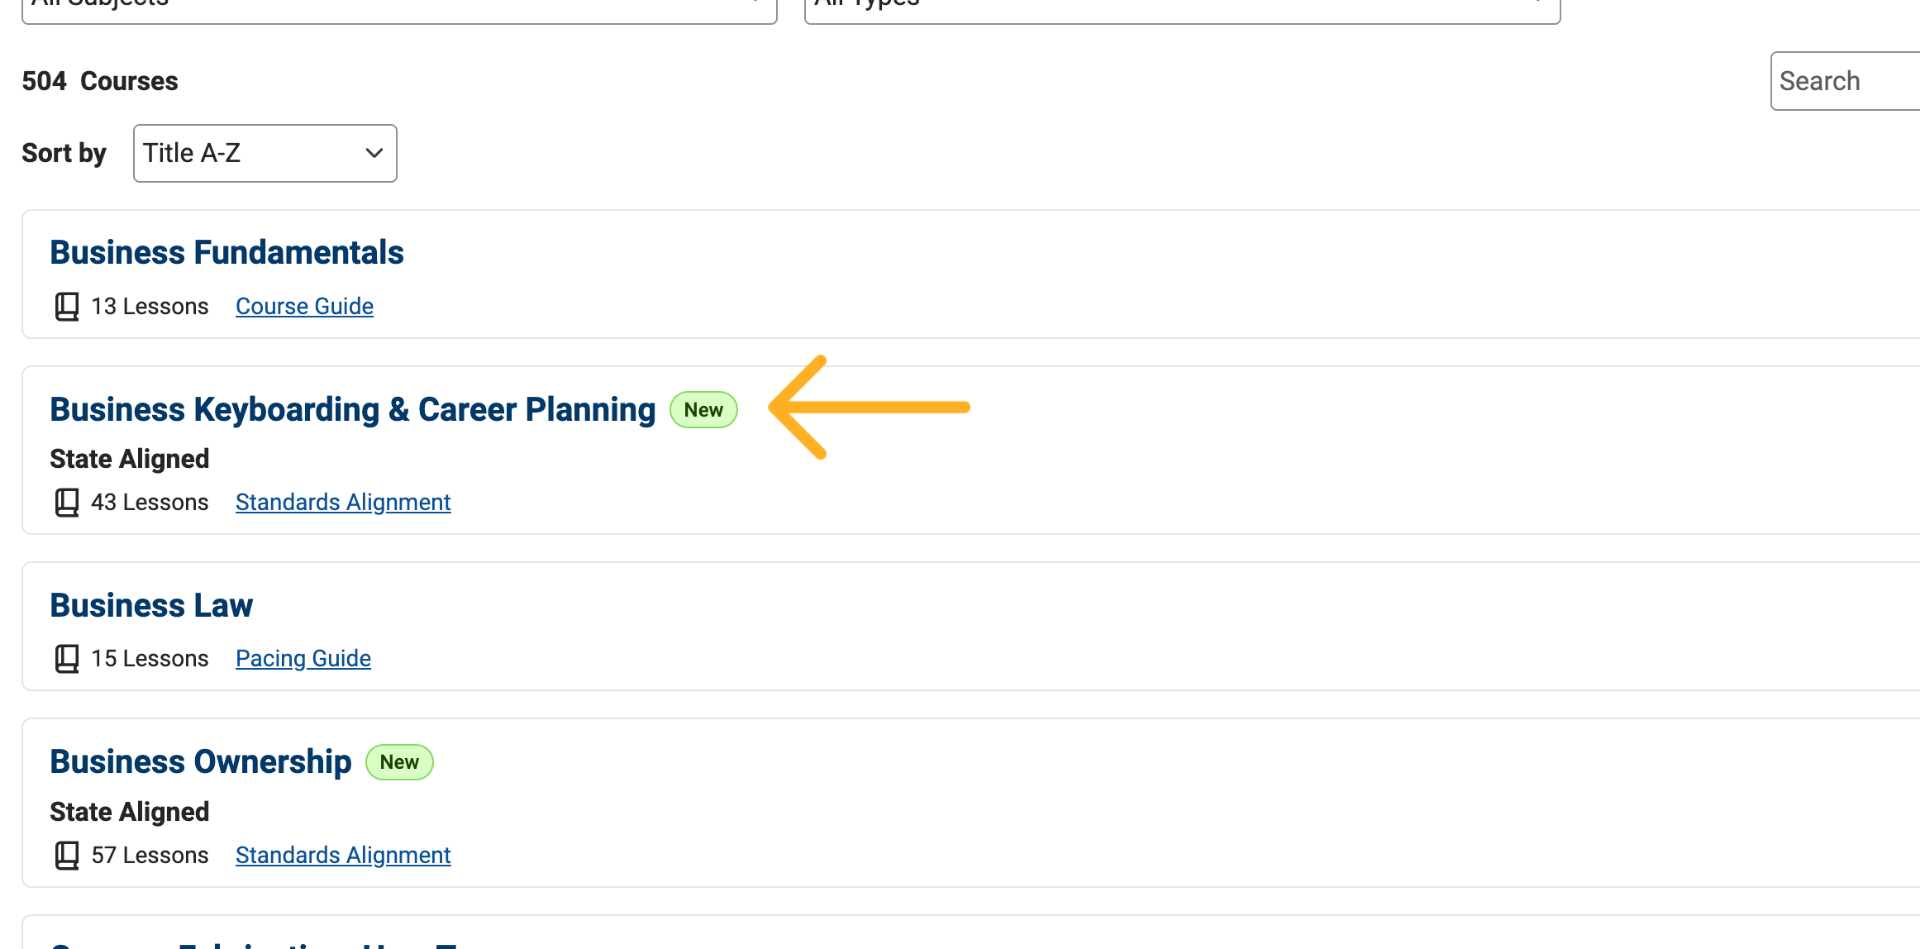
5. Identify New or Updated Courses
Look for New or Updated badges on course cards. These indicators show courses that have recently been added to or updated within the platform.
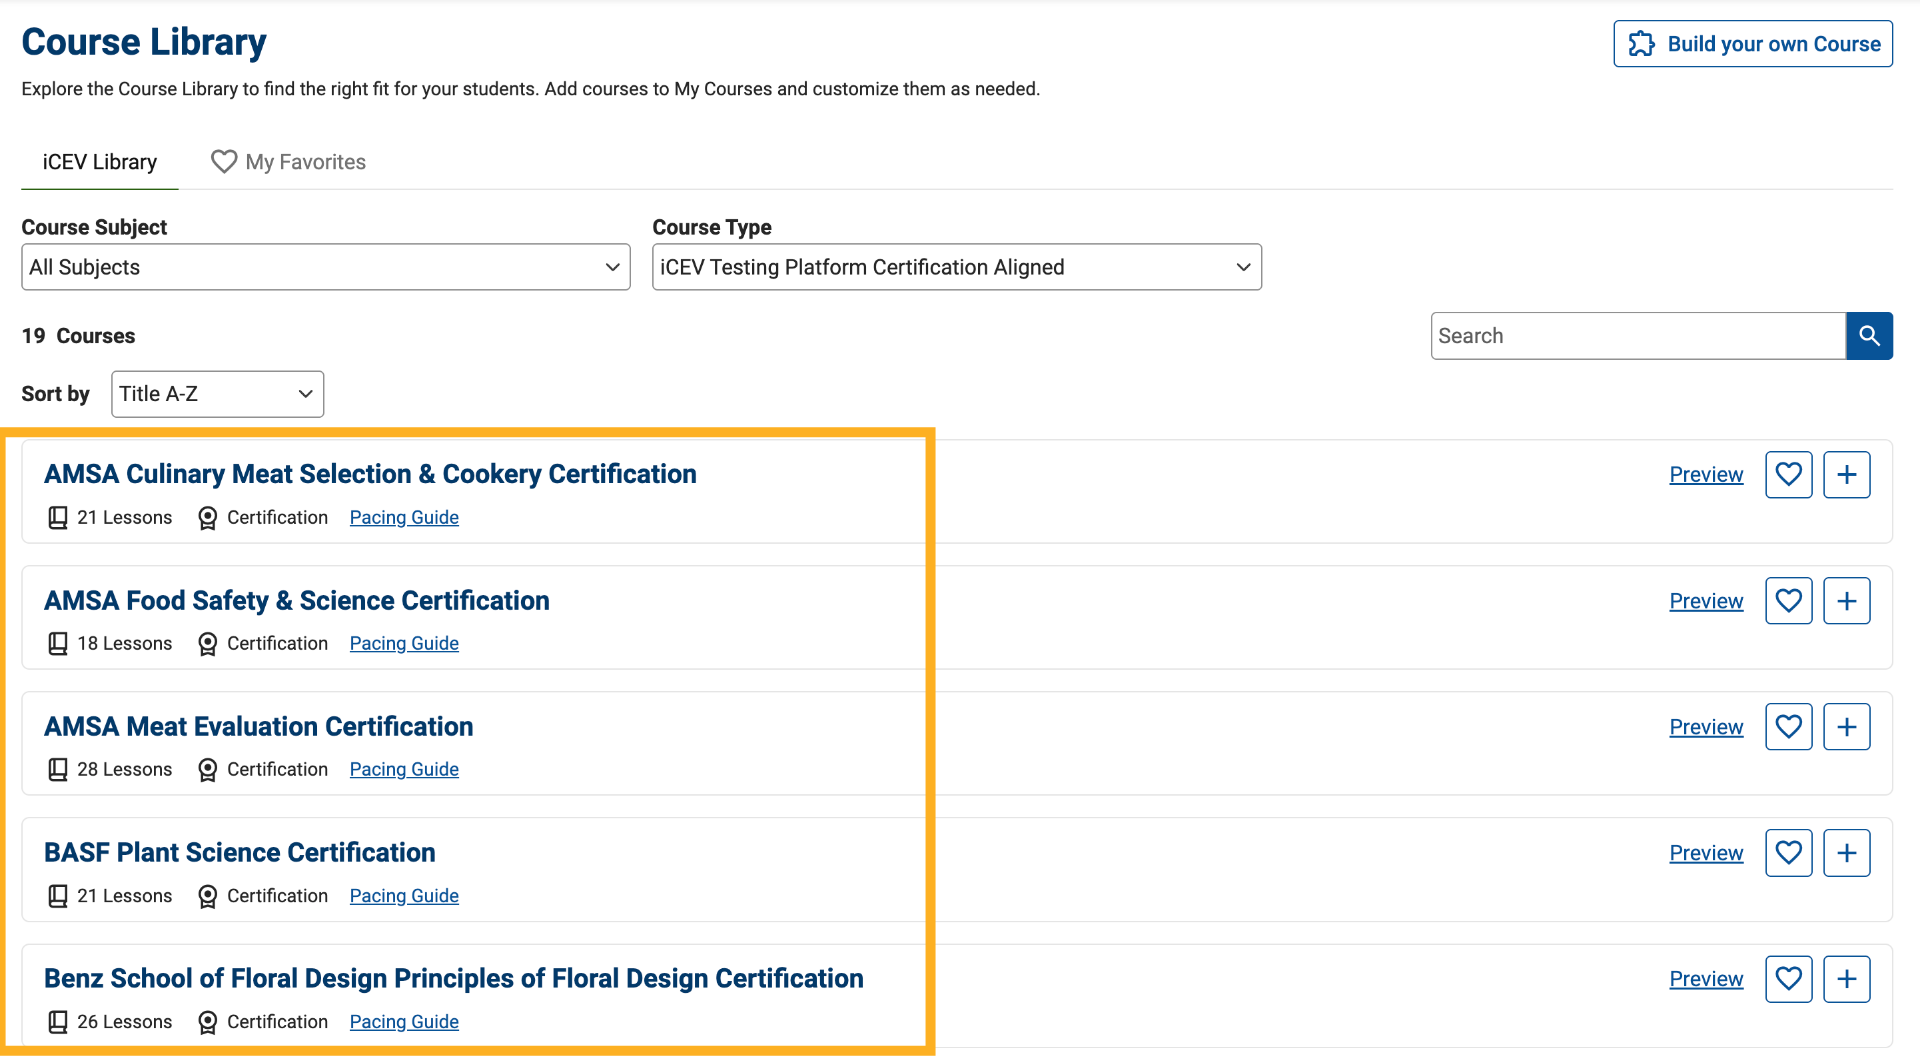
6. Filter for Certification-Aligned Courses
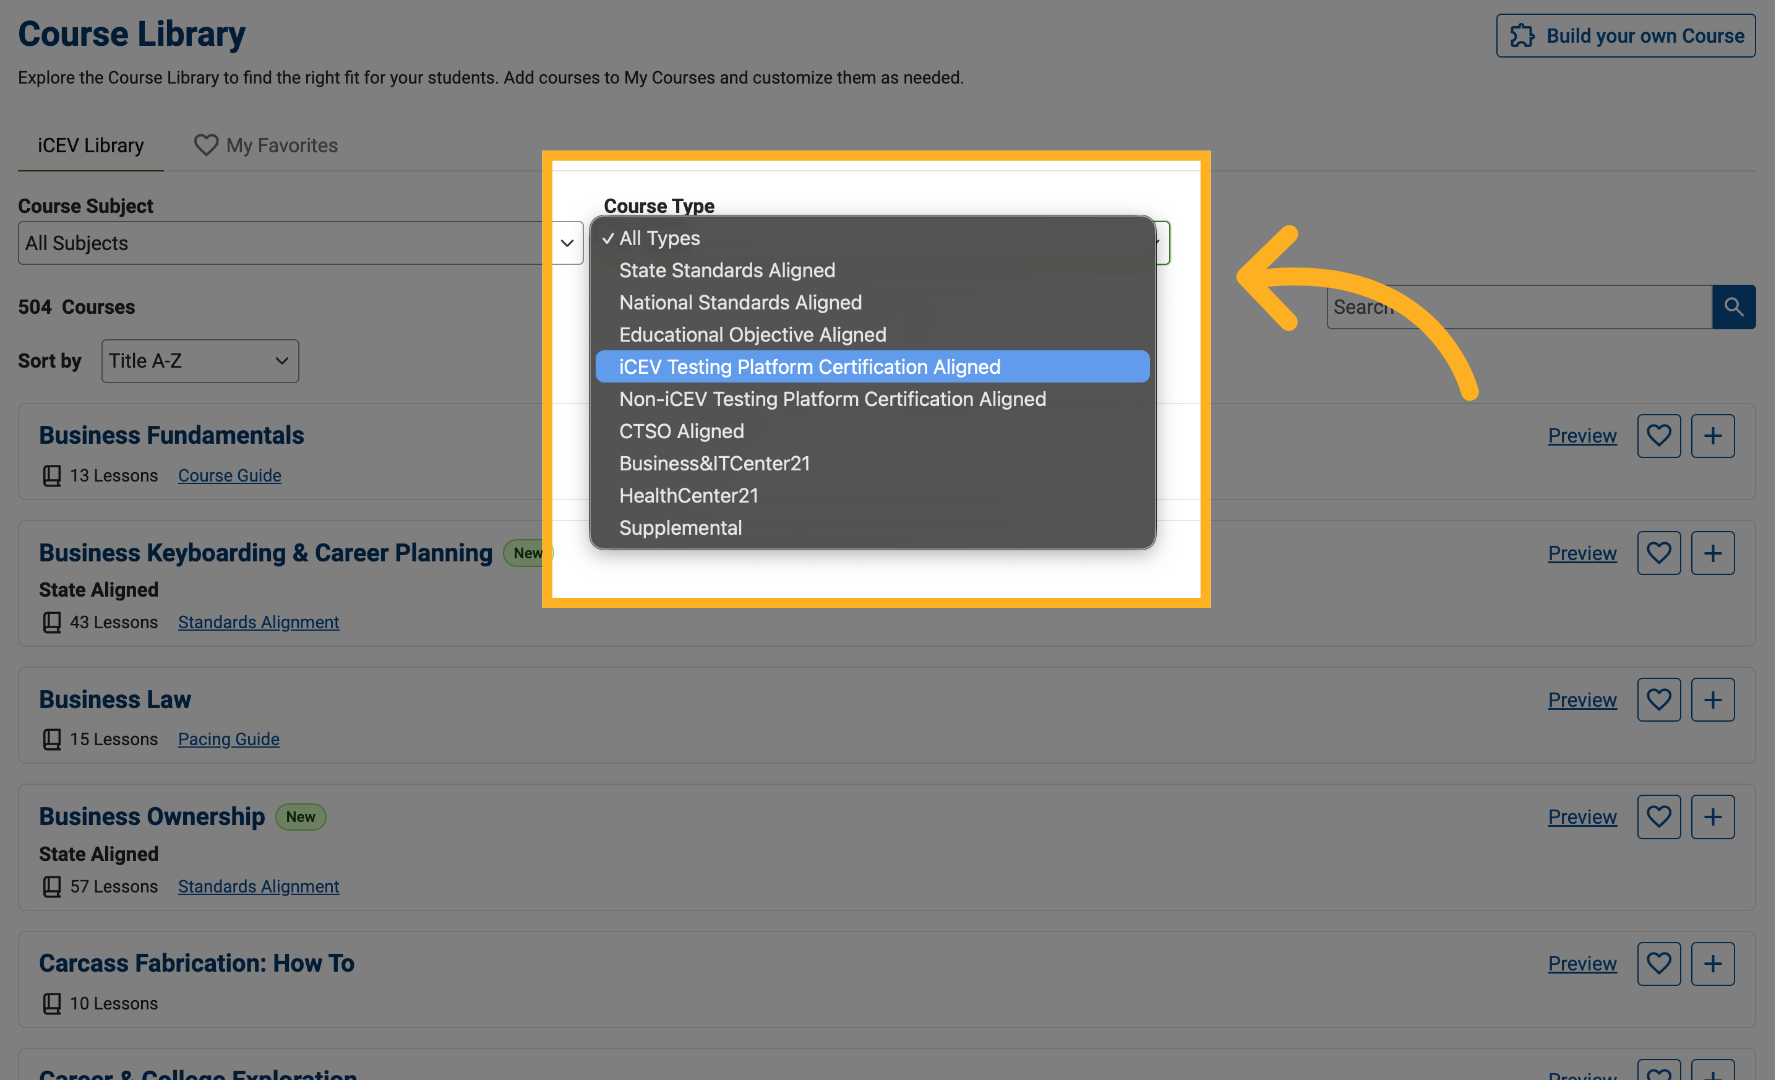
To quickly find certification-aligned courses:
-
Open the Course Type dropdown menu.
-
Select iCEV Testing Platform Certification-Aligned Courses.
Action: Choose iCEV Testing Platform Certification-Aligned Courses
7. View Certification-Aligned Course Results
The Course Library will refresh and display only the certification-aligned courses available to you.
8. Select a Course
Locate the certification-aligned course you would like to add.
For this example, find the Ducks Unlimited Ecology Conservation and Management Certification course.
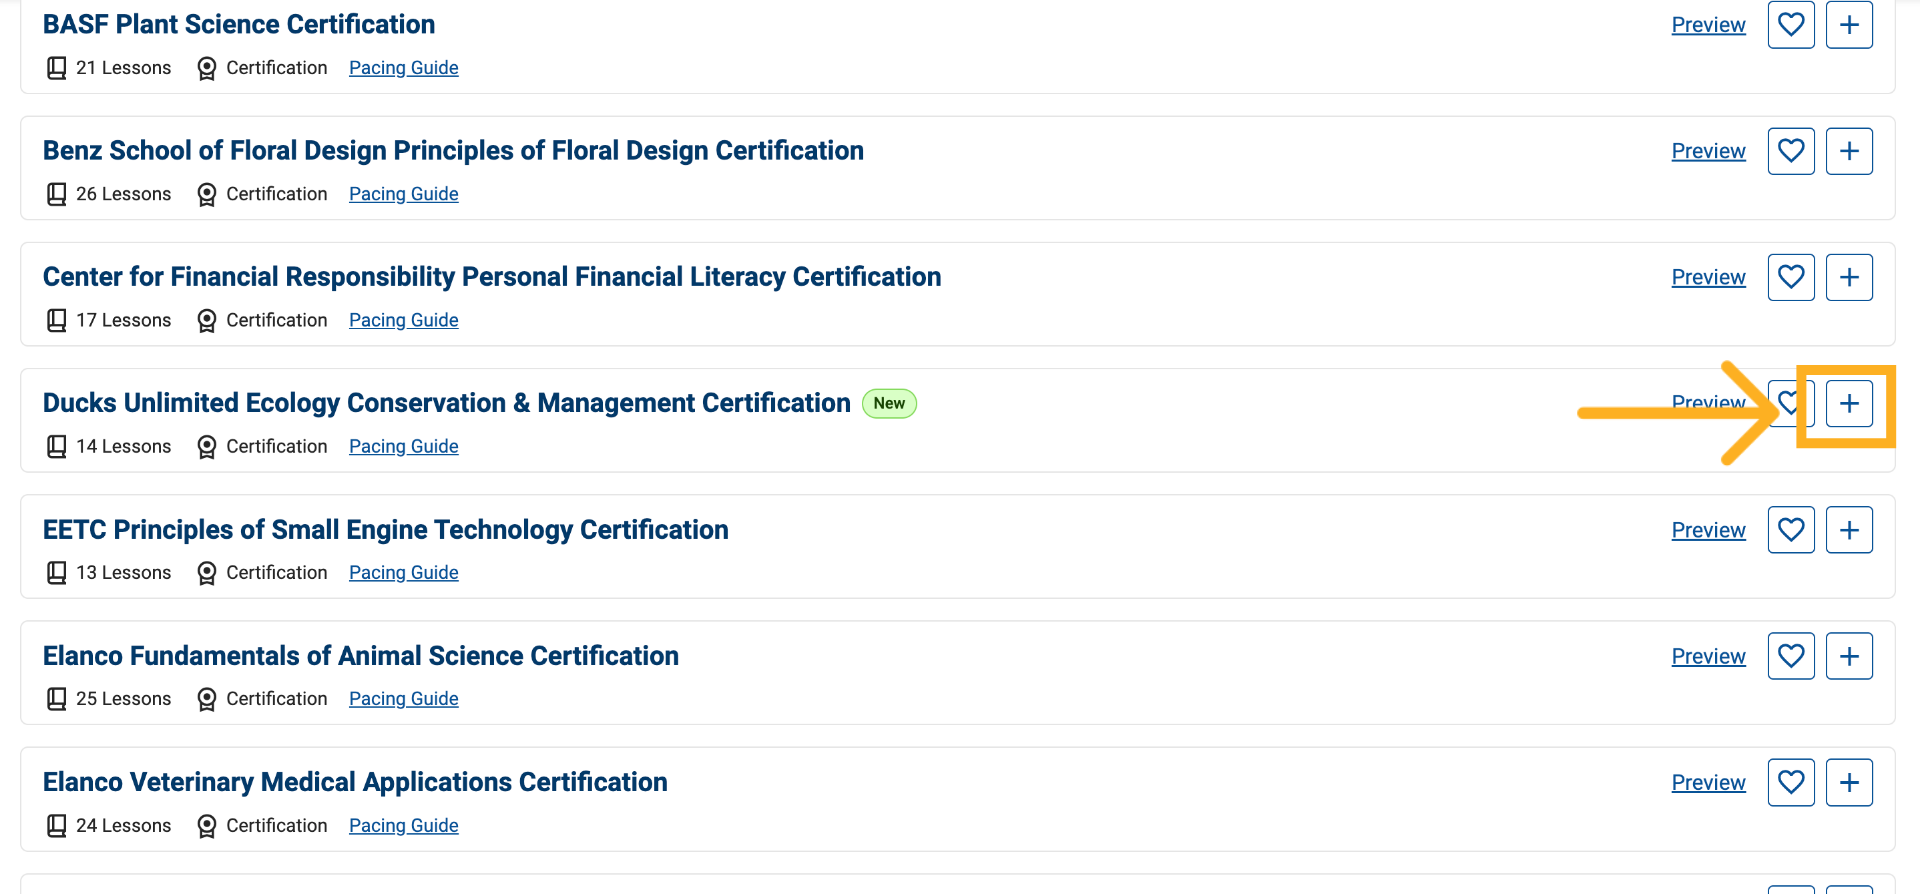
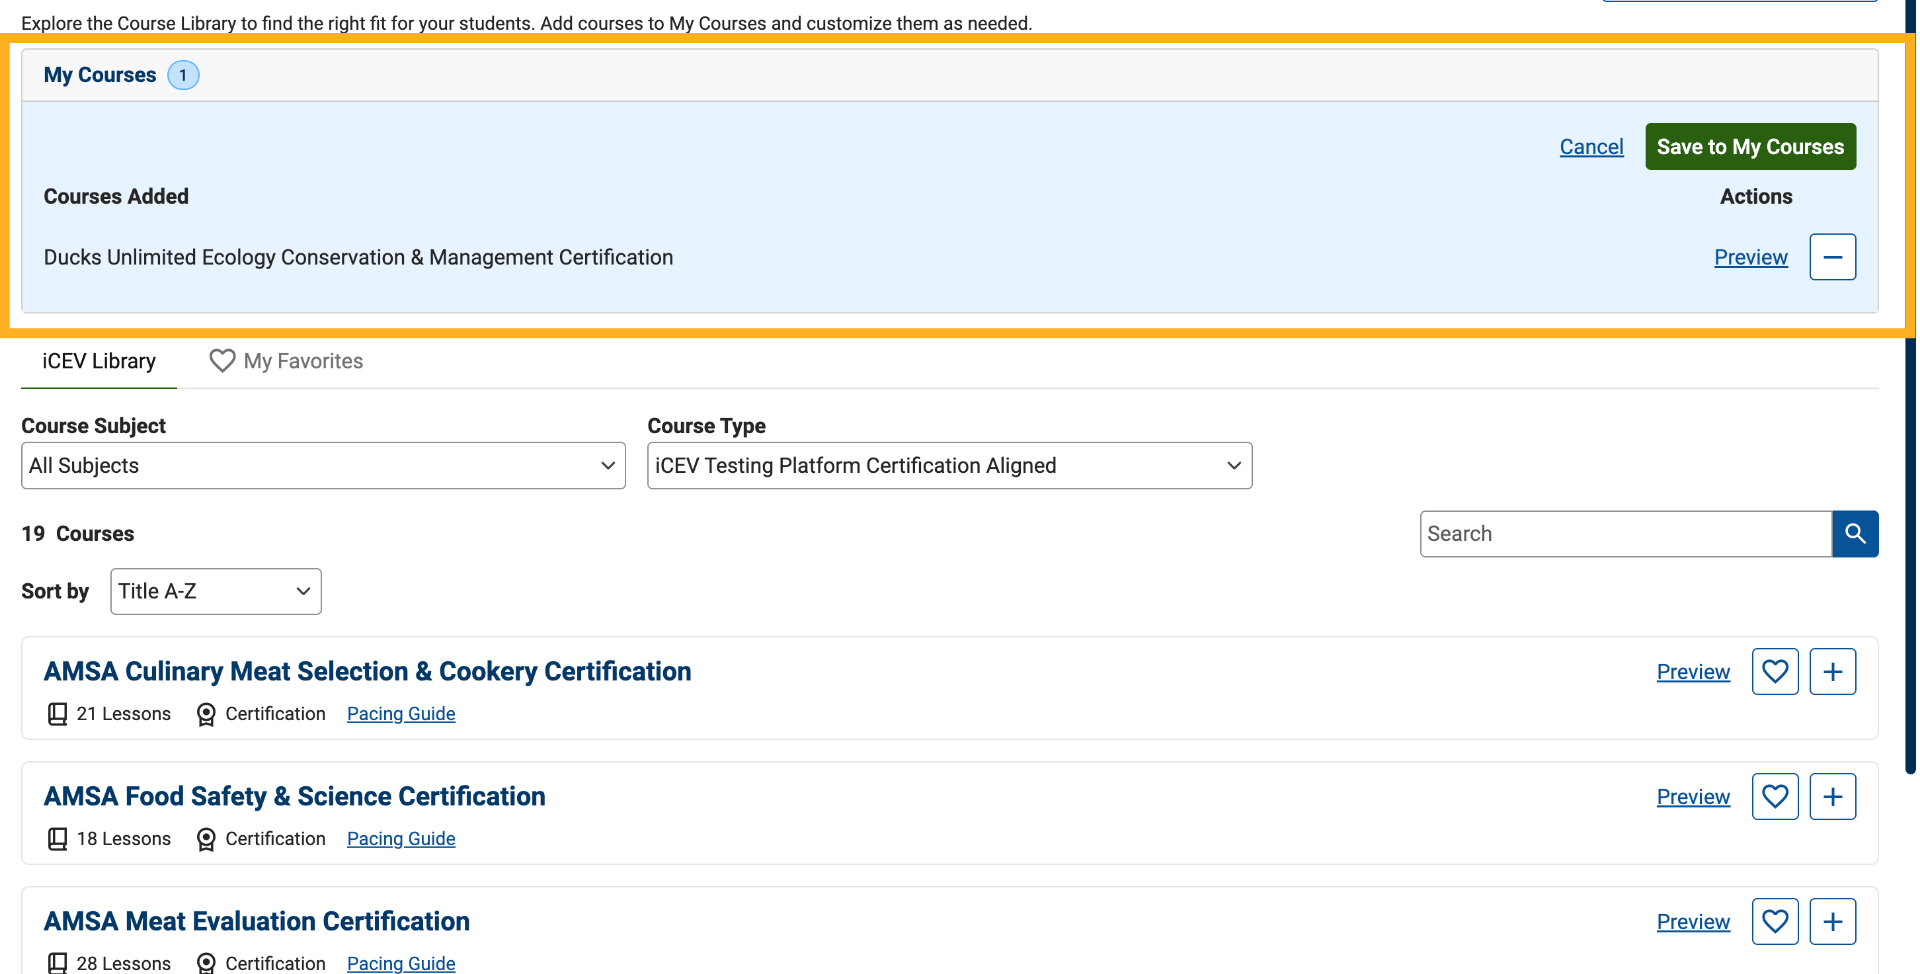
9. Add the Course to Your Queue
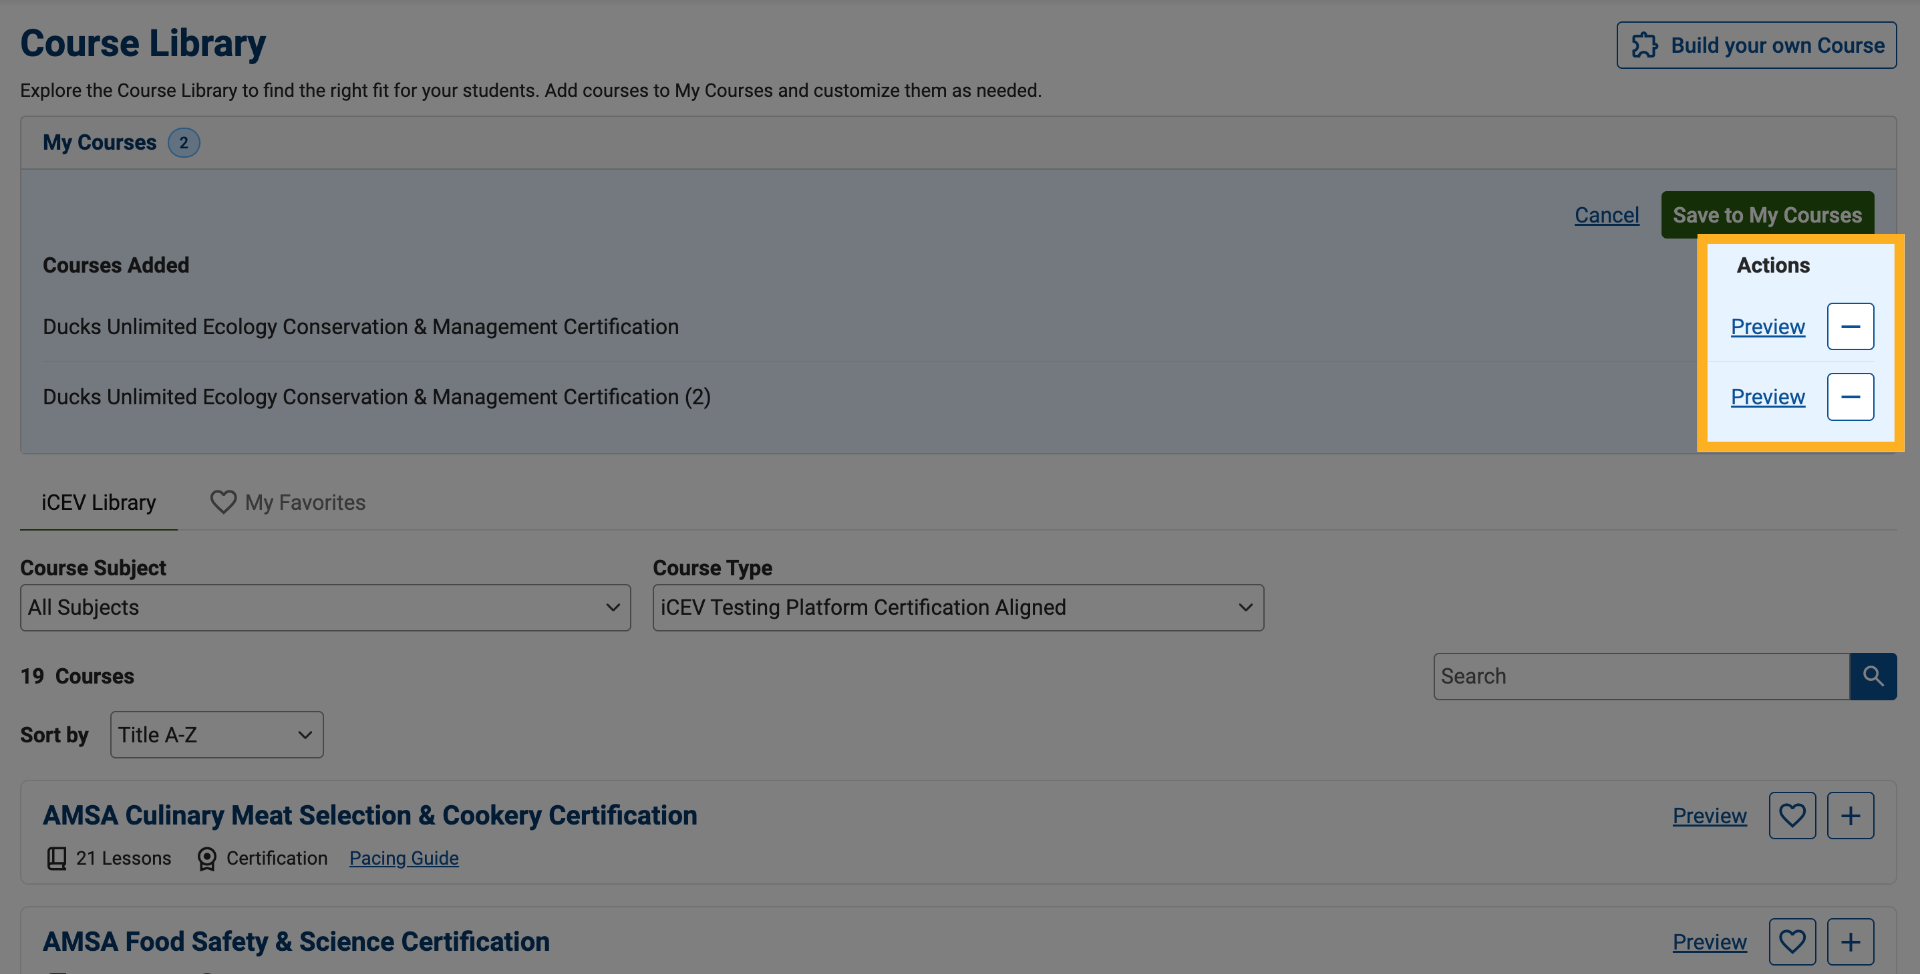
The selected course will be added to your My Courses queue, which functions similarly to a shopping cart while you make course selections.
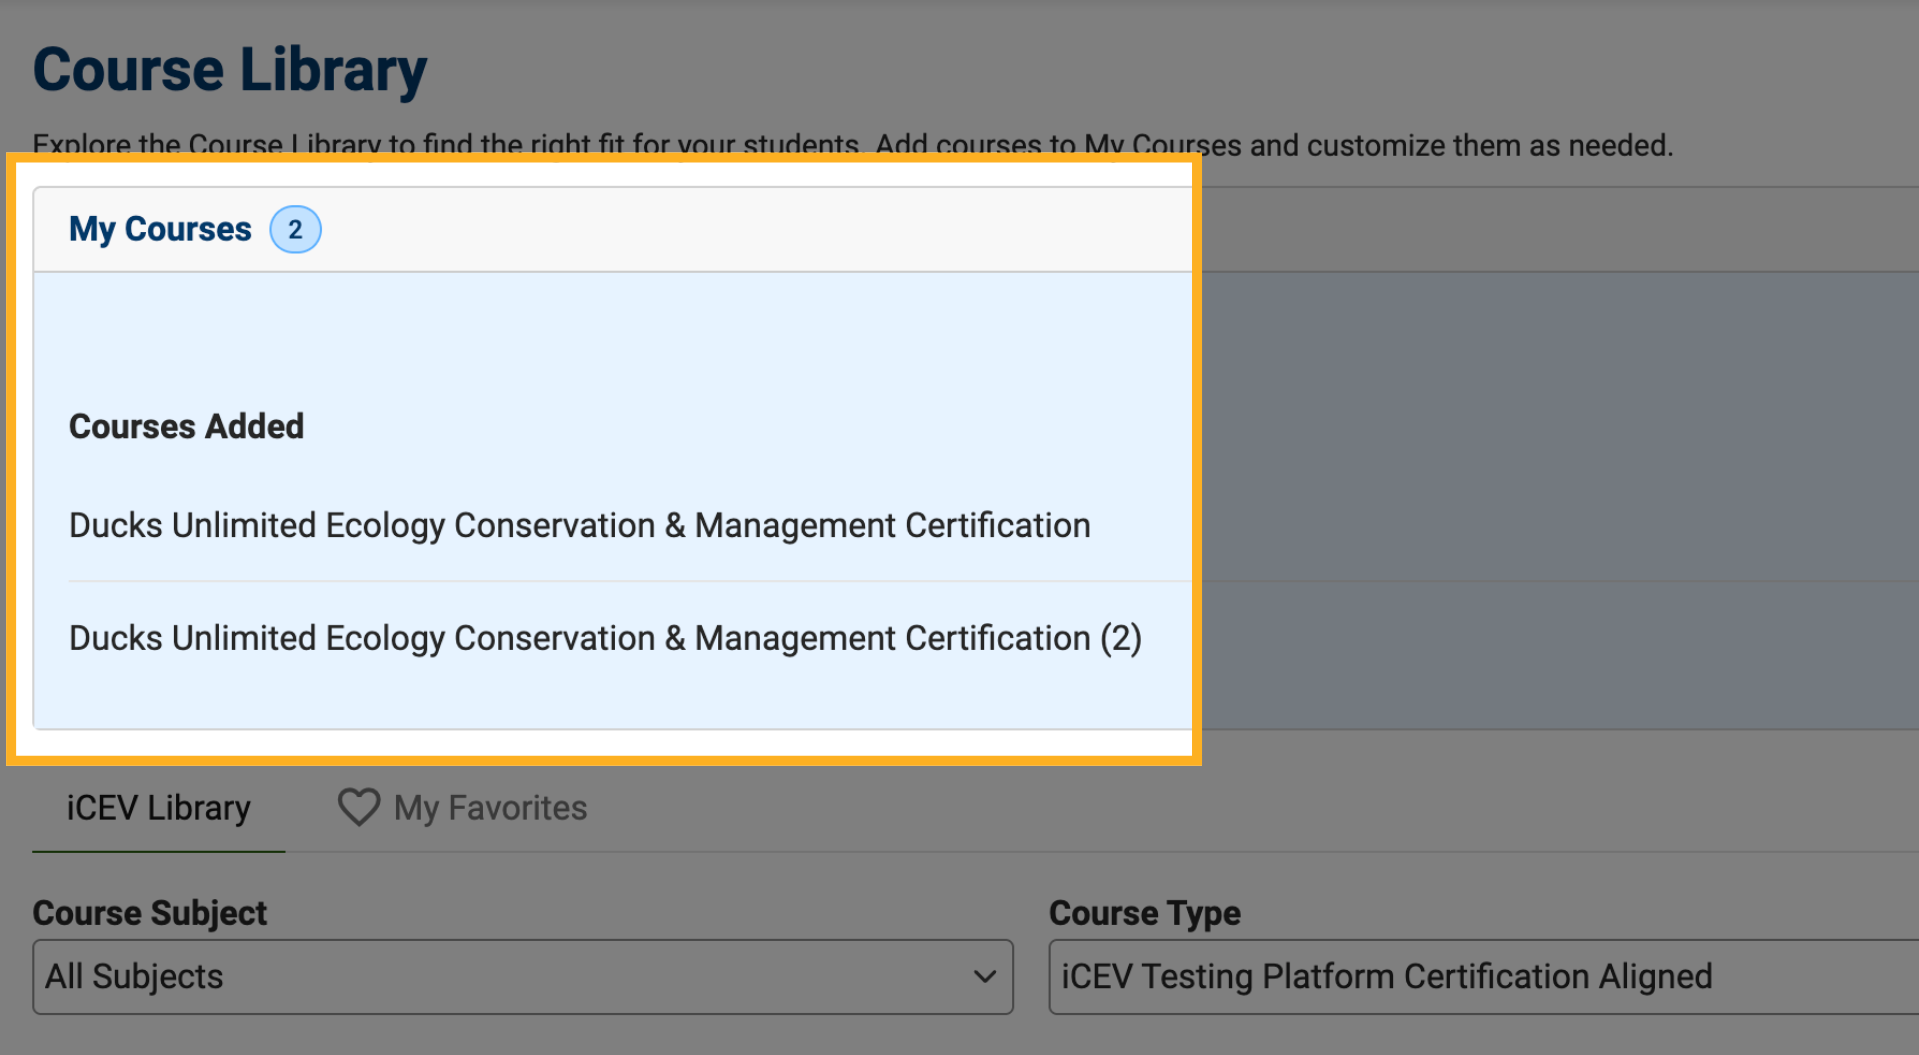
10. Add Additional Course Copies (Optional)
If you teach multiple class periods, you can add the same course more than once.
Each course copy is tracked separately, making it easier to manage enrollment and progress for different classes.
11. Remove or Preview Courses
While reviewing your queue, you can:
-
Click the Remove (-) button to remove a course.
-
Click Preview to learn more about a course before adding it.
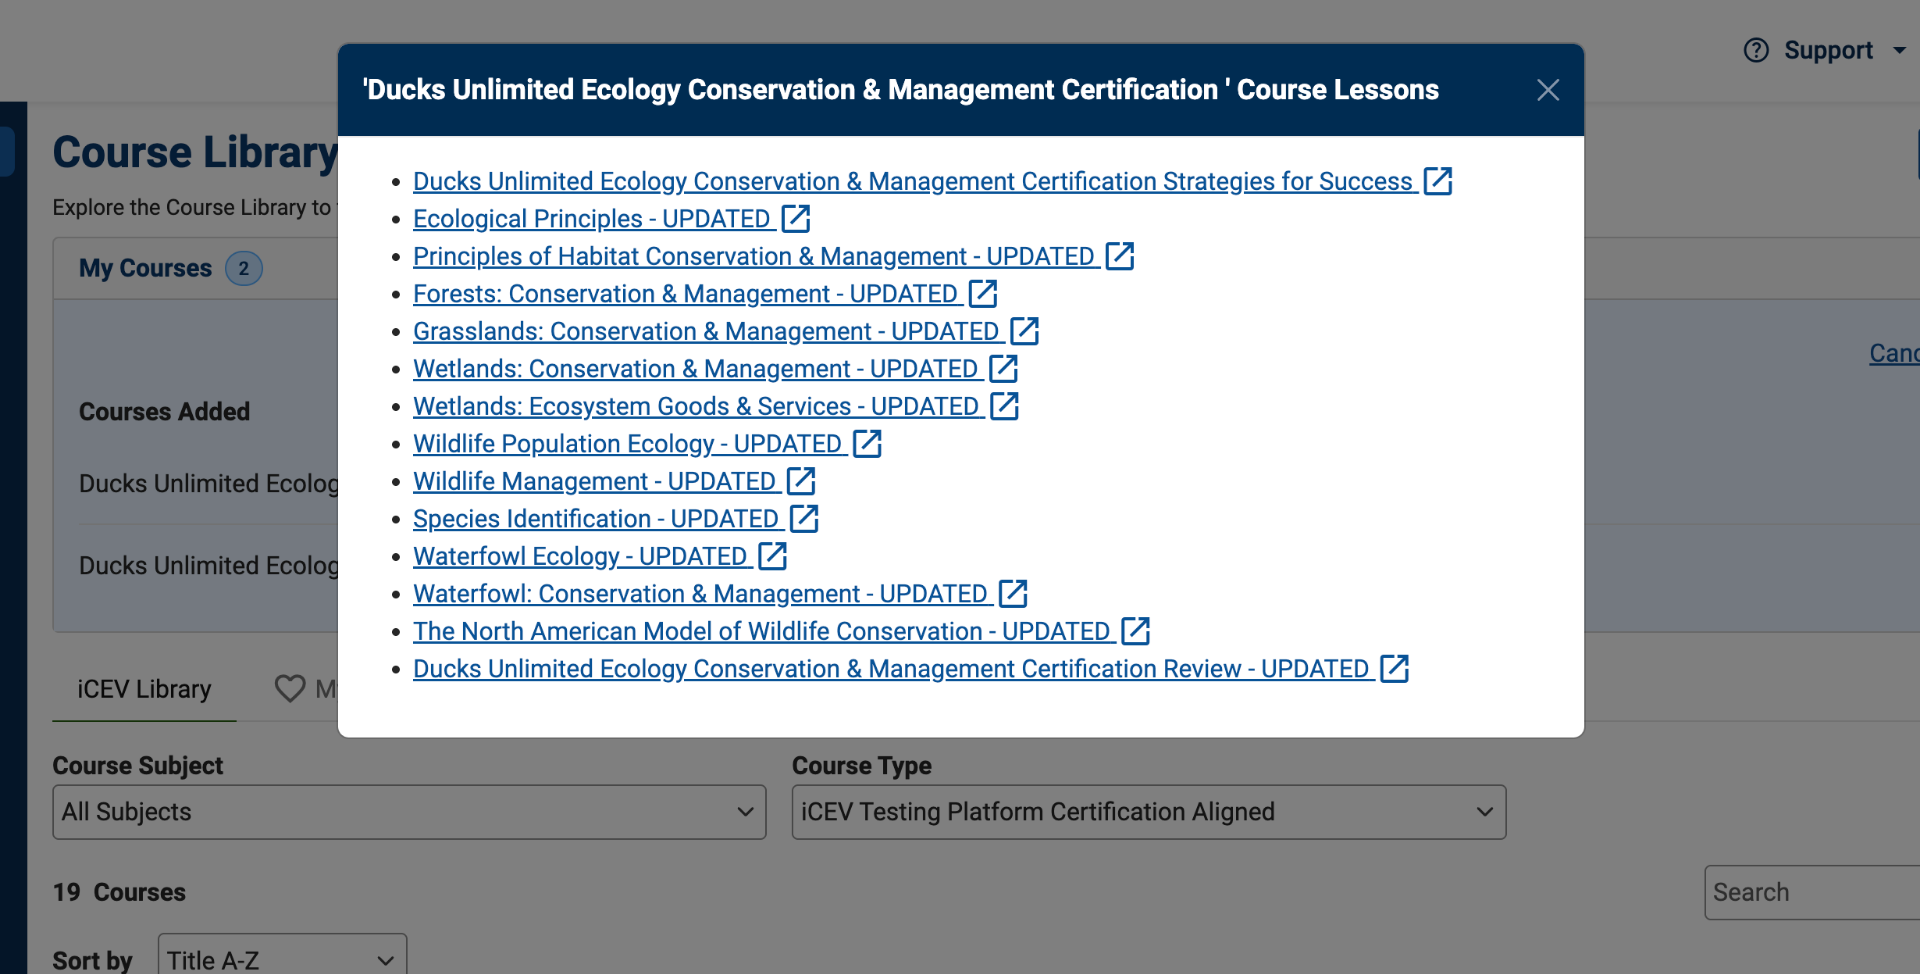
12. Review Course Content
Selecting Preview opens a window displaying all lessons included in the course.
From this view, you can browse the lesson list and open individual lessons for more information.
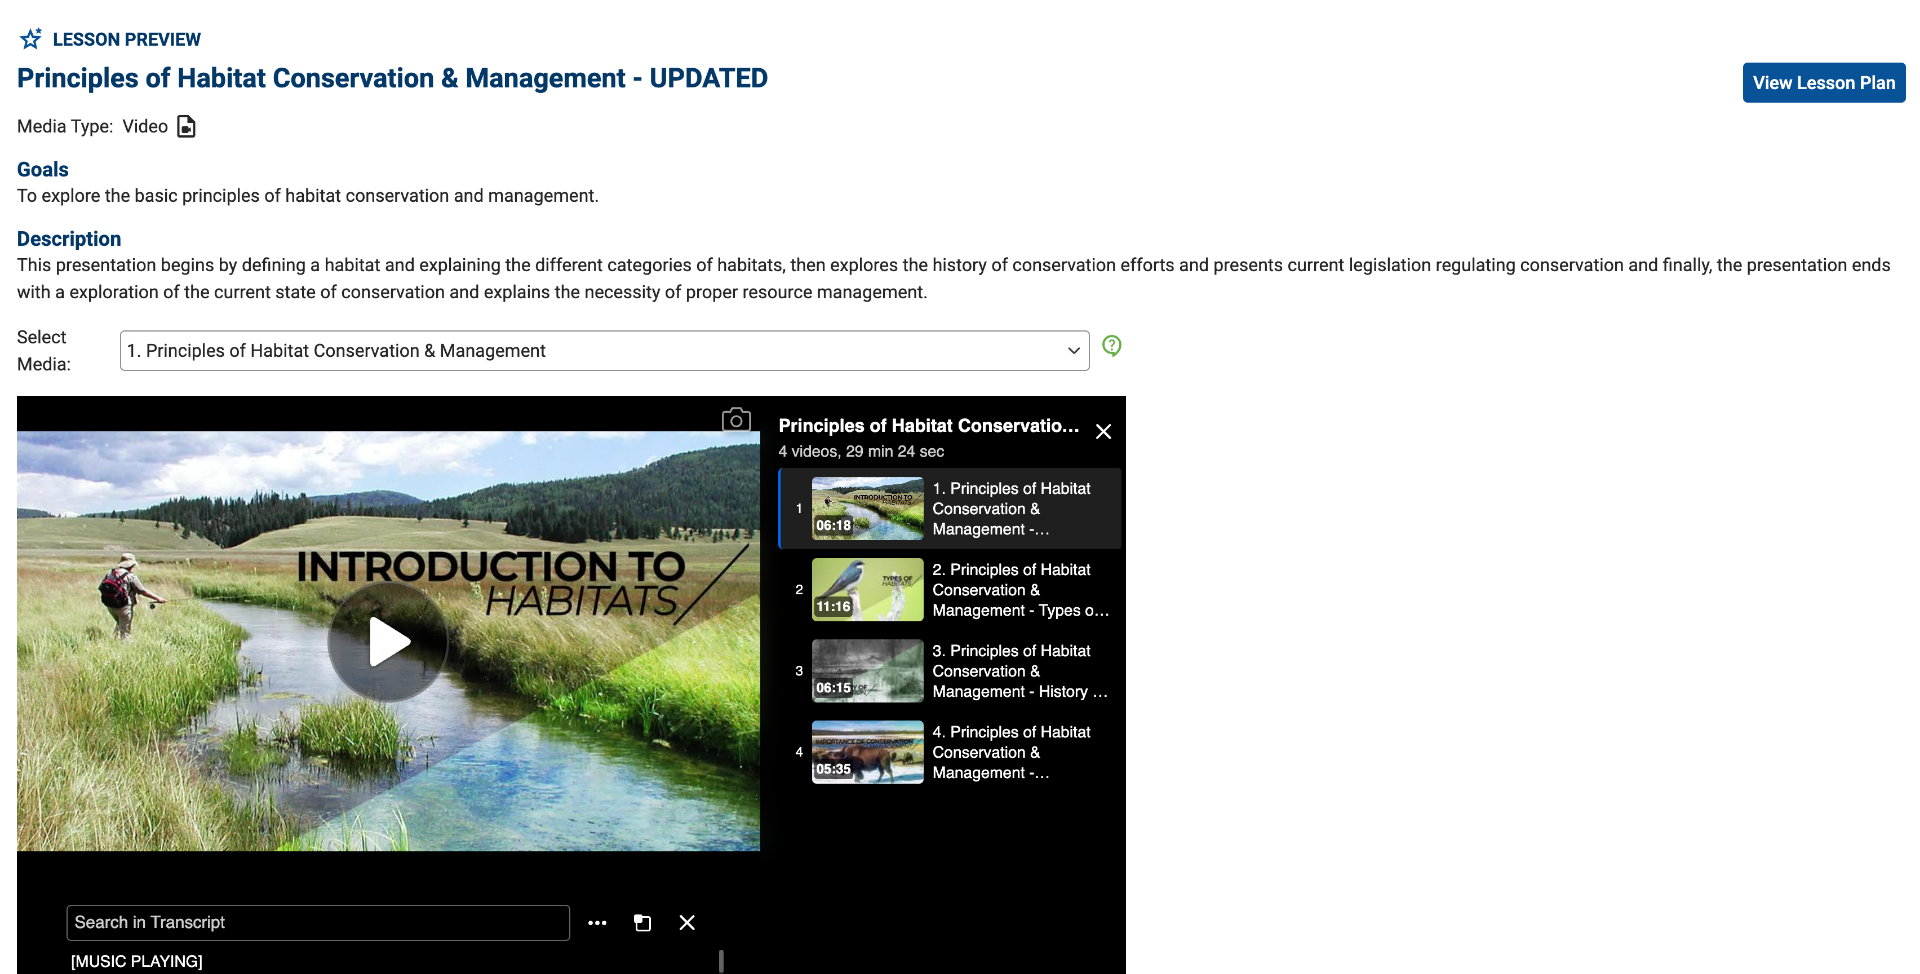
13. Preview Individual Lessons
Within a lesson preview, you can:
-
Read the lesson description
-
View the lesson media type
-
Review learning goals and content
-
Access the lesson plan
14. Save Your Selected Courses
Once you have finished selecting courses, save them to your account.
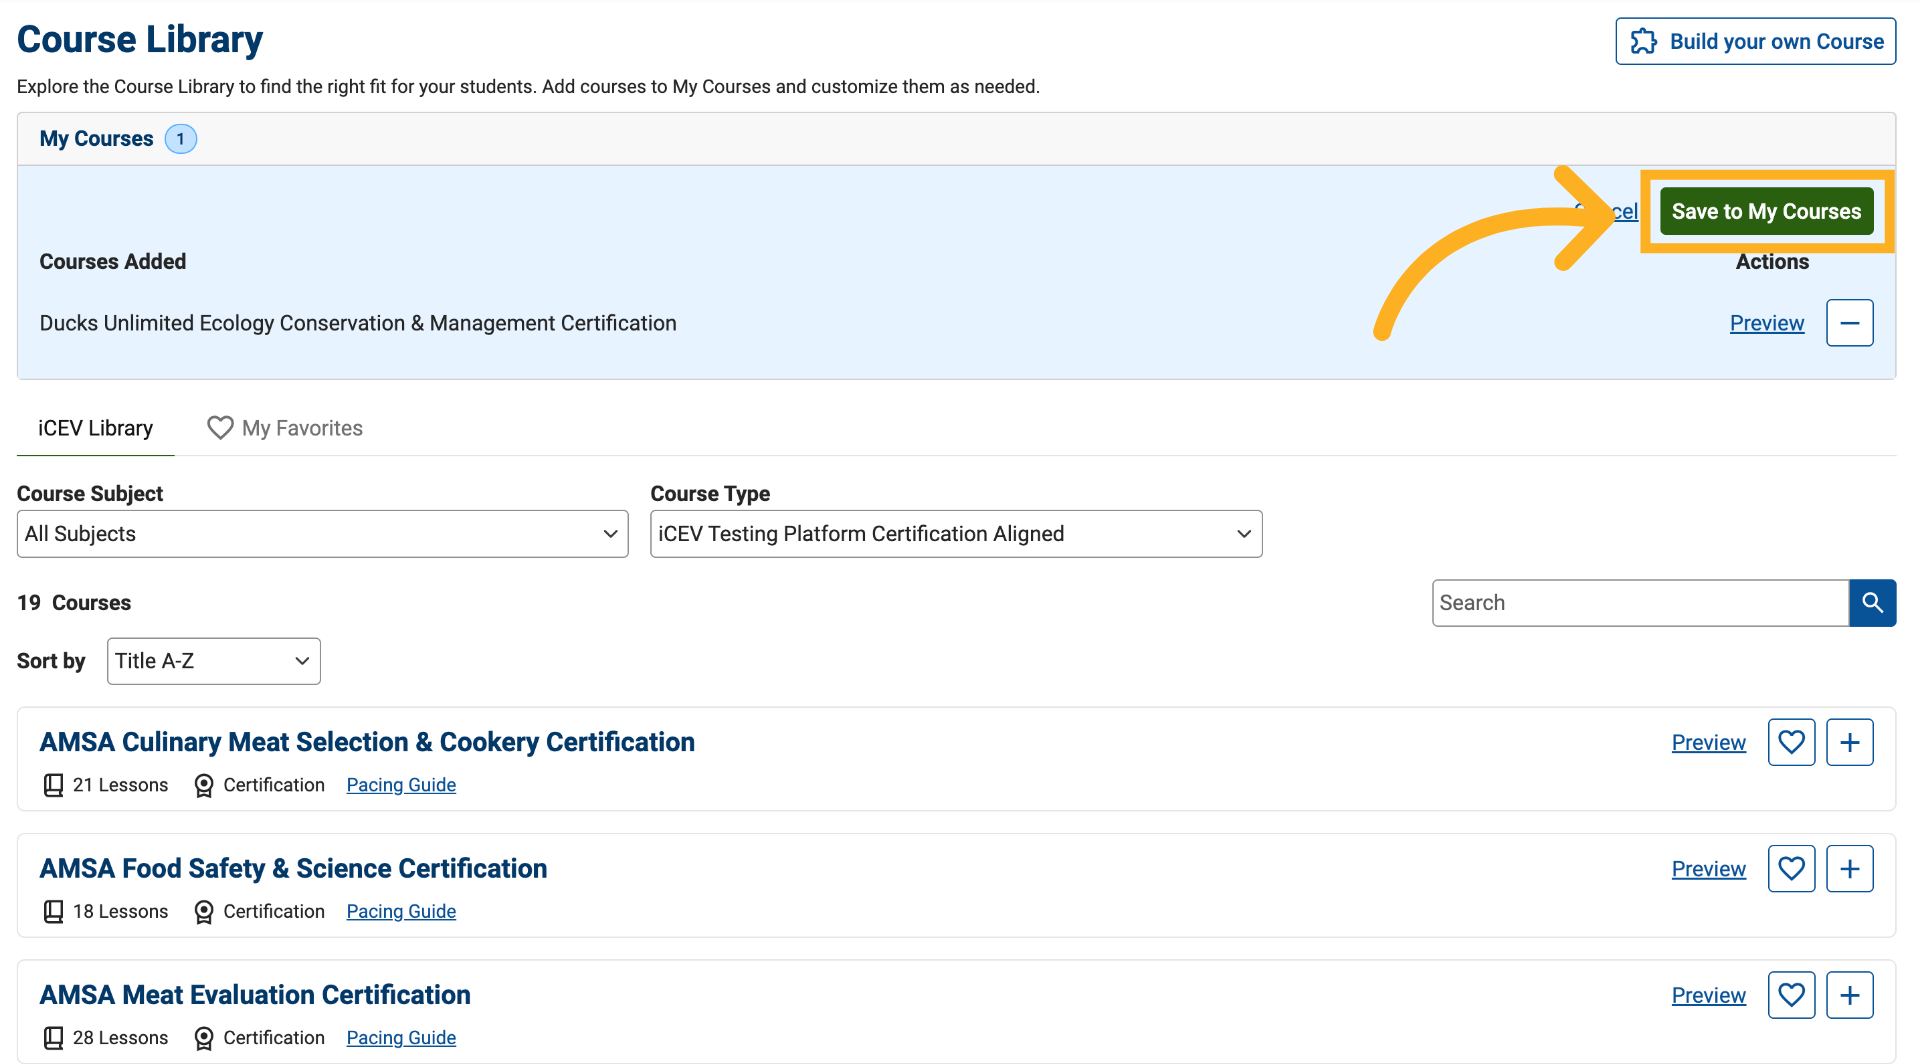
15. Confirm the Course Was Added
After saving, you will be redirected to the My Courses page.
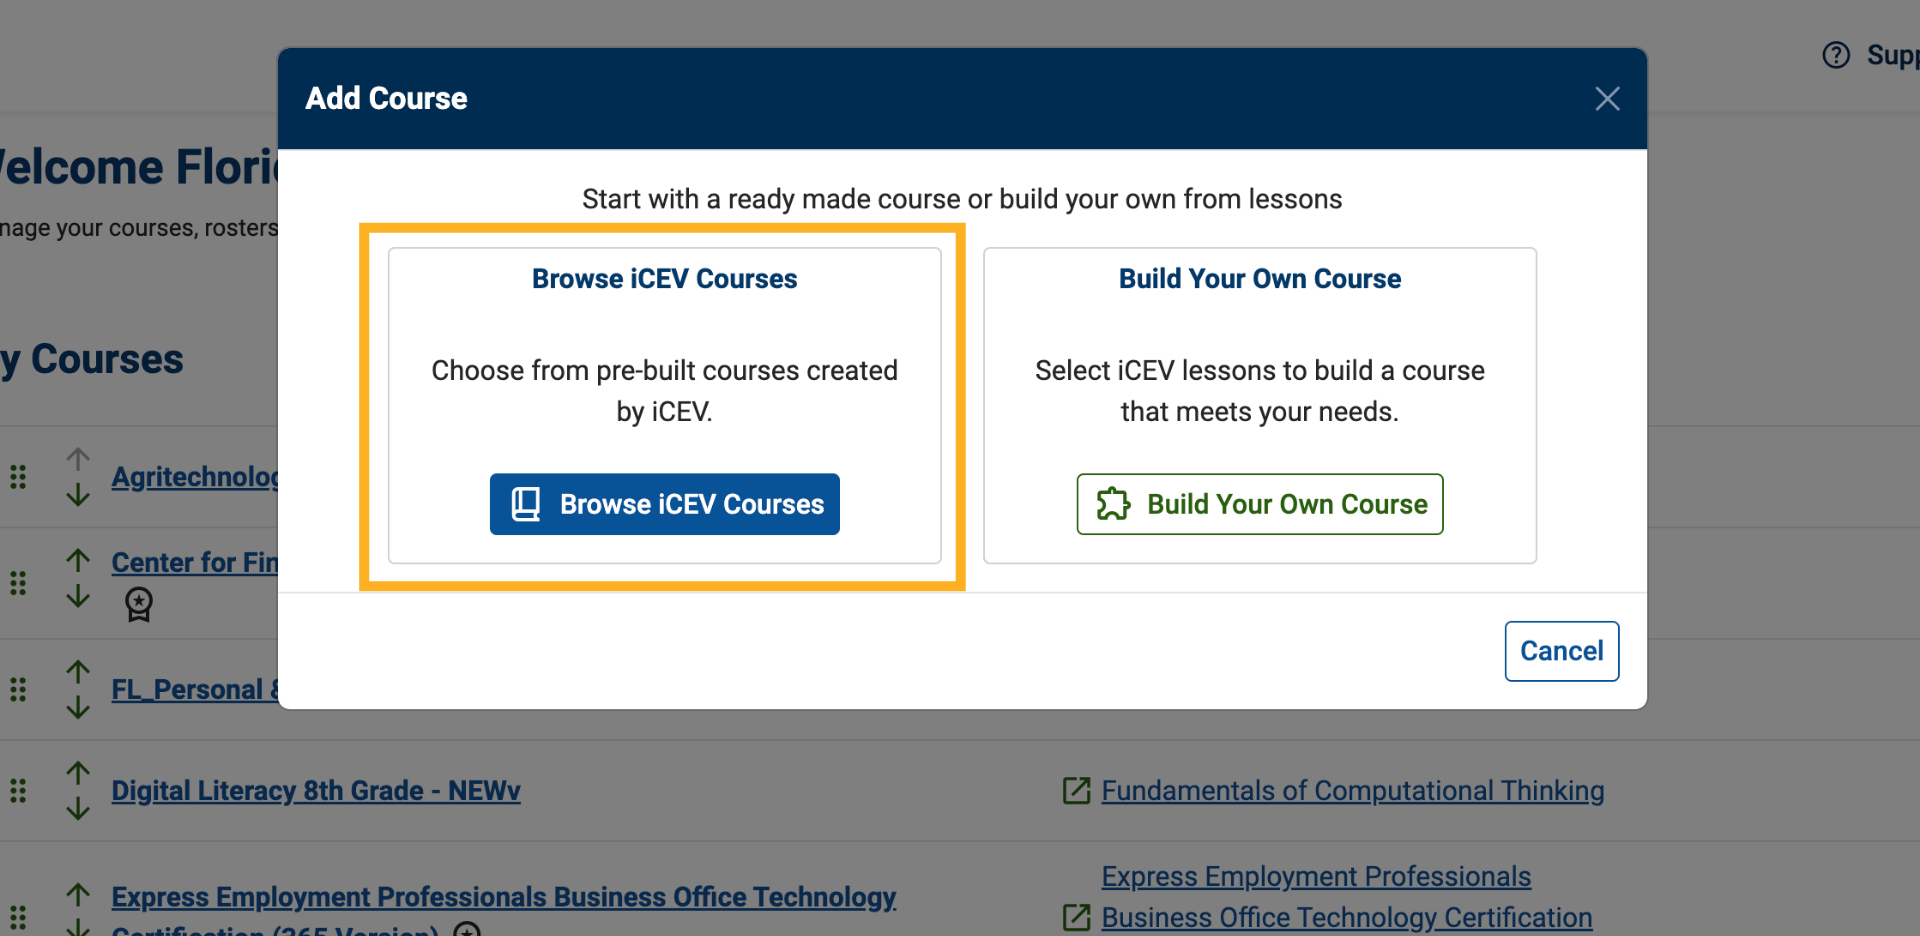
Your newly added certification-aligned course(s) will appear at the top of the course list and will be ready for use.