

CTE Curriculum
Prepare learners with CTE curriculum aligned to industry standards.


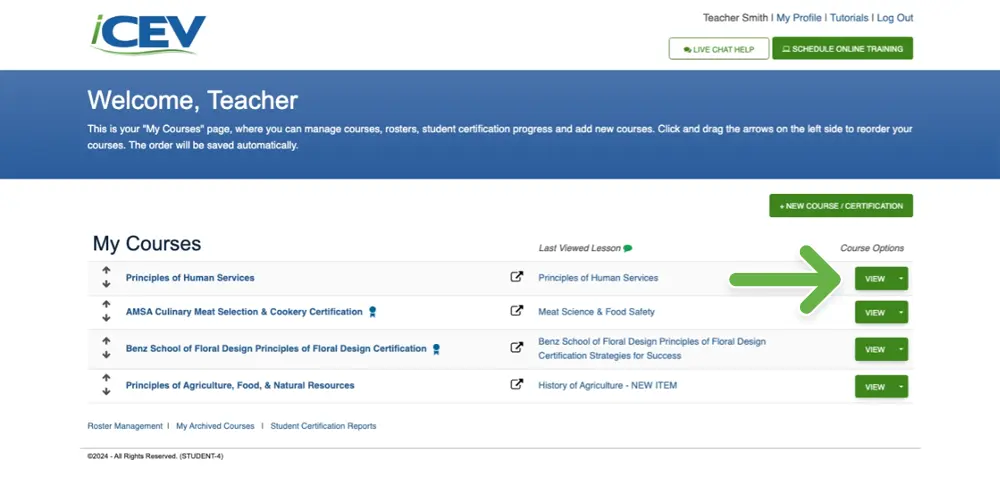
1. Navigate to the Course
- From your My Courses page, navigate to the course you would like to create a customized assessment for and click the View button.
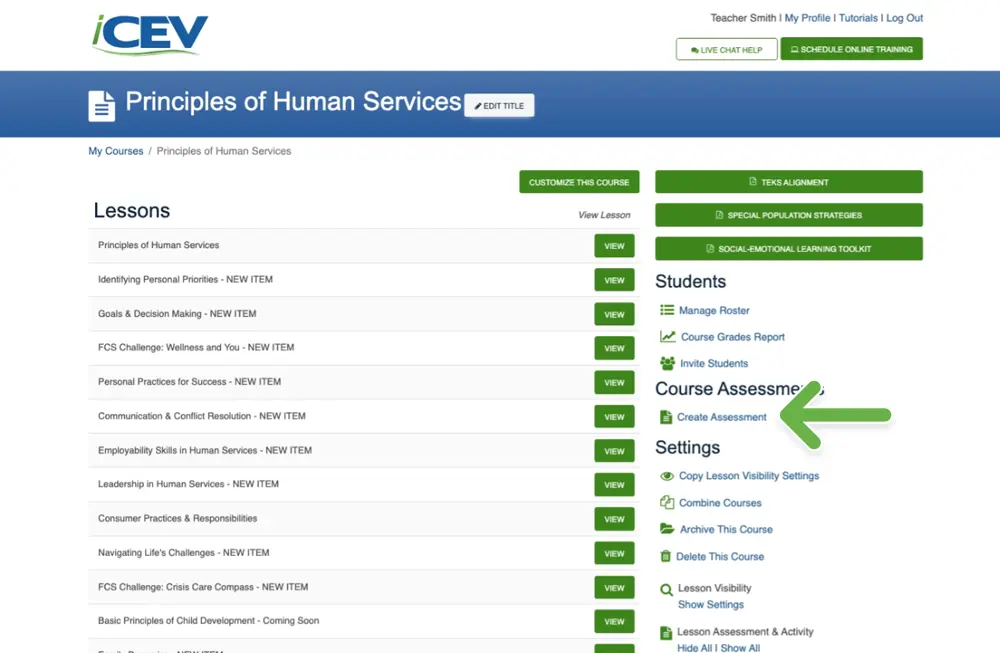
2. Create Assessment
- On the course page, under the Course Assessments heading to the right of the course lessons list, click Create Assessment.
3. Name Assessment
- Input a title for your customized assessment.
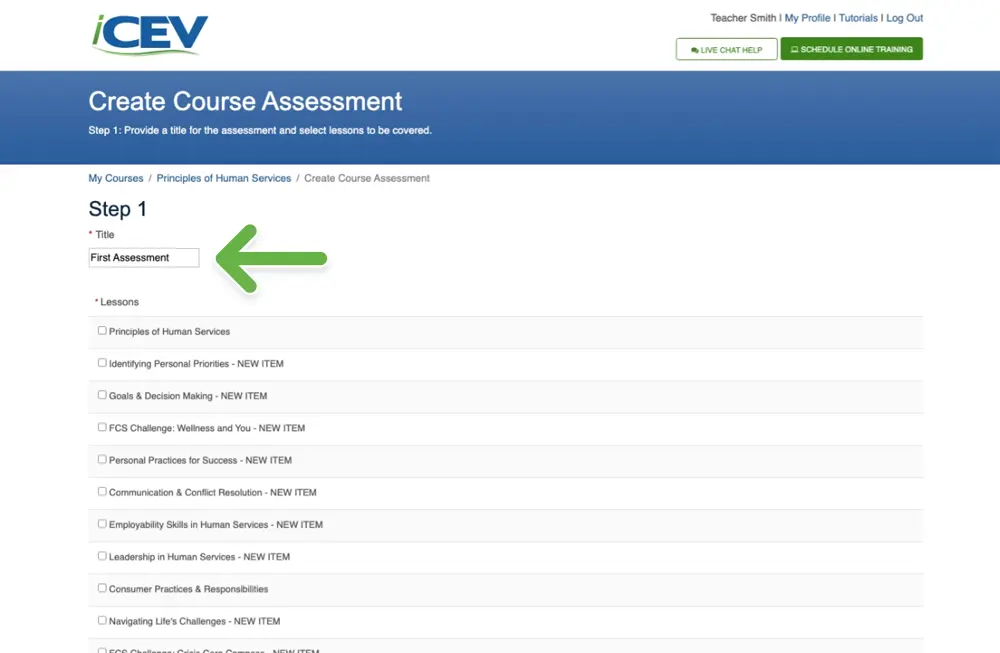
4. Select Lessons
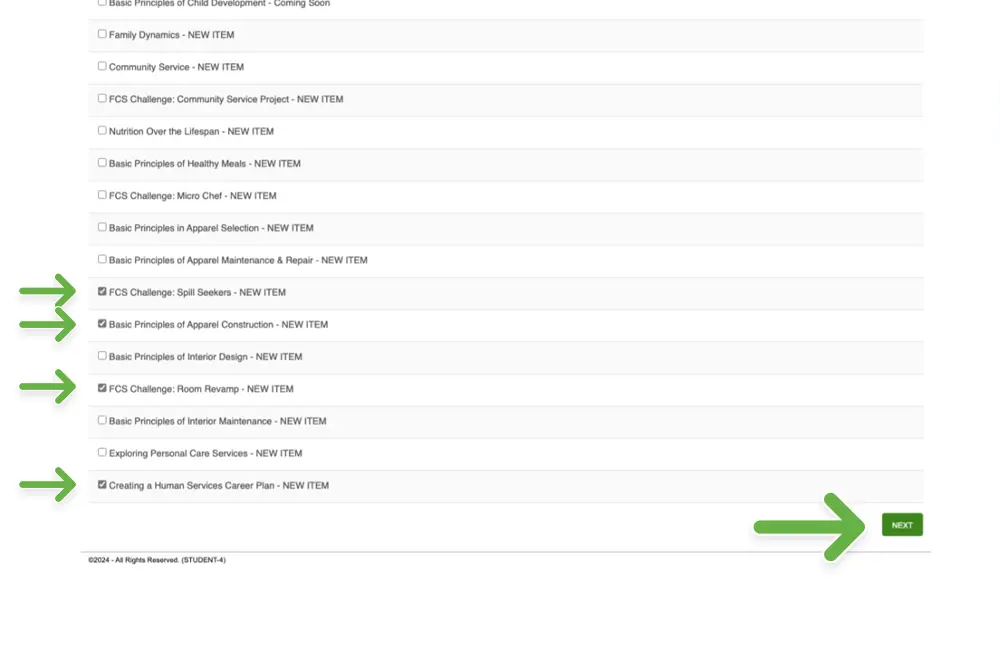
- Select all of the lessons you wish to include in the assessment.
- Scroll to the bottom of the lesson list.
- Click the green Next button located on the right side of the page.
5. Search for Items
- The next screen will have nothing listed.
- Click the Find Items button to show all the interactive items associated with the lessons you chose in Step 3.

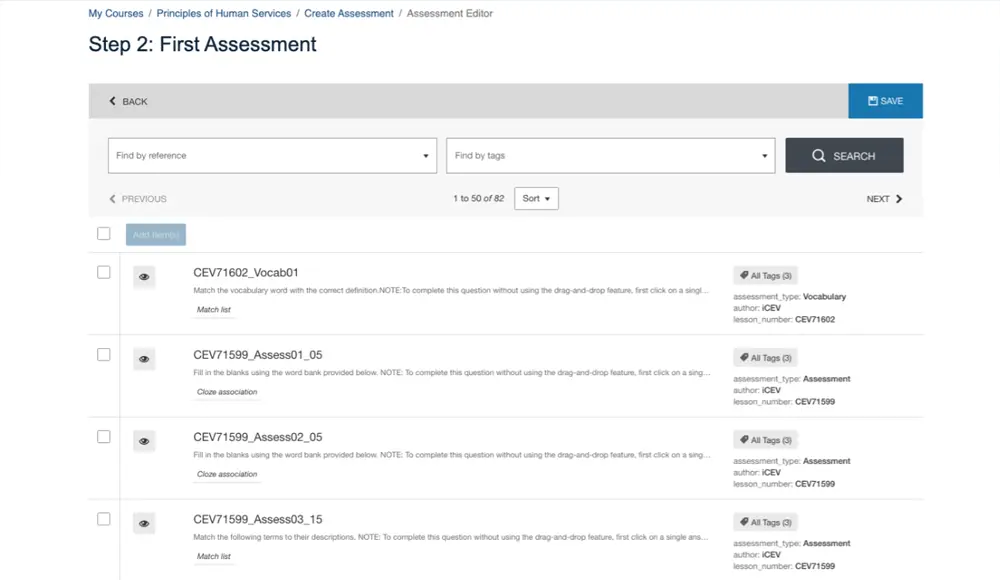
NOTE: Each item is listed with a CEV code number such as CEV70574_SN06_21.
We are working to change this, so items will appear with the lesson title and question type (for example, Organizational Structures Student Notes).
PRO TIP: Use the following key to help you identify what type of question each item is:
SN = Student Notes | Assess = Assessment | WS = Worksheet | Vocab = Vocabulary
6. Narrow Your Search
Depending on the number of lessons you chose, there are likely thousands of questions available for you to choose from. Use the search bar to filter your results by keyword.

- Type a keyword such as "Project" into the search bar.
- Click the search button.
NOTE: There will be a slight delay as the system searches through questions to find those that match the keyword.
PRO TIP: Using the key from Step 5 type “_assess” in the search bar to bring up all assessments.
Typing “_SN” will bring up only student notes questions.
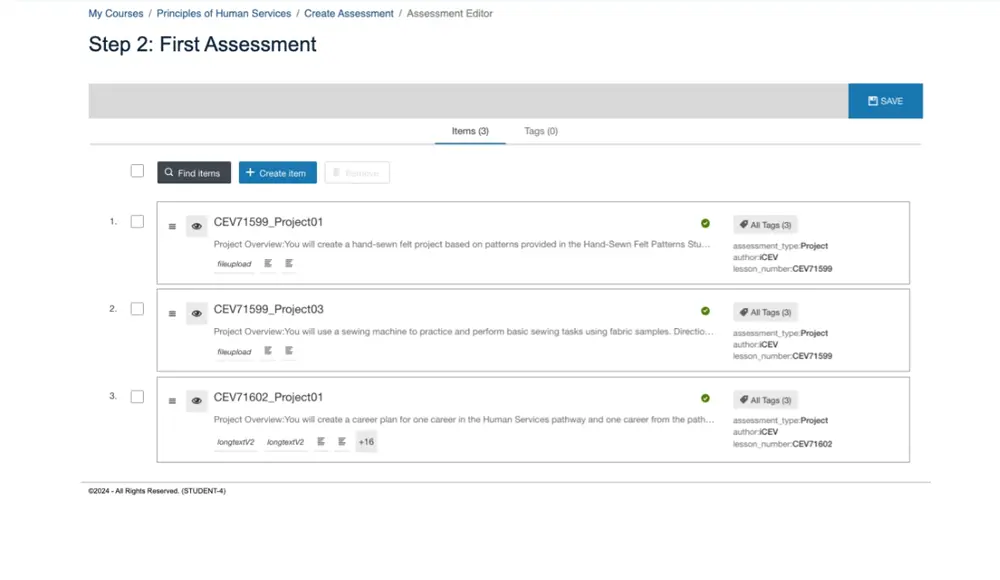
7. Select Items
As you sort through the list, check the items you wish to add. You can search as many times as you wish. Your check marks will remain even if the item isn’t shown in your search.
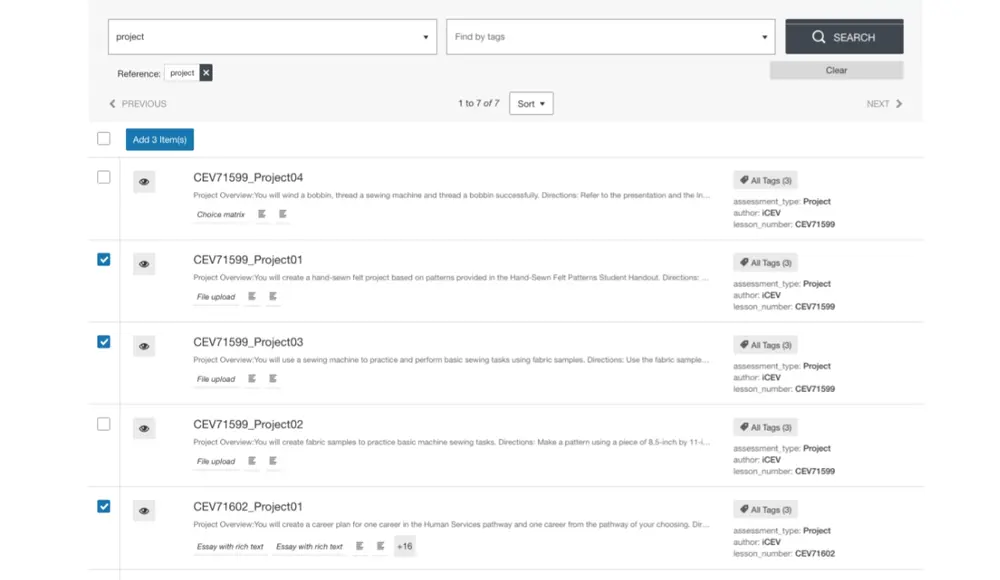
PRO TIP: Click the “eye” icon to the left of each item to preview and test the question.
8. Add Items
- Once you have chosen all of the questions you wish to add.
- Click the blue Add # Items button.
You will remain on the page. The questions you’ve selected remain checked but become greyed out.
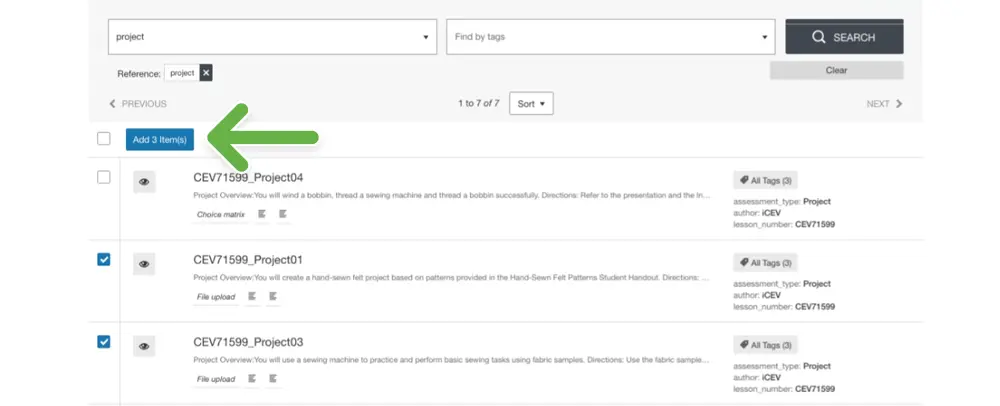
NOTE: You will receive a confirmation message, highlighted in green, verifying your items have been added to the assessment.
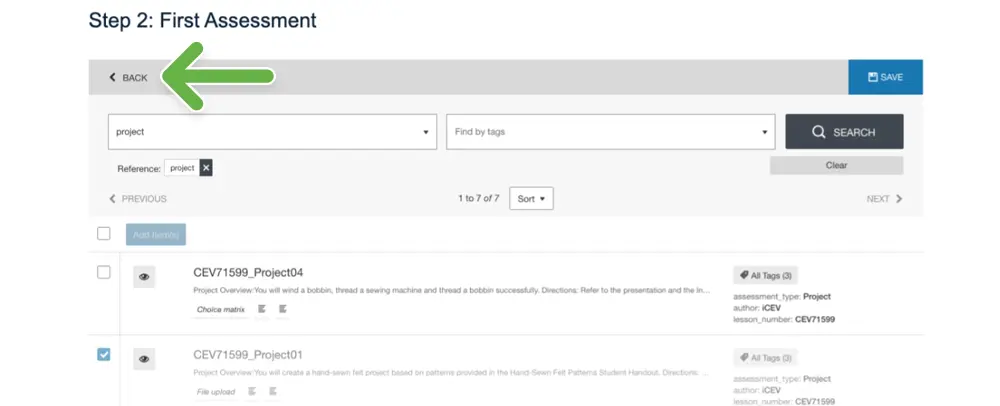
9. View Assessment
- Clicking the Back button will take you back to your assessment.
10. Finalize Assessment
You will now have questions listed where there were none before.
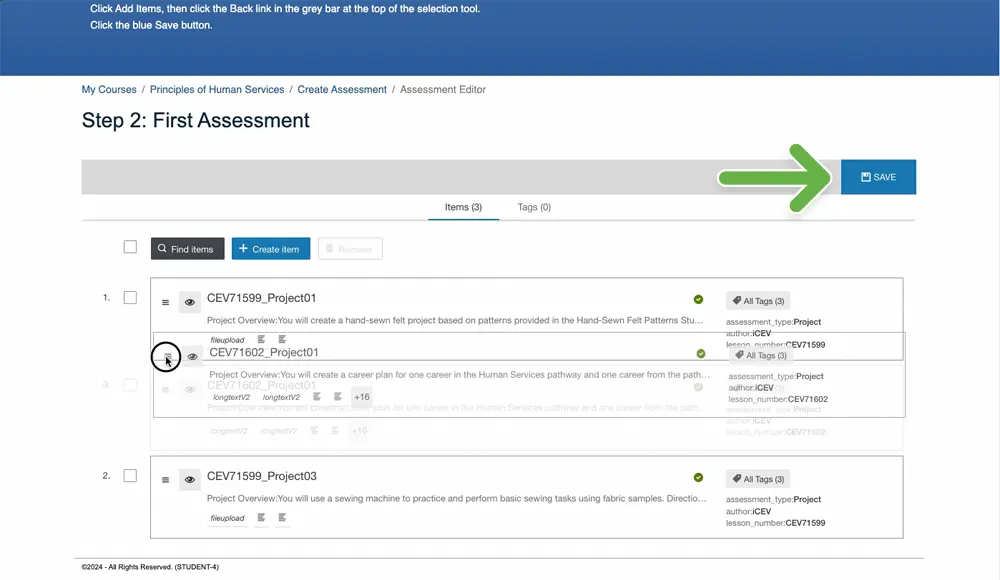
- Click and drag the
 icon to move and reorder your assessment questions and use the check marks to choose and remove assessment questions.
Once you are satisfied with your assessment
- Click the blue Save button.
11. View Customized Assessment
- On the course page, scroll to the bottom of the lesson list to find your assessment under the Course Assessments heading.
- Click its title to preview and test the assessment. Click the edit link to add or delete assessment questions.
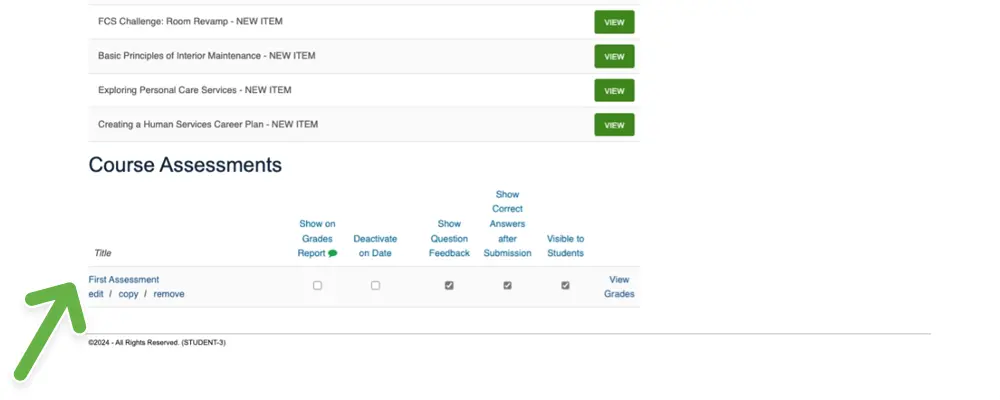
NOTE: Your assessment will automatically be available to students, so uncheck the Visible to Students box if you wish to make it unavailable for the time being.